An example of using Git, IBM BlueMix DevOps Services and MobileFirst Studio
Dennis Schultz May 01, 2016
MobileFirst_Platform Bluemix Git


I introduced some basic concepts around using Git with IBM MobileFirst Platform in the last post. This post will build on that through an example using IBM Bluemix DevOps Services as the host for my repository.
Getting started
First, go to https://hub.jazz.net/. If you don’t have a free account, create one using the SIGN UP button.

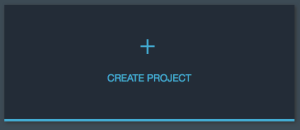
Once logged in, you will see a screen showing you all the projects you have on DevOps Servcies. Create a new project.
If you have code in a GitHub project already, you can just link to it. Let’s assume you do not, so click Create a new repository and choose Create a Git repo on Bluemix. Accept the defaults to create a private project with Scrum features and don’t make it a Bluemix project (that’s a discussion for another day).
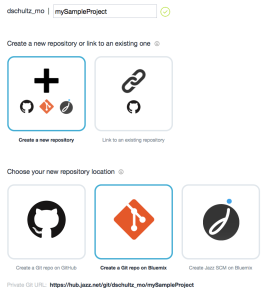
You now have a project on DevOps Services to contain your project. The Git URL needed to reference this repository can be copied from the Git URL link on the upper right corner of the Git view. Do that now because you will need it shortly.

The next steps are done from your local machine.
Adding a project to Git
From the client side, it is recommended to NOT store your projects within the Eclipse workspace. Unfortunately, the Studio New Project wizard doesn’t give you the option to create the project anywhere else. Fortunately, Eclipse projects are portable and can be moved around easily. The easiest way I have found to get started is to
- Create a local Git repo using MFP Studio
- Create a MobileFirst Platform project
- Move the project into the Git repository
- Create your .gitignore file
- Put everything under control
- Push your changes to the DevOps Services server
Let’s quickly walk through that.
Create a local Git repo
- Open MF Studio to a new workspace.
- Open the Git Perspective
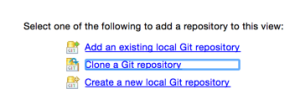
- In the Git Repositories view, choose Clone a Git repository.
 When asked to select a destination, pick a spot on your file system where you will store Git repositories, say /git and then add a folder within it with the name of your project (i.e. /Users/dennis/git/mySampleProject). Now you have an empty Git repository that references the one on DevOps services as its “remote”.
Create a MobileFirst Platform project
- Right-click on the Working Directory node in the Git Repositories view and select Import Projects. Select Use the New Projects wizard.
- Walk through the wizard to create a project named mySampleProject containing a hybrid app named mySampleApp, just as you normally would.
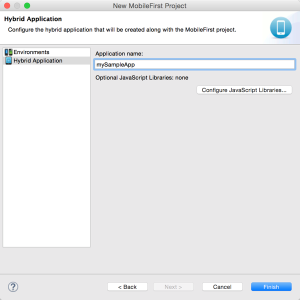
- Create an Android environment in the mySampleApp project.
Move the project into the Git working directory
Unfortunately, MFP Studio simply creates the project within the root of the workspace, which is not what you want. Fortunately, it is easy to move.
- Switch to another perspective such as J2EE or Design.
- Right-click the project and select Refactor > Move to move it within your Git repository. Note that you cannot put it directly in the Git repository root. Create a subdirectory such as /Users/dennis/git/mySampleProject/mySampleProject.
Create your .gitignore file
- Switch back to the Git perspective and hit refresh in the Git Staging view. You should see that you have about 217 files staged, which means they are available to add to SCM. But remember we don’t necessarily want all of them in there.
- Go to https://github.com/andrewferrier/mfp-gitignore and download the MFP_7.0.gitignore file.
- Rename the file to just .gitignore and place it at the root of your project.
- Go back to the Git Staging view, refresh, then drag the .gitignore file from Unstaged Changes to Staged Changes.
- Provide a commit message like “Setup .gitignore file”.
- You should see the Unstaged Changes file count drop to something like 109 because the .gitignore file is filtering out the stuff you don’t want committed.
Put everything under SCM control
- Select all files in Unstaged Changes and drag them to Staged Changes.
- Provide a commit message like “Project Load” and commit.
At this point, everything is under Git control, but only on your local repository.
Push your changes to DevOps Services
- In the Git Repositories view, right-click mySampleProject/Branches/Local/master and select Push Branch.
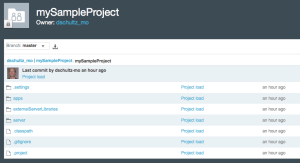
- Accept all defaults. When the operation finishes, go back to your DevOps Services project and refresh the browser. You will now see your project on the master branch on the server.
Conclusion
Managing source code is critical in any project including MobileFirst projects. It takes a few steps to get setup with Git, but it will pay you dividends quickly.
Inclusive terminology note: The Mobile First Platform team is making changes to support the IBM® initiative to replace racially biased and other discriminatory language in our code and content with more inclusive language. While IBM values the use of inclusive language, terms that are outside of IBM's direct influence are sometimes required for the sake of maintaining user understanding. As other industry leaders join IBM in embracing the use of inclusive language, IBM will continue to update the documentation to reflect those changes.