Integrating MobileFirst Foundation 8.0 in Ionic-based apps
Robert Puryear May 09, 2019
MobileFirst_Foundation iOS Android Cordova Ionic


Ionic SDK is a framework built on AngularJS and Apache Cordova that helps you rapidly build hybrid mobile apps using web technologies such as HTML, CSS, and Javascript.
In this blog post I will walk you through how to create, build, and deploy Ionic v1 apps implemented with MobileFirst Foundation. If you are an on-premise 8.0 customer or Mobile Foundation service customer, then read further to learn how to integrate Ionic v1 based apps. Coming soon: walkthrough for Ionic v2.
Prerequisites
You will need to install the following tools: MobileFirst CLI, Ionic CLI, Cordova CLI, as well as have a MobileFirst server running.
Ensure that you have NodeJS downloaded and installed. With NodeJS install you can then install all required CLIs using npm.
To get up & running with the MobileFirst Server you can either use the Mobile Foundation Bluemix service or download the DevKit Installer for an on-prem installation.
Installing the CLIs
MobileFirst CLI
npm install -g mfpdev-cli
Learn more about the MobileFirst CLI
Ionic CLI
npm install -g cordova ionic
Cordova CLI
npm install -g cordova
Creating a New Ionic Project
Create a new Ionic project with a blank template by entering the command below.
ionic start myApp blank
Ionic automatically adds the Cordova iOS v3.8 plug-in, however MobileFirst Foundation v8.0 support Cordova iOS v4.0 and above. To overcome this, remove the iOS platform and re-add it. Change directory into your Ionic project and run:
ionic platform remove ios
ionic platform add ios@latest
If you want to add the android platform, you can add it with:
ionic platform add android@latest
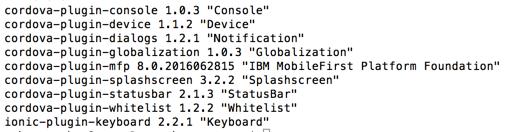
Adding the MobileFirst Cordova SDK
The MobileFirst Cordova SDK is provided as a set of Cordova plug-ins and can be installed by running:
cordova plugin add cordova-plugin-mfp
You can confirm the installed plug-ins by entering ionic plugin list
Learn more about the MobileFirst Cordova SDK
Previewing the App
You can preview the app in a number of ways.
Ionic Preview
To view both iOS and Android platforms using the Ionic CLI:
ionic serve --lab
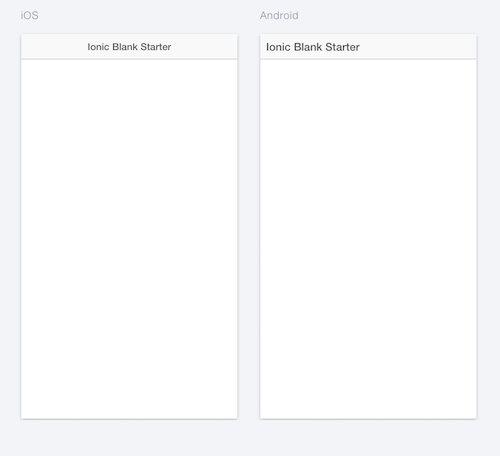
This will launch your default browser and will auto-reload if you change any files in the www directory.
Update Ionic Code
Open the js/app.js file.
The module is named starter.
angular.module('starter', ['ionic'])
The ng-app directive in the index.html file tells angular which code to run on the page.
<body ng-app="starter">
To link the view and the model of the app together, create a controller in the app.js file.
	.controller("mainCtrl", function($scope){
	})
The $scope service allows you to share variables and functions from the controller to the view.
Go back to index.html.
Add ng-controller to the body tag and include the mainCtrl name. This allows you to use the controller anywhere inside the body tag.
ng-controller="mainCtrl"
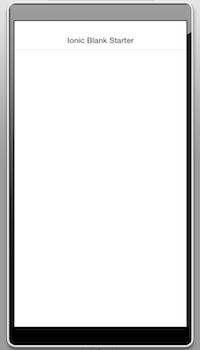
Native App Simulator
To preview the app in a native iOS or Android Simulator, you can use the Cordova emulate command:
cordova emulate
The iOS Simulator will only be available if you are working on a machine running OS X.
Register App on MobileFirst Server
To enable the MobileFirst capabilities such as using the Mobile Browser Simulator to preview the application we need to add some JavaScript code to connect to the MobileFirst Server.
Open app.js and enter the following at the bottom:
function wlCommonInit() {
    console.log(">> wlCommonInit() ..." );
    var serverUrl = WL.App.getServerUrl(function(success){
        console.log(success);
    }, function(fail){
        console.log(fail);
    });
    WLAuthorizationManager.obtainAccessToken().then(
        function (accessToken) {
          console.log(">> Success - Connected to MobileFirst Server");
        },
        function (error) {
          console.log(">> Failed to connect to MobileFirst Server");
          console.log(error);
        }
    );
};
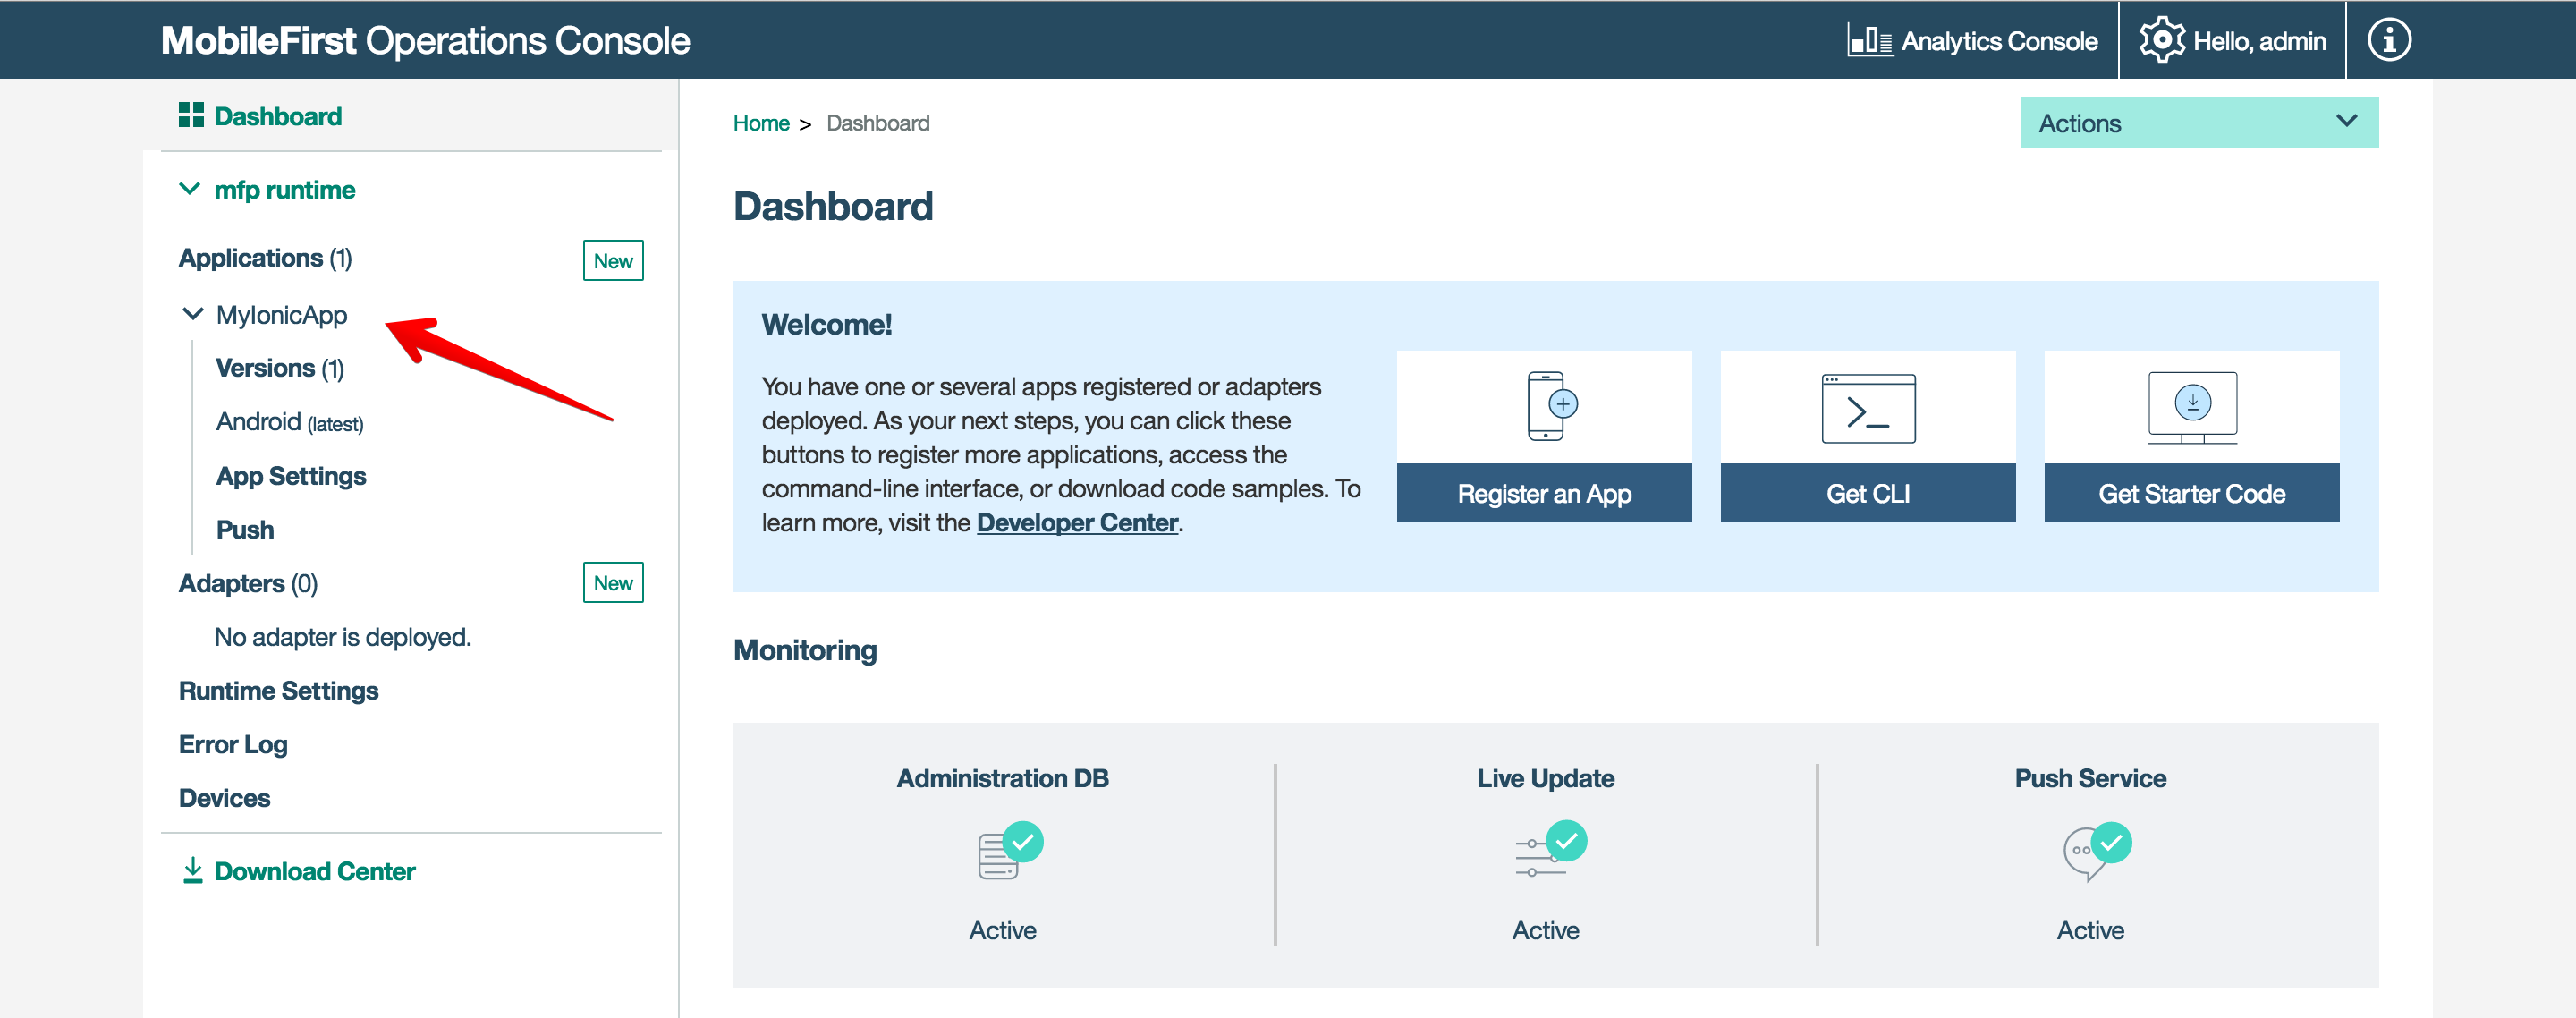
Register your app with your MobileFirst Server.
mfpdev app register
Open your MobileFirst Console and confirm that your app has been registered.
MobileFirst Preview
To preview the app in a browser or the mobile browser simulator using MobileFirst:
mfpdev app preview
Select the mobile browser simulator option.
Note: Currently OAuth isn’t fully implemented with the Mobile Browser Simulator MobileFirst Foundation v8.0 Learn more about previewing applications.
Implementing the MobileFirst Adapter
MobileFirst adapters provide a way to retrieve and manage data for your mobile client app on the server side.
I’m using the ResourceAdapter to call a resource API and PinCodeAdapter for security in this example.
You should first build and deploy them onto your MobileFirst server. Switch into the root folder of each and run the following commands:
mfpdev adapter build
mfpdev adapter deploy
Learn more about Adapters
Security
The URL that gets the balance in the ResourceAdapter is protected by a scope named “accessRestricted”.
@OAuthSecurity(scope="accessRestricted")
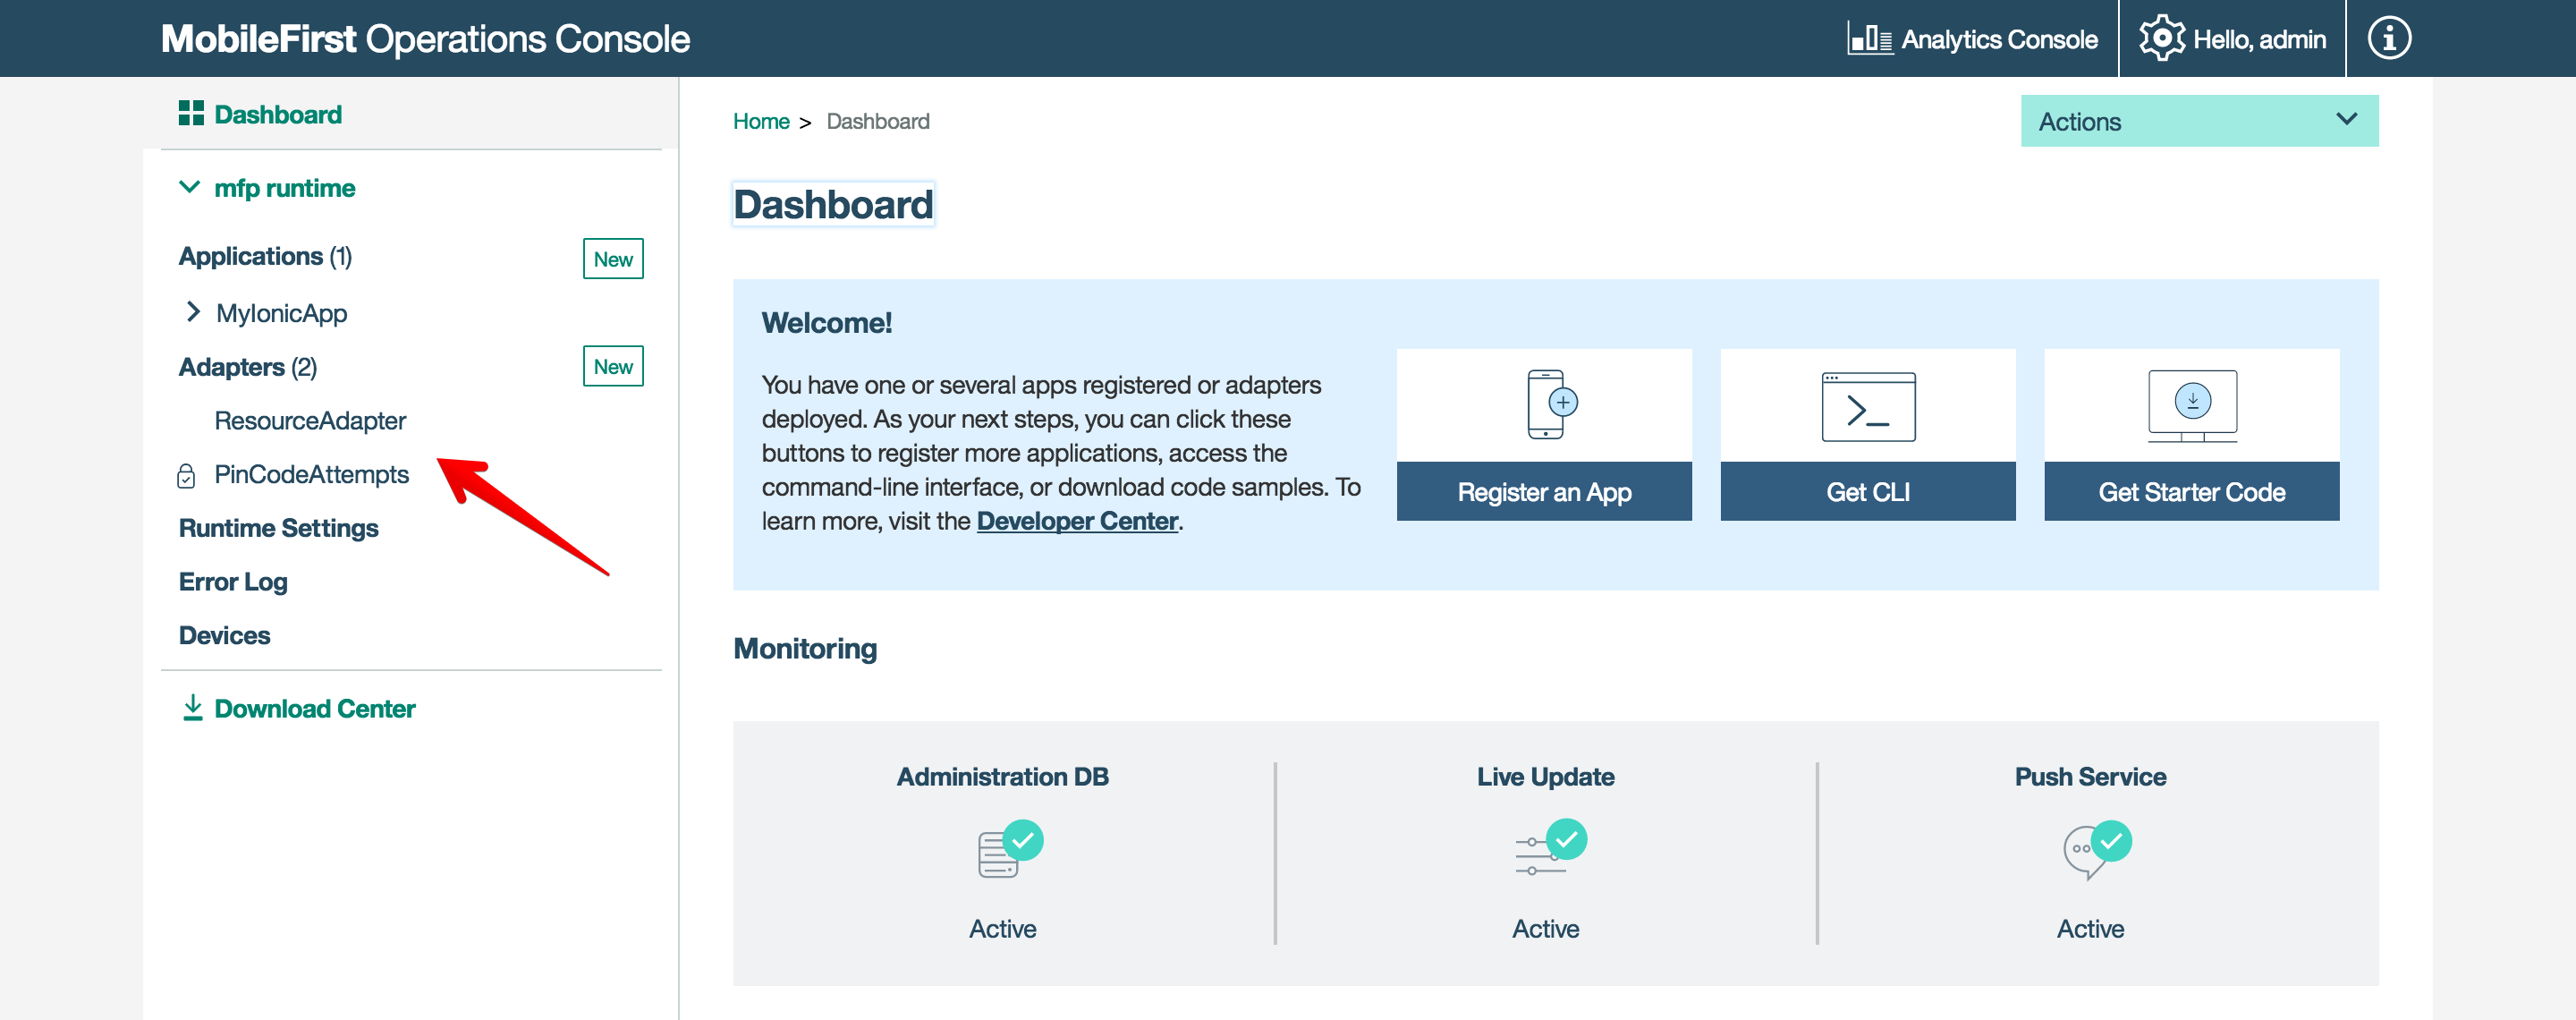
In the Security tab of your registered app in the MobileFirst dashboard, select the New button under the Scope-Elements Mapping section.
Enter accessRestricted in the scope element and select PinCodeAttempts in the Custom Security Checks section.
Call your resource adapter
Add the following code to your mainCtrl controller to call make the adapter call:
  $scope.balance = "";
  $scope.getAdapter = function(){
	var resourceRequest = new WLResourceRequest("/adapters/ResourceAdapter/balance",
                WLResourceRequest.GET
            );
    resourceRequest.send().then(
                  function(response){
                     $scope.balance = response.responseText;
                     $scope.$apply();
                  },
                  function(error){
                      console.log(error);
                  }
              );
  };
We have defined the balance variable that will hold the value we get back from the adapter call. We have also defined the getAdapter variable which is the function where we actually call the adapter and get the balance.
Learn more about the MobileFirst security framework
Updating the view
Add the following code in your index.html in the <ion-content> elements:
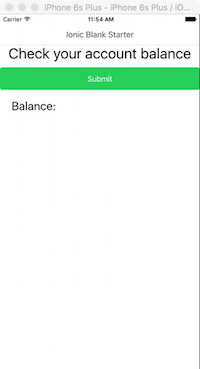
<h3>Check your account balance</h3>
<button ng-click="getAdapter()" class="button button-block button-balanced">Submit</button>

<h3>Balance: </h3>
The ng-click directive calls the getAdapter function.
To display the value of a $scope variable in your view, you surround it with double curly brackets
Adding the Challenge Handler
Add ChallengeHandler.js in your project in the js directory.
Reference the script in index.html: <script src="js/ChallengeHandler.js"></script>
Call the challenge handler in wlCommonInit to handle the security check.
PinCodeChallengeHandler()
Testing the App
Run the app in the simulator using Cordova since we are using OAuth security.
cordova emulate
Click the Submit button to get your balance.
This will call the PinCode adapter and you will need to enter your authorization.
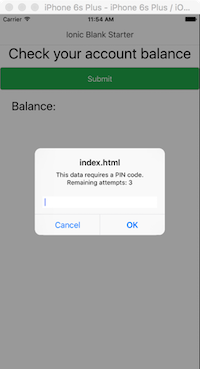
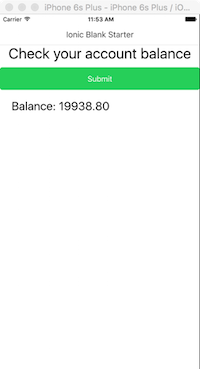
The default pin code is 1234. You can update this in the console under the PinCodeAttempts adapter > Security Check. After your code is validated, your balance is shown in the app.
Inclusive terminology note: The Mobile First Platform team is making changes to support the IBM® initiative to replace racially biased and other discriminatory language in our code and content with more inclusive language. While IBM values the use of inclusive language, terms that are outside of IBM's direct influence are sometimes required for the sake of maintaining user understanding. As other industry leaders join IBM in embracing the use of inclusive language, IBM will continue to update the documentation to reflect those changes.