Using the Auto-Scaling Service with the MobileFirst Foundation tile on Bluemix
Vasanth Raghavan May 02, 2018
MobileFirst_Foundation Mobile_Foundation_Service Bluemix Mobile_Foundation


Overview
MobileFirst Foundation can be setup on Bluemix in two ways:
- Using the Mobile Foundation Bluemix service
- Using IBM-provided scripts that come with your License entitlement
Note: with the scripts path you can setup MobileFirst Foundation either in IBM Containers or in a Liberty for Java runtime.
This blog post explains the process of auto scaling your MobileFirst Foundation tile running on Liberty for Java runtime on Bluemix. Auto scaling can be achieved using the Auto-Scaling service also available on Bluemix. The Auto-Scaling service enables you to automatically increase or decrease the available compute capacity. The number of application instances (nodes) are adjusted dynamically based on various operational parameters that you define in the auto-scaling policy.
Setup
For the purposes of this blog post, we will provision a single node with 1GB memory.
Ensure that you connect to a DashDB enterprise service plan on Bluemix (for the Mobile Foundation service. it is important to note that auto-scaling works only for the Professional plan).
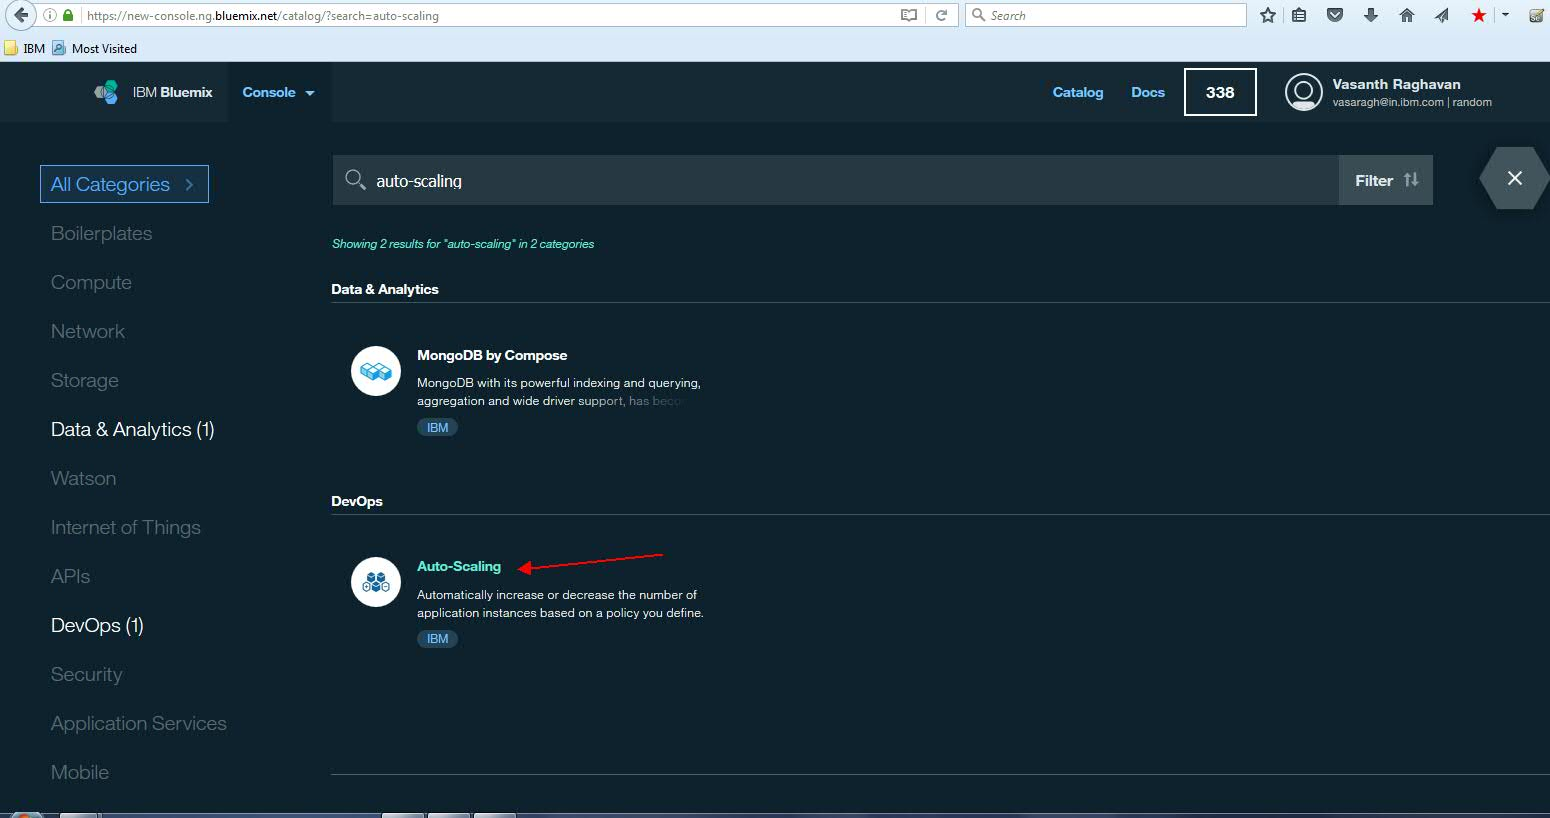
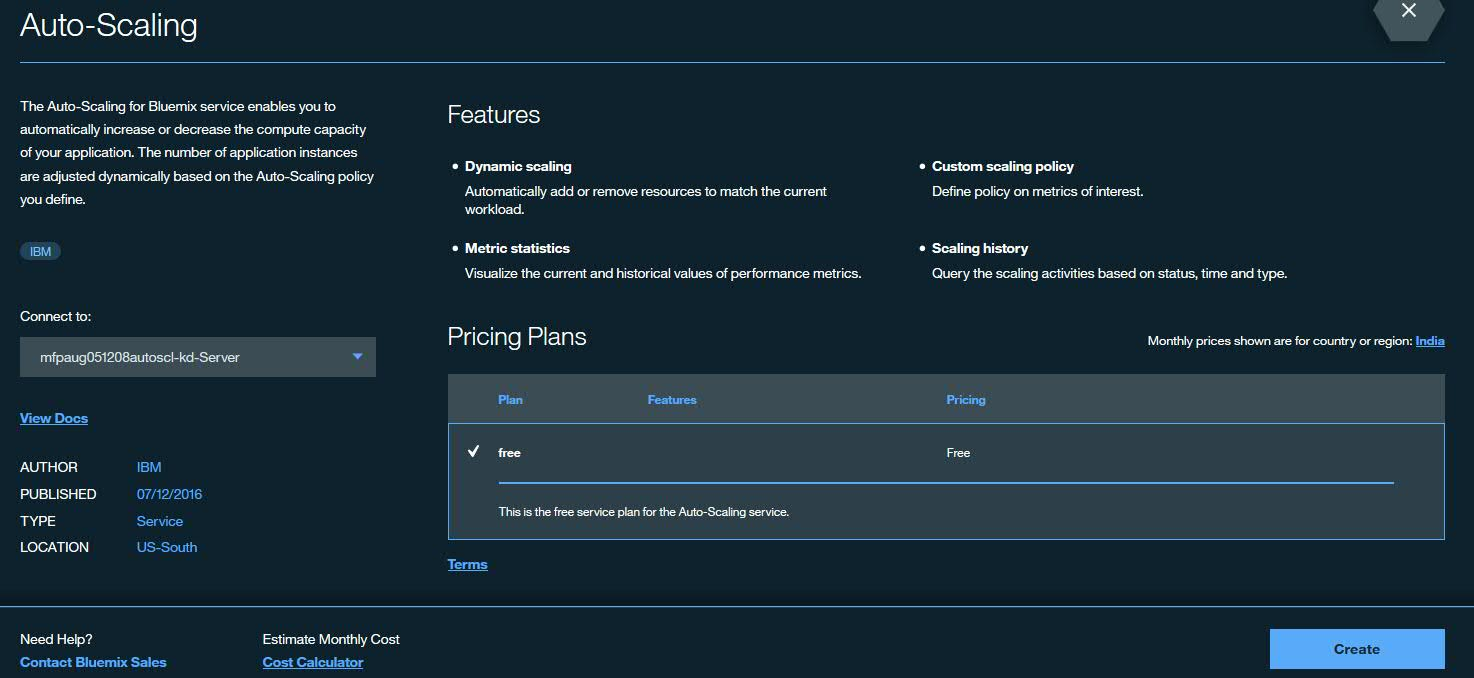
You can associate the Auto-Scaling service with the Liberty for Java Cloudfoundry app that is running the MobileFirst Server. Search for the Auto-Scaling service under DevOps services in catalog. Select the same Space and Application (The MobileFirst Foundation tile service application) and click Create.
Configuration
The Auto-scaling service allows you to configure a policy based on which application server nodes are increased (scale out) or decreased (scale in). The “Policy Configuration” tab allows you to set the rules.
For the purpose of this blog post – the Mobile Foundation server was subject to a load using an automation test harness.
In the production case, you will base this on the load subjected by mobile devices connected to the server. The “Metric Statistics” tab in the “Auto-Scaling” service gives you an overview of the various performance metrics. It provides a visual representation of different metric values. A meter shows the current specific metric value and a historical graph for the specific metric.
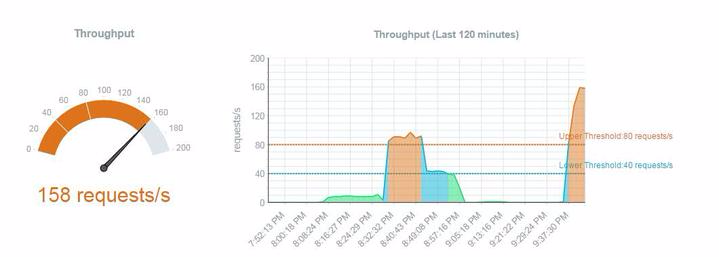
In the above example, we see the current “throughput” at 158 requests/second. The history graph on the right indicates the average throughput across nodes over approximately a one-and-a-half-hour time period. The “rules” specified are also displayed as the upper and the lower thresholds.
Each rule allows you to specify a minimum and maximum default instance count and is based on 4 metric types:
• JVM Heap size • Memory size • Throughput (number of client requests/second) • Server response time
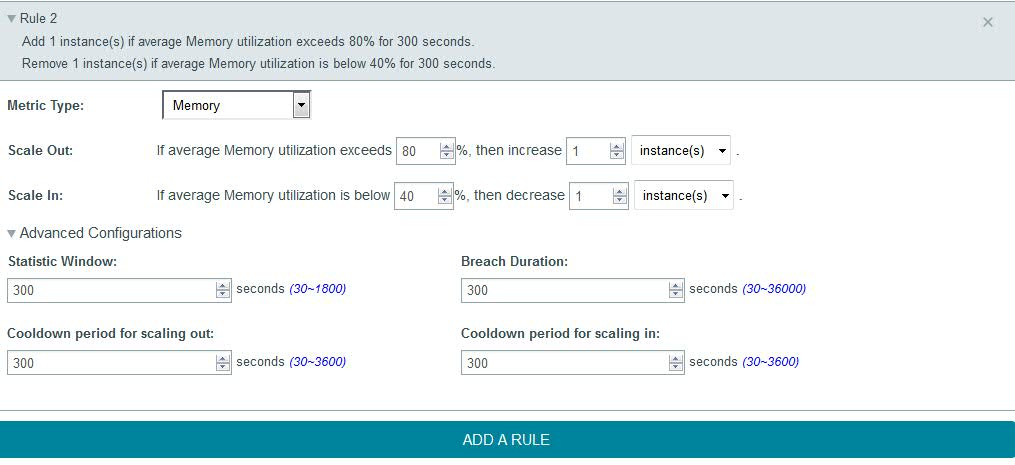
You can select a specific metric type and then specify conditions for a “Scale Out“ and “Scale In”. “Scale Out“ allows you to increase the number of application nodes (till the maximum default instance count) based on whether a specific metric exceeds a user defined value for a specified time limit. “Scale In” allows you to decrease the number of application nodes (till the minimum instance count) based on whether a specific metric falls below the user defined value for a specified time limit.
You can specify different rules for different metrics.
In advanced configuration you can specify time buffers for various criteria. The “Statistic Window” enables you to specify the time period in seconds when the metrics are measured. The “Breach Duration” allows you to specify the time period after which the scaling action is triggered if the measured metric values always fall above or below the upper and the lower threshold specified by the user respectively. The “Cool down periods for scaling in and out” allows you to specify a time period after a scaling activity ends and before the next scaling activity starts.
Auto-Scaling example with throughput
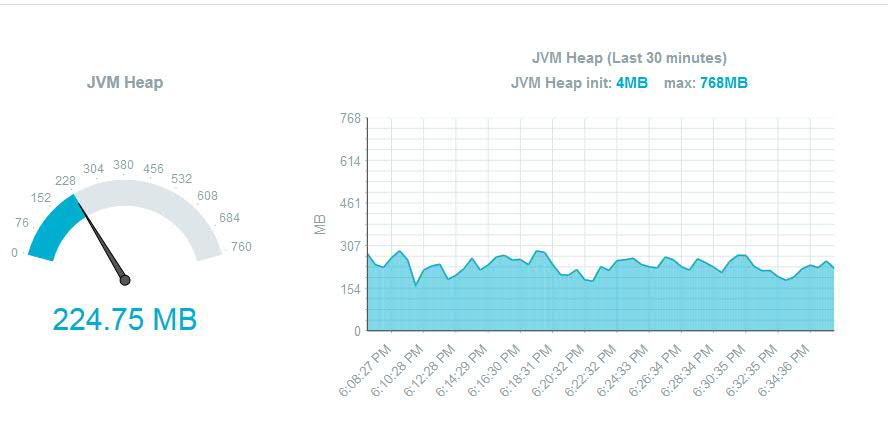
In our example we will configure an autoScaling policy based on throughput. In the example below, at a steady state load it seems like 225 requests/second seems to be around about the throughput that can be achieved with 1 node.

At this time the memory graph looked like this:
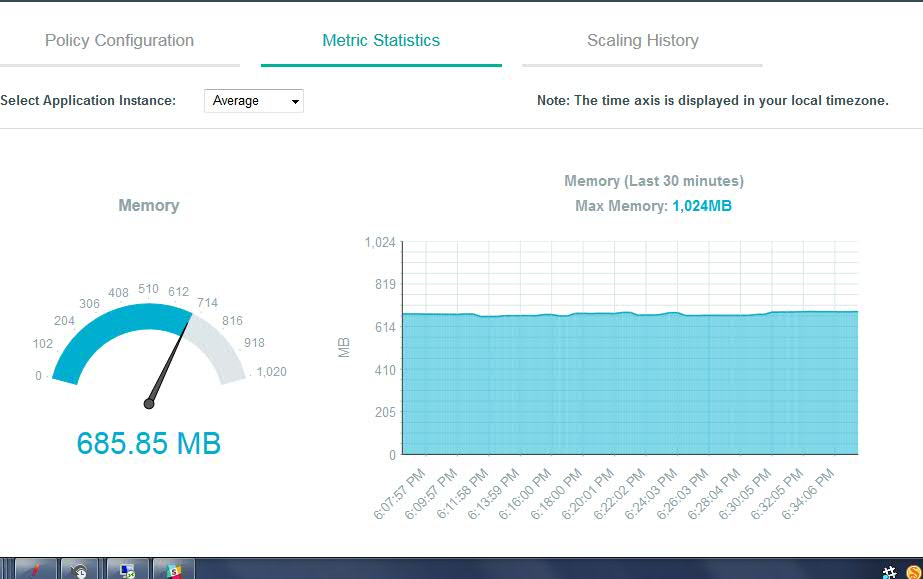

In the ”Policy Configuration” tab, we will specify the minimum and maximum instance count as 1 and 2 respectively. We will choose “Metric Type” as “Throughput” and set our rule as follows:
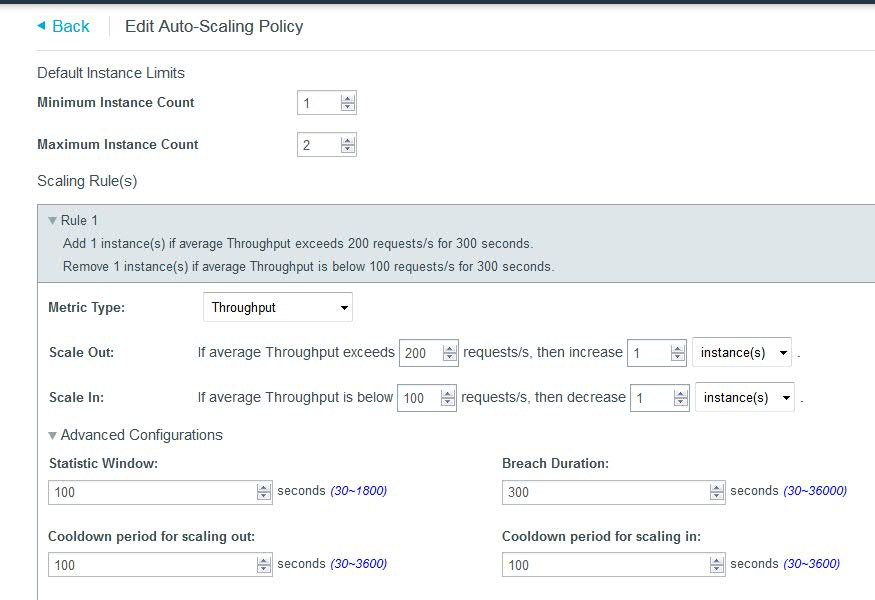
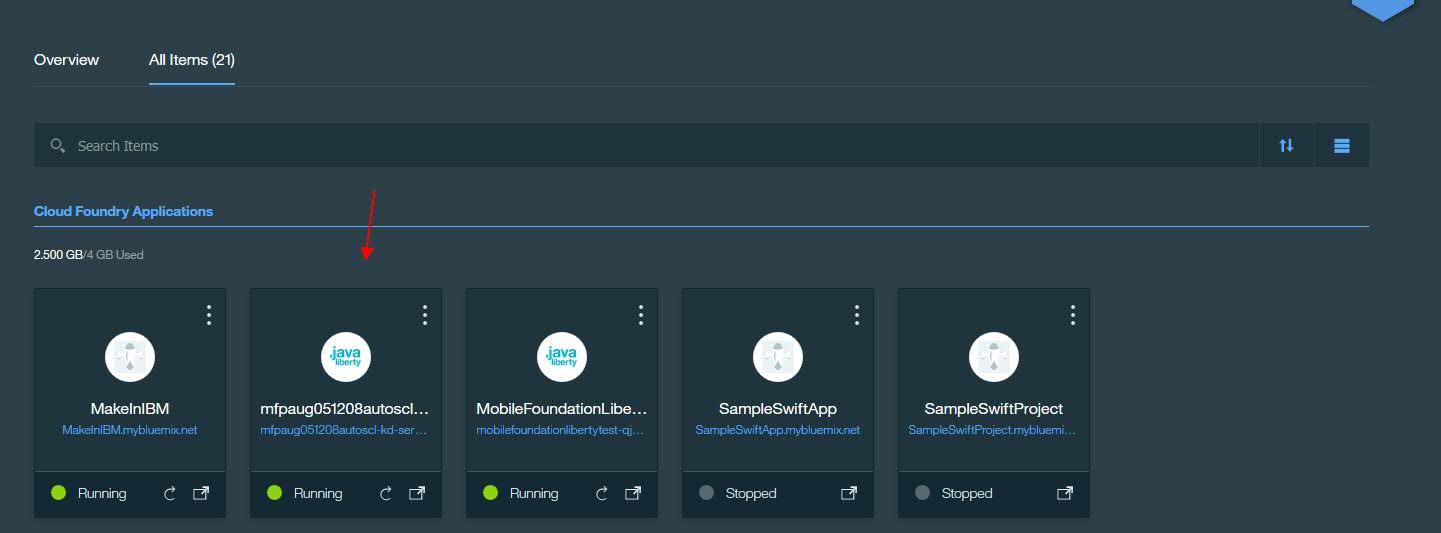
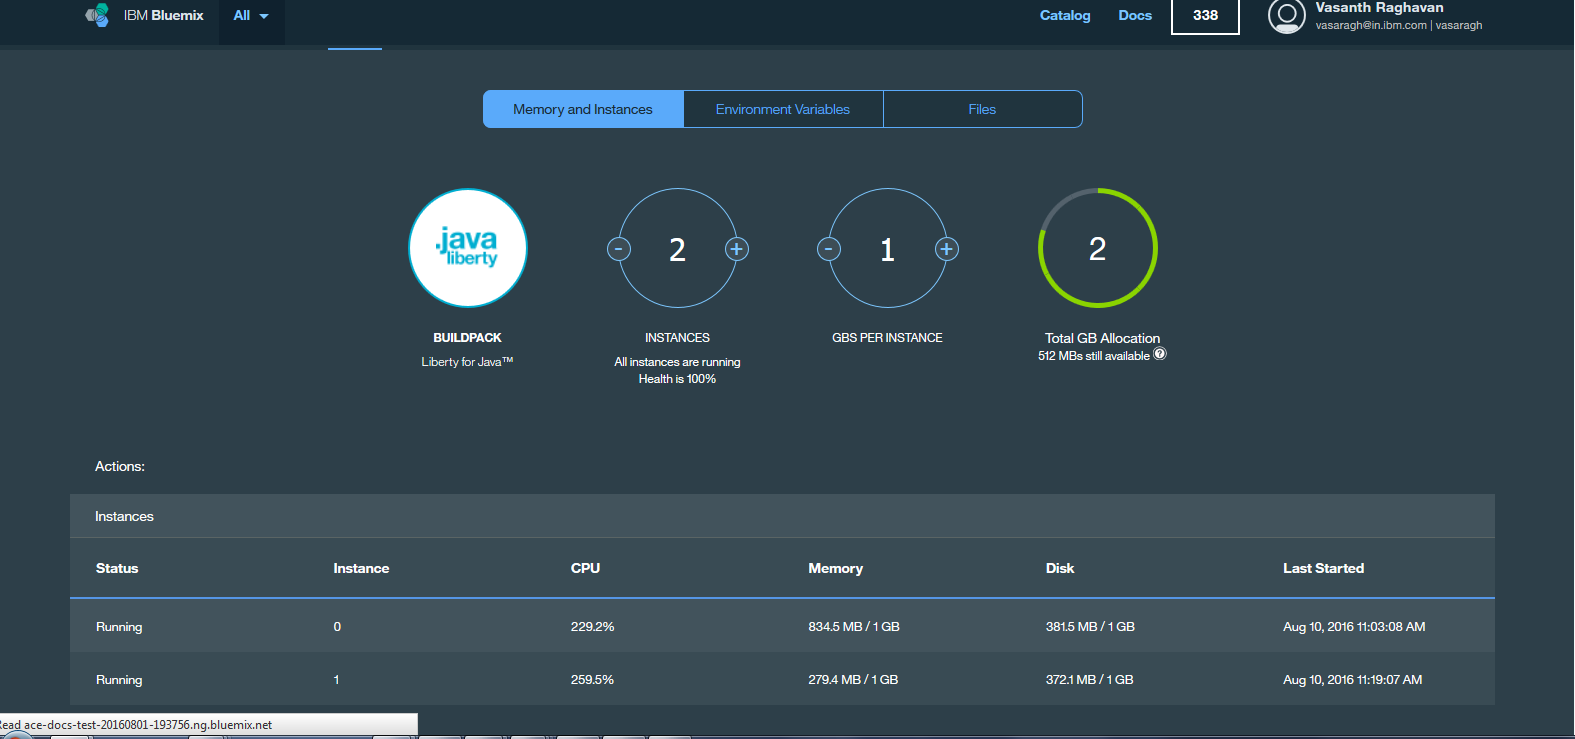
The rule is fairly self-explanatory. It specifies that if the average throughput across instances exceeds 200 requests/second for a time period of 300 seconds (the “Breach Duration”) then the number of liberty nodes will be increased by 1. If the average throughput falls below 100 requests/second, for a time period of 300 seconds (the “Breach Duration”) then the number of liberty nodes will be decreased by 1. Average throughput here is calculated taking into account the throughput across all current active nodes. Do not set this window to be too close as this may cause unwanted cycling of nodes.As we see the throughput load increasing and crossing the 200 requests/second mark specified in our rule, we see a new node being created after 300 seconds, when we navigate to the “Runtime” tab section, in “Instances”,after selecting our MobileFirst Foundation tile application under “Cloud Foundry Applications“.
To recap, if the average throughput exceeds 200 requests/second for a period of 300 seconds (5 minutes -the specified “Breach Duration”), another instance is added.

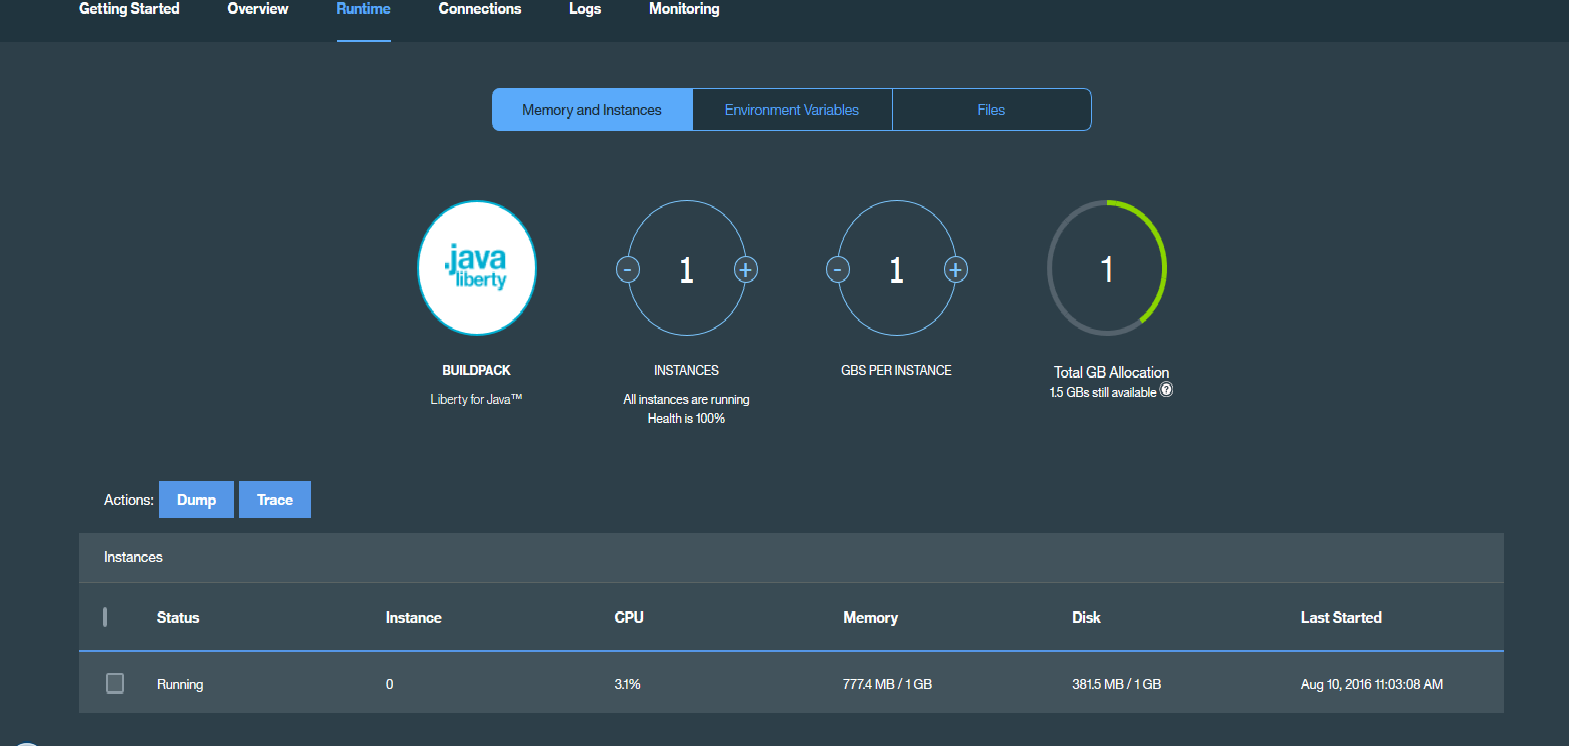
As the average throughput drops to below 100 requests/second (achieved by merely stopping our jmeter client scripts), the new instance is removed and only 1 instance remains.
Inclusive terminology note: The Mobile First Platform team is making changes to support the IBM® initiative to replace racially biased and other discriminatory language in our code and content with more inclusive language. While IBM values the use of inclusive language, terms that are outside of IBM's direct influence are sometimes required for the sake of maintaining user understanding. As other industry leaders join IBM in embracing the use of inclusive language, IBM will continue to update the documentation to reflect those changes.