Integrating IBM MobileFirst Foundation 8.0-based Web applications with IBM Bluemix Push Services
Josephine E. Justin May 09, 2019
Bluemix MobileFirst_Foundation Bluemix_Push_Service Web_Push


Overview
Applications using the MobileFirst Foundation SDK can be integrated with Bluemix Push Services for the applications to receive notifications.
Follow the instructions in this blog post in order to integrate your Android application with the Bluemix Push Notifications service.
Learn more about IBM Bluemix Push Notificaitons service and IBM Bluemix Mobile Foundation service
Prerequisites
- Running a MobileFirst Server either locally or Mobile Foundation service on Bluemix.
- Instance of IBM Bluemix Push Notification
- Push Notification instance created at step 2 should be configured with GCM credentials.
- Push Notification instance created at step 2 should contain few tags.
Setting up the Web Application
For the purpose of this blog post, the RememberMe Web sample application is used. Download the sample application and follow the instructions in the README.md file to setup and run the app.
To deploy this web app in the Mobile Foundation in Bluemix, follow the below steps
- Modify the port from
var port = 9081;tovar port = (process.env.VCAP_APP_PORT || 9081); - Update the mfpServer variable value from
"http://localhost:9080";to the correct URL of the MobileFirst Server.
Adding Push Related artifacts into the App
Follow the steps mentioned in the Bluemix web push GIT to allow the application to receive notification. As mentioned in the document, follow the steps mentioned in the section “Initialize in Chrome & Firefox” to setup the Push Web SDK. These changes has to be done in the index.html of the web app.
And as part of this blog post, three buttons were added to the app.
- “Register Push & subscribe” – This button on click calls the register & the subscribe for tags methods. These methods are explained in the sections “Registering Web application” and “Subscribing for tags”.
- “UnSubscribe Push” – This button on click calls the unsubscribe method explained in the “Subscribing for tags” section
- “UnRegister Push” – This button on click calls the un-register method explained in the “Unregister from Bluemix Push notifications Service” section.
Modify protectedDiv in index.html to add the buttons:
<div id="protectedDiv" style="display: none;">
 <p class="label" id ="helloUser"></p><br/>
	<button id="getBalance">Get Balance</button><br/>
	<button type="button" id="register" value="register" onclick="registerPush()">Register Push & subscribe</button>
	<button type="button" id="unsubscribe" value="unsubscribe"  onclick="unsubscribe()"/>UnSubscribe Push</button>
	<button type="button" id="unregister" value="unregister" onclick="unregister()"/>UnRegister Push</button>	<button id="logout">Logout</button>
 <p class="label" id="resultLabel"></p>
</div>
Include the registerPush() method in the <script></script> section of the index.html. This method is called on the Register Push & subscribe button click.
var tagList = [];
var bmsPush ; //create an instance of BMSPush

function registerPush() {
    bmsPush = new BMSPush(); //create an instance of BMSPush
    bmsPush.isDebugEnable(true) // for debugging
	function callback(response) {
		alert("register call back function is "+response.response)
	}
	var params = {
        "appGUID":"<<app GUID of you Bluemix Push Service",
        "appRegion":".ng.bluemix.net" //can be any valid bluemix region
	}
	bmsPush.initialize(params, callback) // initialize Push Service
	// register device in push service
	bmsPush.register(function(response) {
		alert("register response "+response.response)
		//Retrieve available tags
		bmsPush.retrieveAvailableTags(function(response) {
		    var tagsA = [];
		    tagList = [];
            var json = JSON.parse(response.response);
            for (i in json.tags){
                tagsA.push(json.tags[i].name)
                tagList.push(json.tags[i].name);
            }
            // subscribe to available tags
            bmsPush.subscribe(tagsA,function(response) {
                tagsA.shift();
            }) //end of subscribe
        }) // end of retrieve available tags
    }) // end of register device
}
Add the unsubscribe() to be called on the UnSubscribe Push button click.
function unsubscribe()
{
	// unsubscribe from tags
	bmsPush.unSubscribe(tagList,function(response) {
		alert(response.response)
	})
}
Add the unregister() to be called on the UnRegister Push button click.
function unregister()
{
	// unregister device
	bmsPush.unRegisterDevice(function(response) {
		alert(response.response)
	})
}
Uploading the App to Bluemix
Upload the above app to Bluemix as a cloud foundary application. Add a manifest.yml appropriately to make it as a cf app. Contents of the app would be similar to:
applications:
- path: .
  memory: 256M
  instances: 1
  domain: mybluemix.net
  name: webpushdemo
  host: webpushdemo
  disk_quota: 1024M
Use the command cf push on the root folder of the app to upload it to Bluemix.
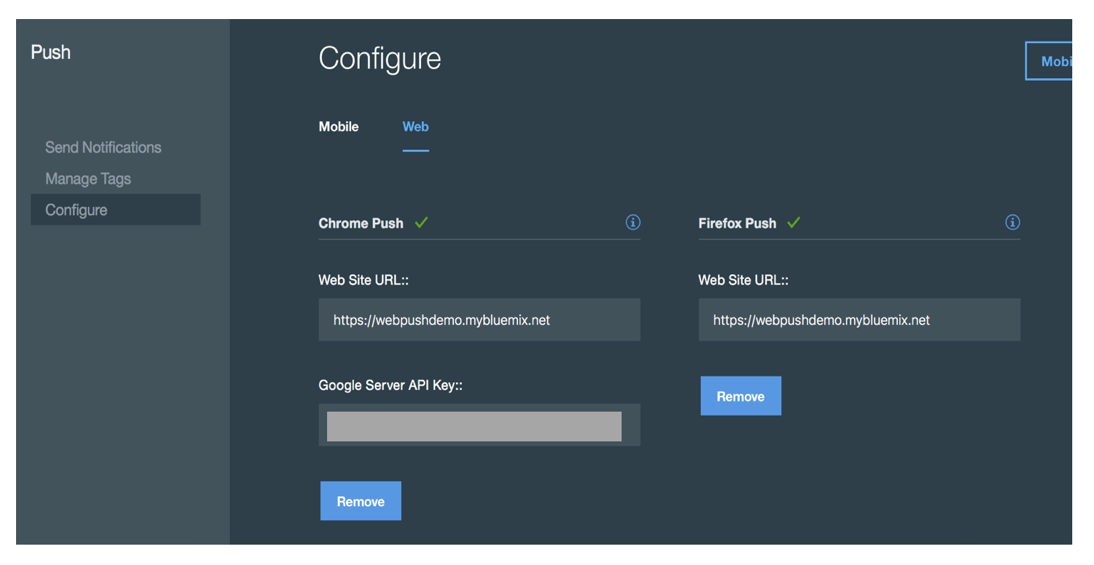
Configuring Web Push Services on Bluemix
To configure your push notification service and click on the “configure” tab of the service. In the “web” section of the “configure tab” provide the uploaded app’s URL.
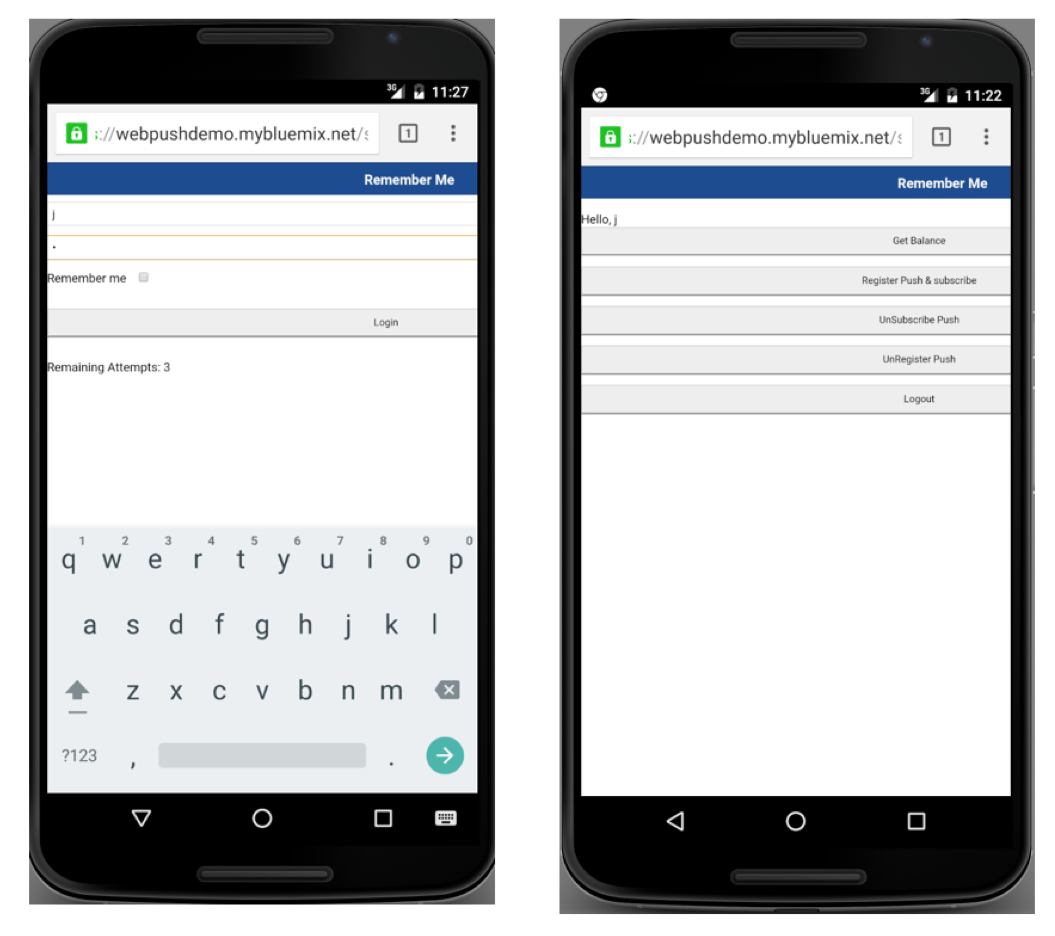
Running the app in the device
Open the supported browser (Chrome or firefox) in the device and run the app’s URL.
Running the app in desktop
Open the supported browser (Chrome or firefox) in the desktop / laptop and run the app’s URL.

Sending the Notification
To send the notification, use the Push Notification dashboard on the IBM Bluemix. See this document for more details for more details on sending the notification.
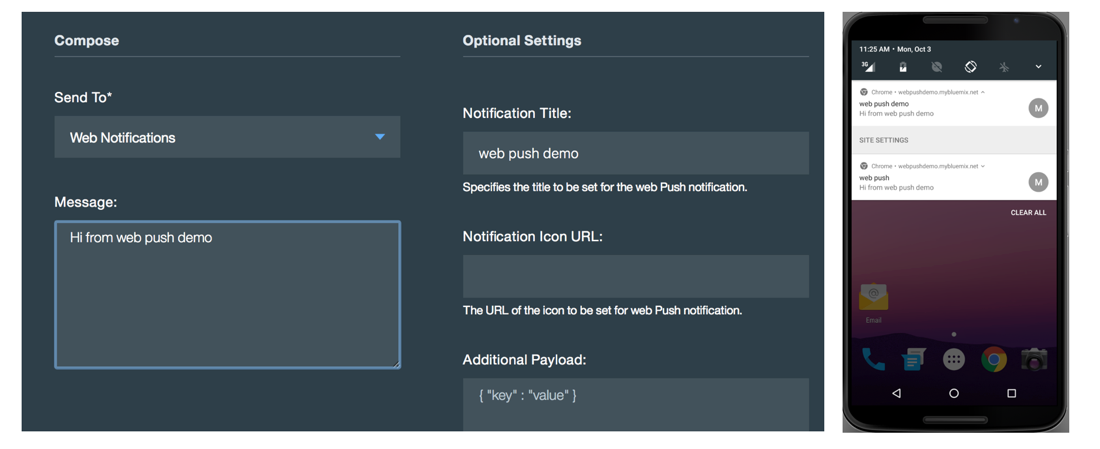
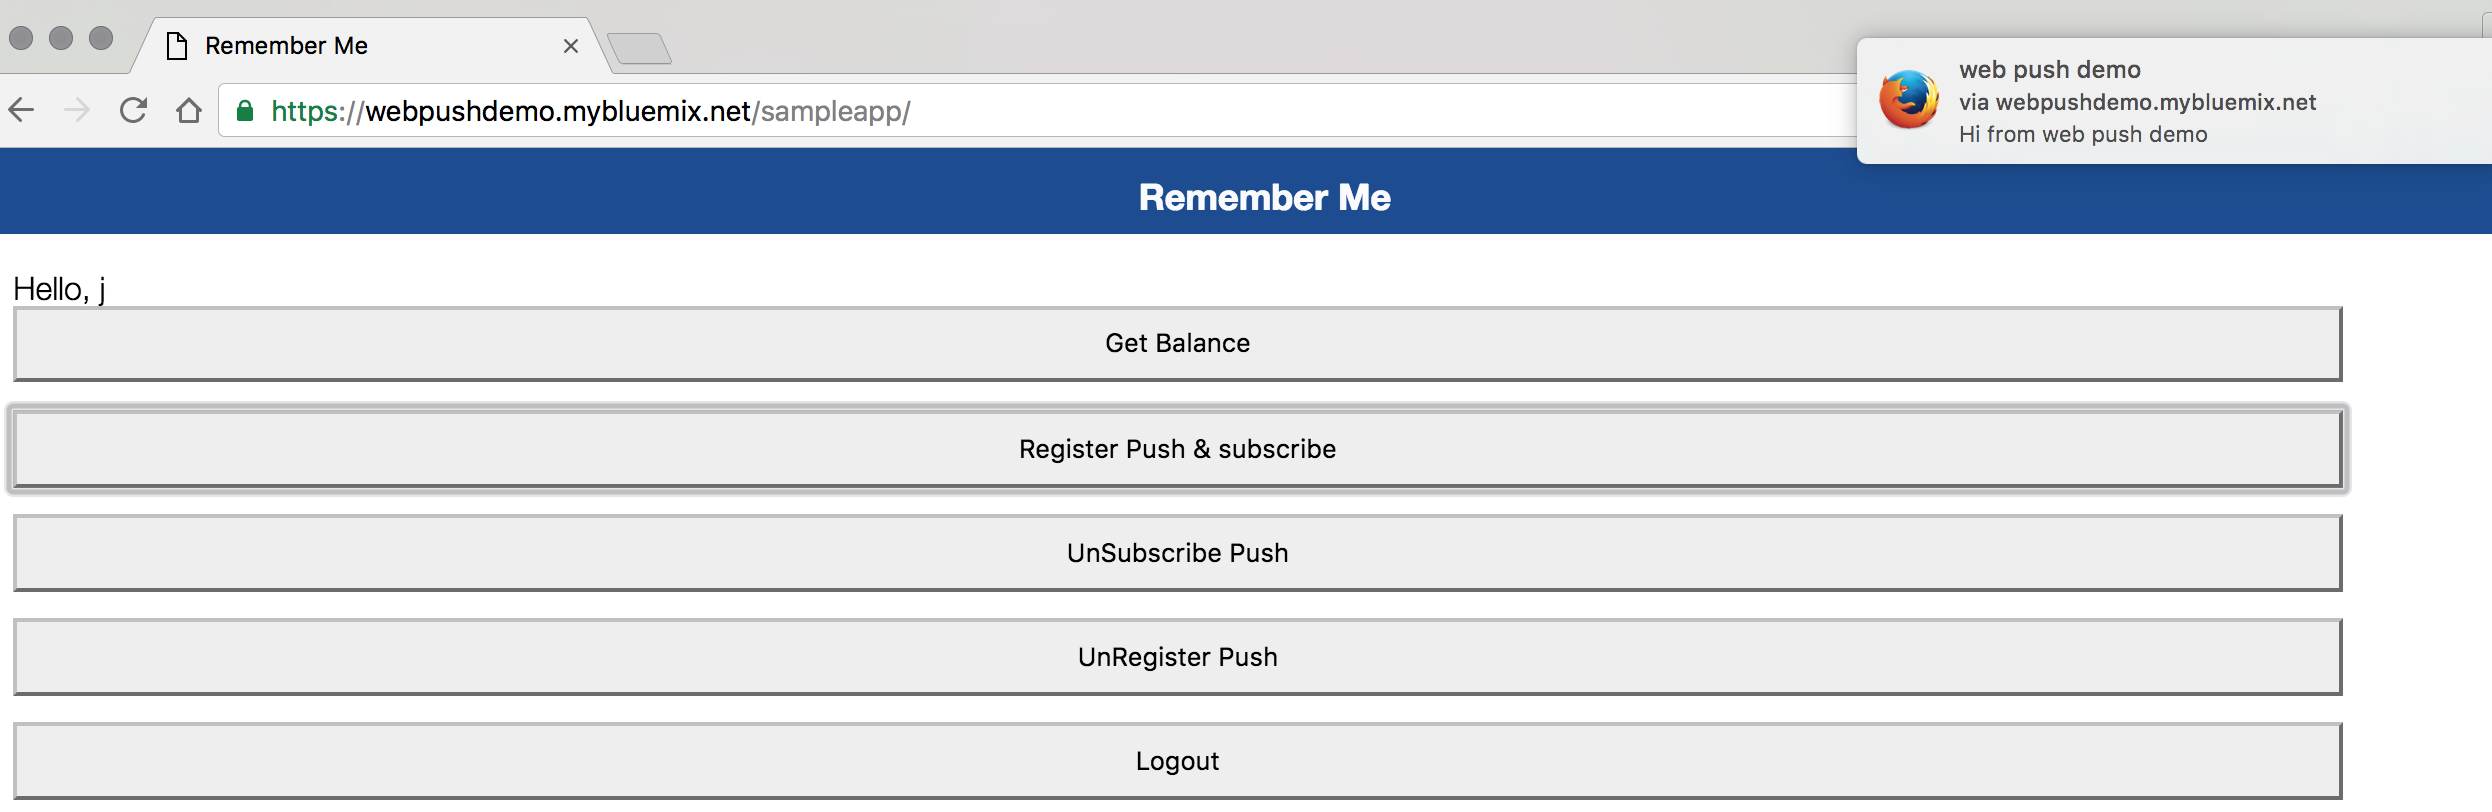
When the notfication is sent, browser running in the desktop / laptop receives the notification.
Inclusive terminology note: The Mobile First Platform team is making changes to support the IBM® initiative to replace racially biased and other discriminatory language in our code and content with more inclusive language. While IBM values the use of inclusive language, terms that are outside of IBM's direct influence are sometimes required for the sake of maintaining user understanding. As other industry leaders join IBM in embracing the use of inclusive language, IBM will continue to update the documentation to reflect those changes.