Integrating MobileFirst Foundation 8.0 in Ionic 2 based apps
Robert Puryear May 07, 2018
MobileFirst_Foundation iOS Android Cordova Ionic


Overview
In my previous blog post, I walked you through how to create, build, and deploy Ionic 1 apps implemented with MobileFirst Foundation 8. If you are an on-premise 8.0 customer or Mobile Foundation service customer, then read further to learn how to integrate with Ionic 2 apps which is quite different than the version 1.
Ionic 2 is based on AngularJS 2 which is being written for ECMAScript 6 however this isn’t actually supported by browsers yet. In the mean time, Ionic 2 uses TypeScript which transpiles ES6 code into ES5 code. This will allow us to make use of all the new ES6 features now and future proof the framework.
Install MobileFirst CLI and SDKs
You will need to install the MobileFirst CLI, the Ionic, and Cordova SDKs as well as have an MobileFirst server running.
Ensure that you have NodeJS downloaded and installed.
MobileFirst CLI
Install the MobileFirst CLI by entering the following command:
npm install -g mfpdev-cli
Ionic SDK
To install the Ionic 2 SDK and create Ionic 2 projects, you’ll need to install the latest beta release:
npm install -g cordova ionic
Cordova SDK
Install the Cordova SDK by entering the following command:
npm install -g cordova
Create a New Ionic Project
Create a new Ionic 2 project with a blank template by entering the command below.
ionic start --v2 myApp blank
Once Ionic 2 is out of beta you won’t need to include the
--v2flag in the command.
Change directory into the new app’s directory and add android platform if needed (iOS platform 4.1.1 is added by default).
ionic platform add android@latest
File Structure
Ionic 2 has a more modular approach as you can see in its file structure. You now have an src directory which will be where you spend 90% of your time. In this blog, I will mainly focus on the app and pages directory in the src folder.
The app.component.ts file is the main component of the app. The app.module.ts is basically our entire app as a module. We need to declare all of the components that your app uses here. Since this blog isn’t adding any new pages, providers, etc…we won’t need to modify the file.
The app is divided into pages which are in the src/pages directory. These are the views for your app and are pushed and popped on and off the stack as needed.
You will notice that there are no javascript files like in Ionic 1. They have been replaced with typescript files which is a superset of Javascript ES6. When your browser runs this code it is transpiled into the javascript version that the browser understands.
Since we will be working with the home page, open the home.ts file in your favorite editor which is located in the src/pages/home directory.
At the top of the file are the imports for your class. Below that are any “decorators” such as @Component or @Directive. These decorators just allow you to add some extra information to your class to “decorate” the class.
In the default example, the @Component decorator includes a selector and a templateUrl. The selector is used to easily reference the page. You can see how this is used by looking in the home.scss page where you can add styling to just this home page. The templateUrl tells the class which view to use.
Each new page that you create will automatically come with its own TypeScript file that controls how your page will behave, a SASS file (.scss) that controls how your page will look, and an HTML page which will control how it is laid out on the screen.
Add the MobileFirst Cordova SDK
The MobileFirst Cordova SDK is provided as a Cordova plugin and can be installed by running:
cordova plugin add cordova-plugin-mfp
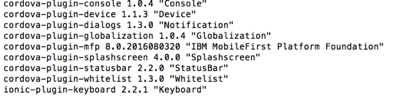
You can confirm the installed plugins by entering ionic plugin list.
Preview the App
You can preview the app in a number of ways.
Ionic Preview
To view both iOS and Android platforms using the Ionic CLI:
ionic serve --l
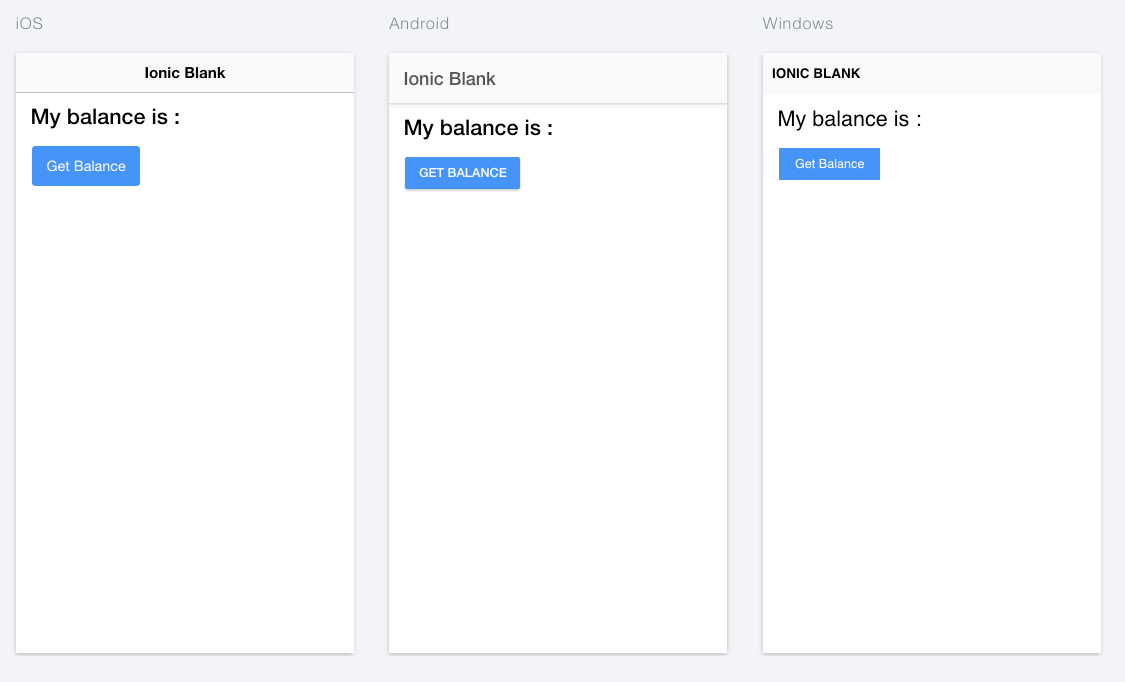
This will launch your default browser and will auto-reload if you change any files in the www directory.
Ionic 2 now previews iOS, Android, and Windows Phone with the
--labflag.
Native App Simulator
To preview the app in a native iOS or Android Simulator, you can use the emulate command:
ionic emulate iOS
The iOS simulator will only be available if you are working on a machine running OS X.
Register App on MobileFirst Server
To enable the MobileFirst capabilities such as using the Mobile Browser Simulator to preview the application we need to add some javascript code to connect to the MobileFirst Server.
Note: Make sure you have your MobileFirst Server running.
To register the application:
mfpdev app register
Open your MobileFirst console and confirm that your app has been registered.
MobileFirst Preview
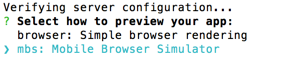
To preview the app in a browser or the mobile browser simulator using MobileFirst:
mfpdev app preview
Select the mobile browser simulator option.
Note: Currently OAuth isn’t fully implemented with the Mobile Browser Simulator
Implement the MobileFirst Adapter
MobileFirst adapters provide a way to retrieve and manage data for your mobile client app on the server side.
I’m using the ResourceAdapter to call a resource API and UserLogin for security in this example.
You should first build and deploy them onto your MobileFirst server. Run:
mfpdev adapter build
Followed by:
mfpdev adapter deploy
Security
The URL that gets the balance in the ResourceAdapter is protected by a security check named accessRestricted.
@OAuthSecurity(scope="accessRestricted")
In the Security tab of your registered app in the MobileFirst Operations Console’s dashboard, select the New button under the Scope-Elements Mapping section.
Enter accessRestricted in the scope element and select UserLogin in the Custom Security Checks section.
Call your resource adapter
Open the home.ts file and add the following code under the import section but before the @Component line:
declare var WLResourceRequest;
Next, add a balance variable above the constructor function. This variable will hold the value we get back from the adapter call.
balance;
Finally, add a getBalance() function that will make the adapter call.
getBalance(){
    var resourceRequest = new WLResourceRequest("/adapters/ResourceAdapter/balance",WLResourceRequest.GET);

    resourceRequest.send().then((response) => {
        this.balance = response.responseText;
        console.log(this.balance);
    },
    function(error){
        console.log(error);
    });
}
Update the view
Add the following code in your home.html in the <ion-content padding> elements:
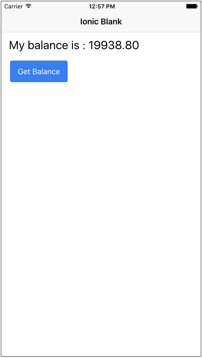
<h2>My balance is : {{ balance }}</h2>
<p><button ion-button (click)="getBalance()">Get Balance</button></p>
- The click action calls the
getBalancefunction. - To display the value of a variable in your view, you surround it with double curly brackets:
{{ balance }}
Add the Challenge Handler
When we start the app, we want to go ahead and register the challengeHandler for the securityCheck. We will make these changes in the app.component.ts file.
Add a AuthHandler variable above the constructor.
AuthHandler: any;
Add the AuthInit function below the constructor function. This will create a challengeHandler and call the DisplayLogin() function when its called.
AuthInit(){
    this.AuthHandler = WL.Client.createSecurityCheckChallengeHandler("UserLogin");
    this.AuthHandler.handleChallenge = ((response) =>{
        this.DisplayLogin();
    });
}
In order to recognize the WL variable, we need to declare it under the imports.
declare var WL;
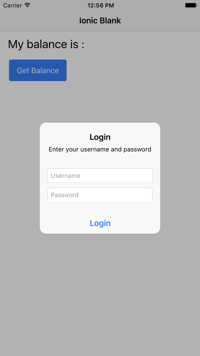
Under the AuthInit() function, add the DisplayLogin() function. An alert will be displayed with inputs for a username and password. Because we are using the UserLogin security check, as long as the username and password matches each other, it will be allow you access.
DisplayLogin(){
    let prompt = this.alertCtrl.create({
    title: 'Login',
    message: "Enter your username and password",
    inputs: [
      {
        name: 'username',
        placeholder: 'Username'
      },
      {
        name: 'password',
        placeholder: 'Password',
        type:'password'
      },
    ],
    buttons: [
      {
        text: 'Login',
        handler: data => {
          console.log('---> Trying to auth with user', data);
          this.AuthHandler.submitChallengeAnswer(data);
        }
      }
    ]
  });
  prompt.present();
}
Since we are using an alert, we need to import the AlertController at the top of the file.
import { AlertController } from 'ionic-angular';
Also add this to the constructor’s arguments
public alertCtrl: AlertController
Since we don’t want to create the challengeHandler before MobileFirst finishes loading, we need to listen for the mfpjsloaded event.
Add the Renderer in the imports:
import { Component, Renderer } from '@angular/core';
Also add this to the constructor’s arguments:
public renderer : Renderer
Add the listener at the top of the constructor
renderer.listenGlobal('document', 'mfpjsloaded', () => {
    this.AuthInit();
})
Test the App
Run the app in the simulator using Cordova since we are using OAuth security.
ionic emulate
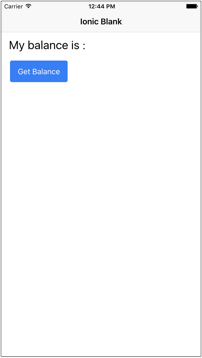
Click the Submit button to get your balance.
This calls the ResourceAdapter and you will need to enter your authorization.
After your username and password is validated, your balance is shown in the app.
View the source code here
Inclusive terminology note: The Mobile First Platform team is making changes to support the IBM® initiative to replace racially biased and other discriminatory language in our code and content with more inclusive language. While IBM values the use of inclusive language, terms that are outside of IBM's direct influence are sometimes required for the sake of maintaining user understanding. As other industry leaders join IBM in embracing the use of inclusive language, IBM will continue to update the documentation to reflect those changes.