Rapidly develop MobileFirst apps using Ionic Creator
Vittal R Pai May 09, 2019
MobileFirst_Platform Mobile_Foundation_Service iOS Android Cordova Ionic


In this blog post you will learn how to add IBM MobileFirst capability to an Ionic v3 application developed using Ionic Creator.
Overview
Ionic 3.0 released with Angular 4.0.0 Support and TypeScript 2.1 & 2.2 compatibility in the month of April. More details about new features of Ionic 3.0 can be found in this blog post. Creator is a simple drag & drop tool from Ionic where users can build high quality user interface for Ionic applications. More details about Ionic Creator can be found here.
Prerequisites
- Knowledge of using Mobile Foundation Service on IBM Cloud
- Knowledge of using MobileFirst CLI
- Knowledge of Ionic framework
Quick start
In this tutorial, building of an iOS Application using Ionic Creator and application life cycle management using MobileFirst Platform is demonstrated. The development process is divided into three steps.
- Build Mobile user interface using Ionic Creator
- Create an Ionic v3 Application
- Create a Mobile Foundation service instance, Register the app and Test
Build Mobile user interface using Ionic Creator
-
Log in to Ionic Creator Console
-
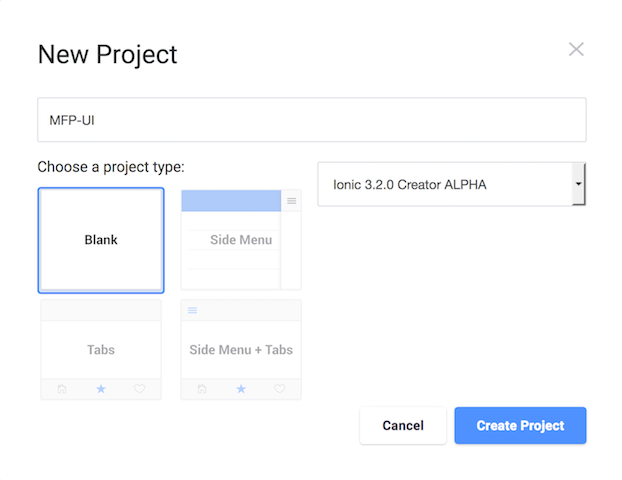
Create a new blank project with any name and the project type as Ionic 3.2.0.
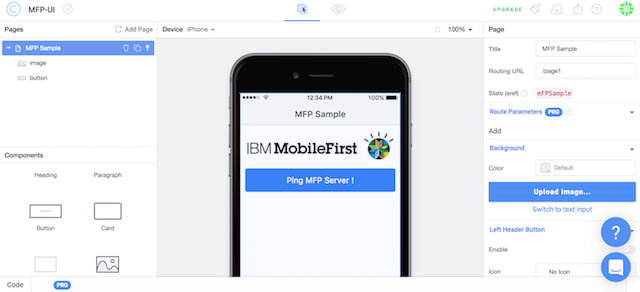
- Prepare a user interface by adding buttons, image and header as shown below.
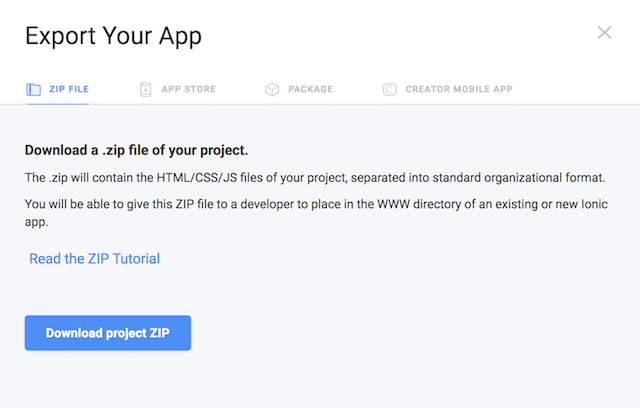
- Click Export Your App option which you can find on top right of the menu & Download the project zip file.
Create an Ionic v3 application
-
Create a blank ionic v3 project. Open terminal and type the following command:
ionic start mfpsample blankWhere mfpsample is the project name, blank is the name of smallest ionic 3 project template.
-
Install iOS Platform by running the following command:
cd mfpsample ionic cordova platform add ios -
Add MobileFirst Cordova SDK by running the following command :
ionic cordova plugin add cordova-plugin-mfp - Go to the newly created
mfpsampledirectory in finder, you will see directory calledsrcinside.- Uncompress the contents of the zip file you exported and downloaded.
- Copy and paste the contents from your zip export into the src directory.
- Overwrite the
appdirectory,pagesdirectory, andindex.html. This step adds the UI generated using Ionic Creator in the mobile application.
-
Add the following snippet inside body tag in
index.htmlfile which is located inside the pathsrc/index.html. This is the requirement introduced only from ionic version 3.5.3 onwards.<script src="build/vendor.js"></script> -
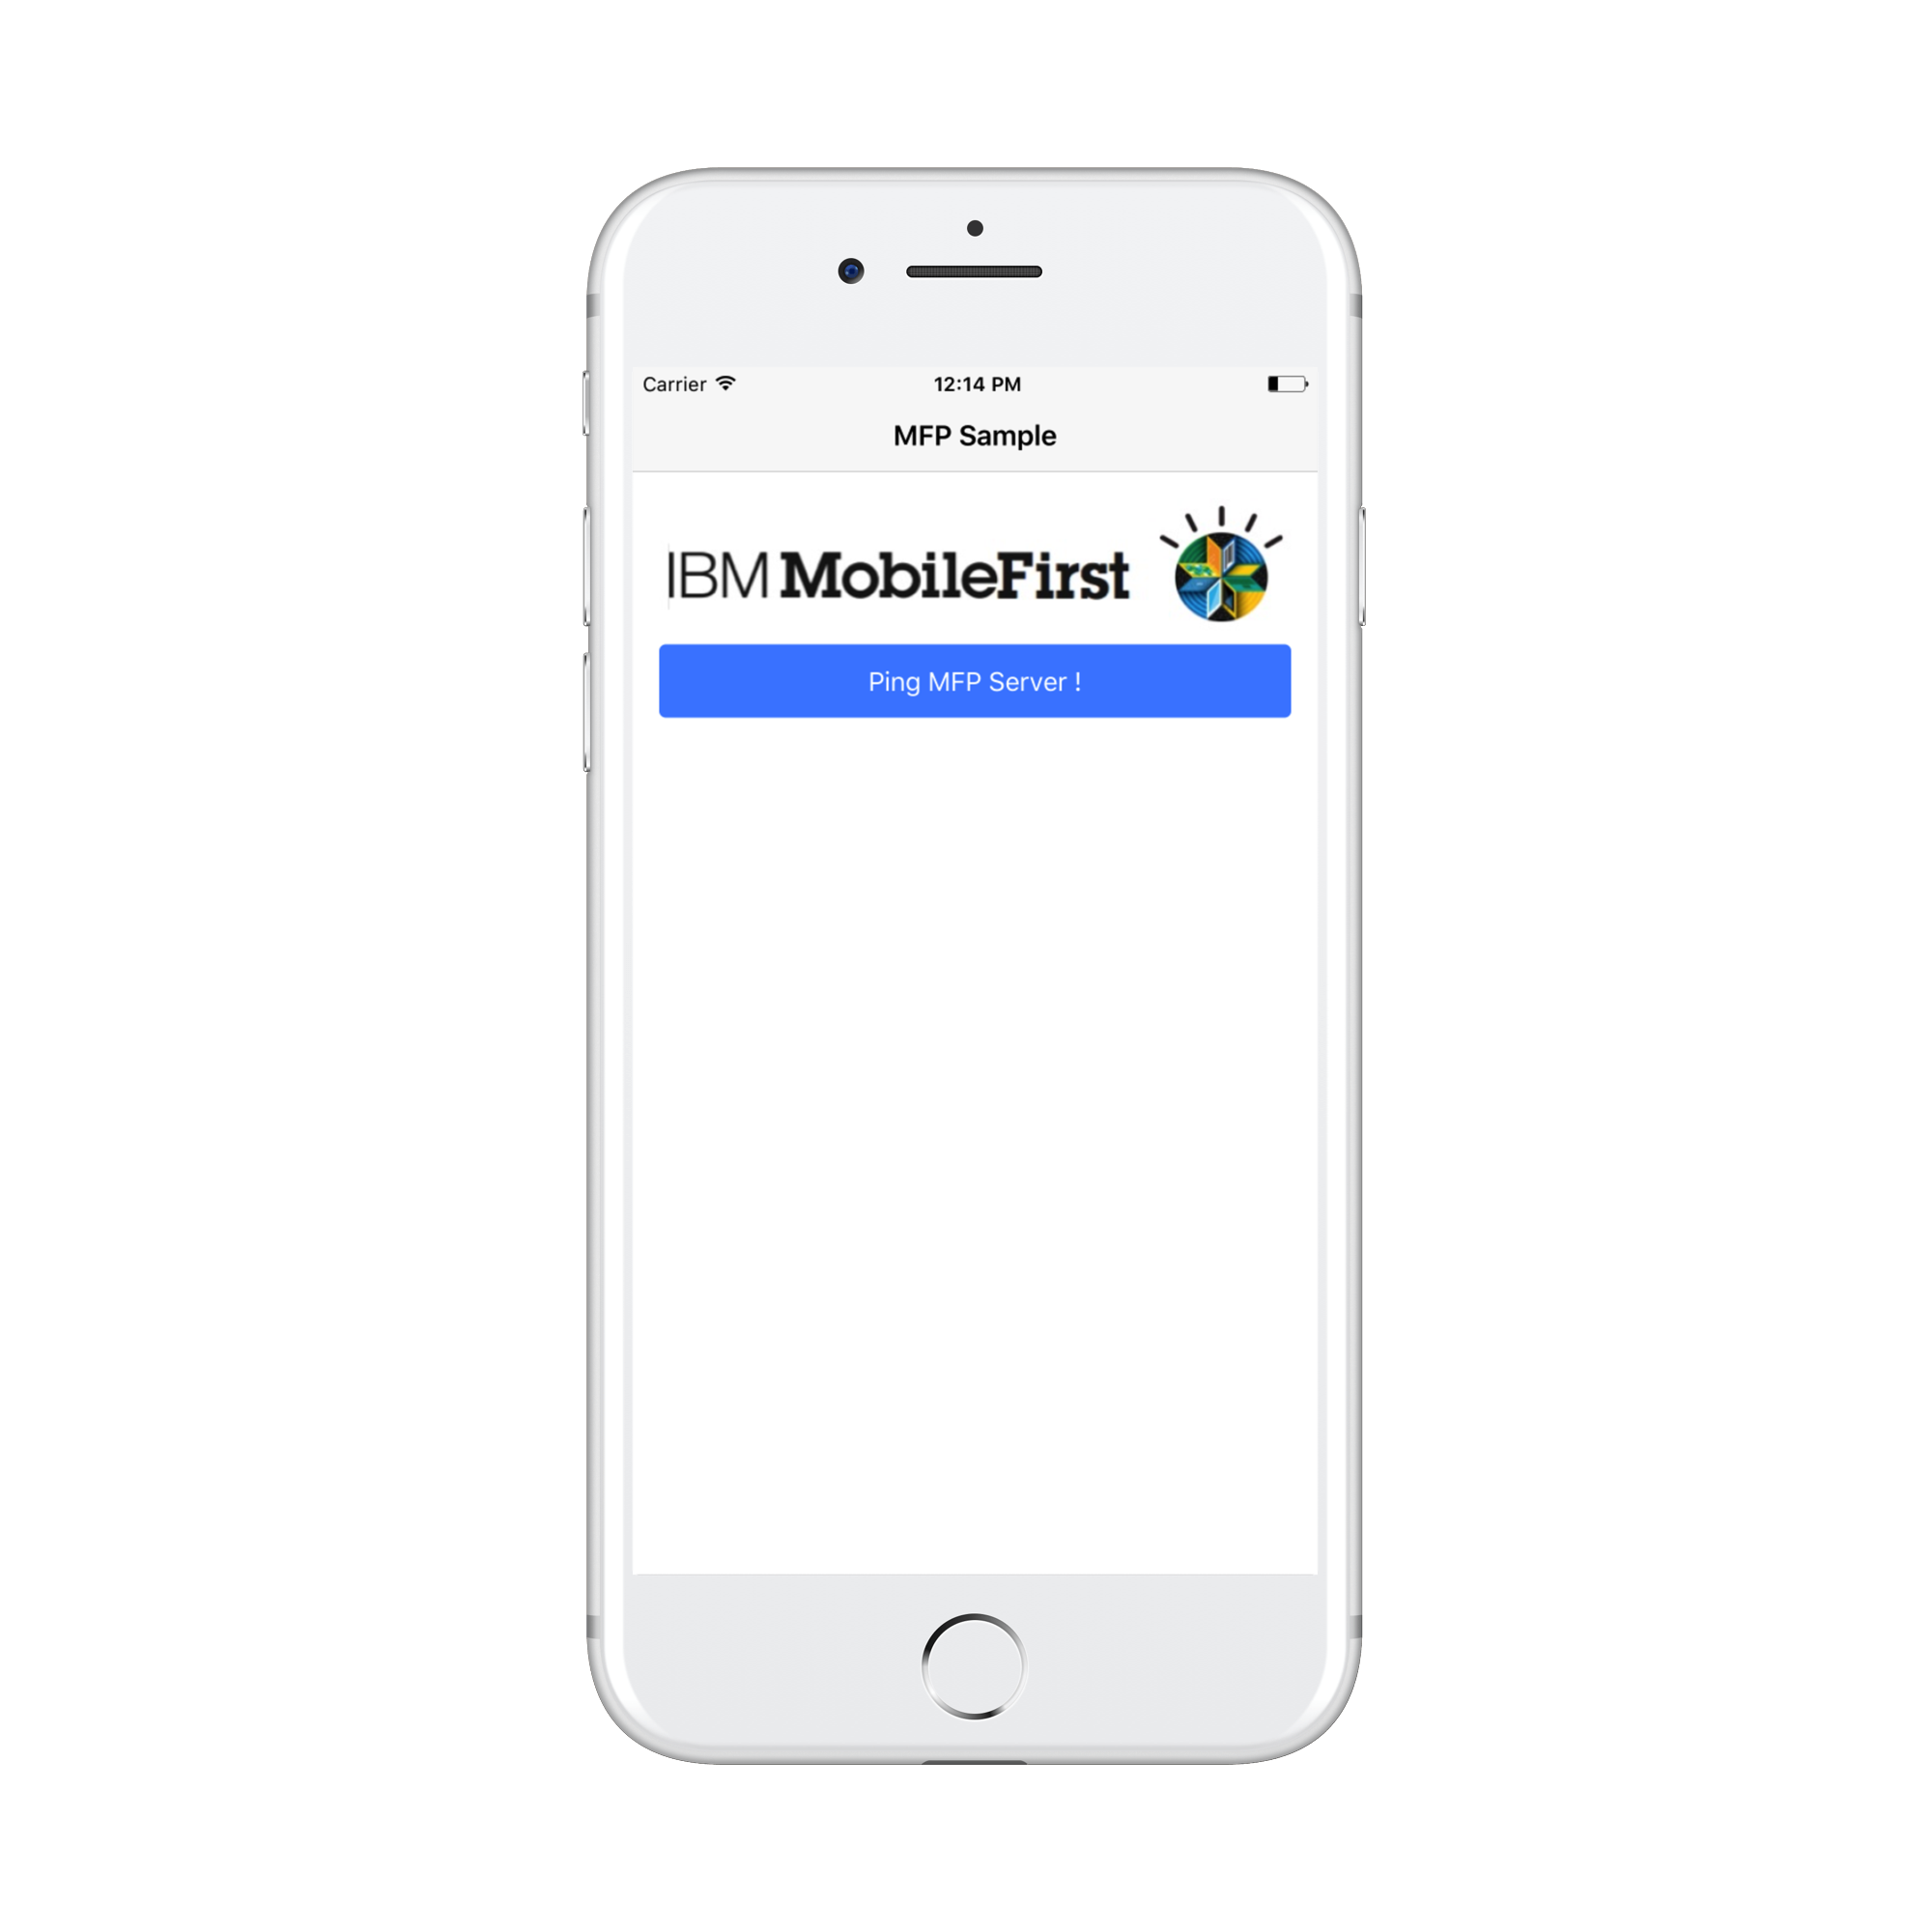
Add the click functionality to the Ping MFP Server button which is located inside
src/pages/m-fpsample/m-fpsample.html. The button snippet should look like below.<button id="mFPSample-button1" ion-button (click)="ObtainToken()" color="positive" block>Ping MFP Server !</button>Note : Page name may vary in your application as it depends on the name that you have provided while creating the UI in ionic creator.
-
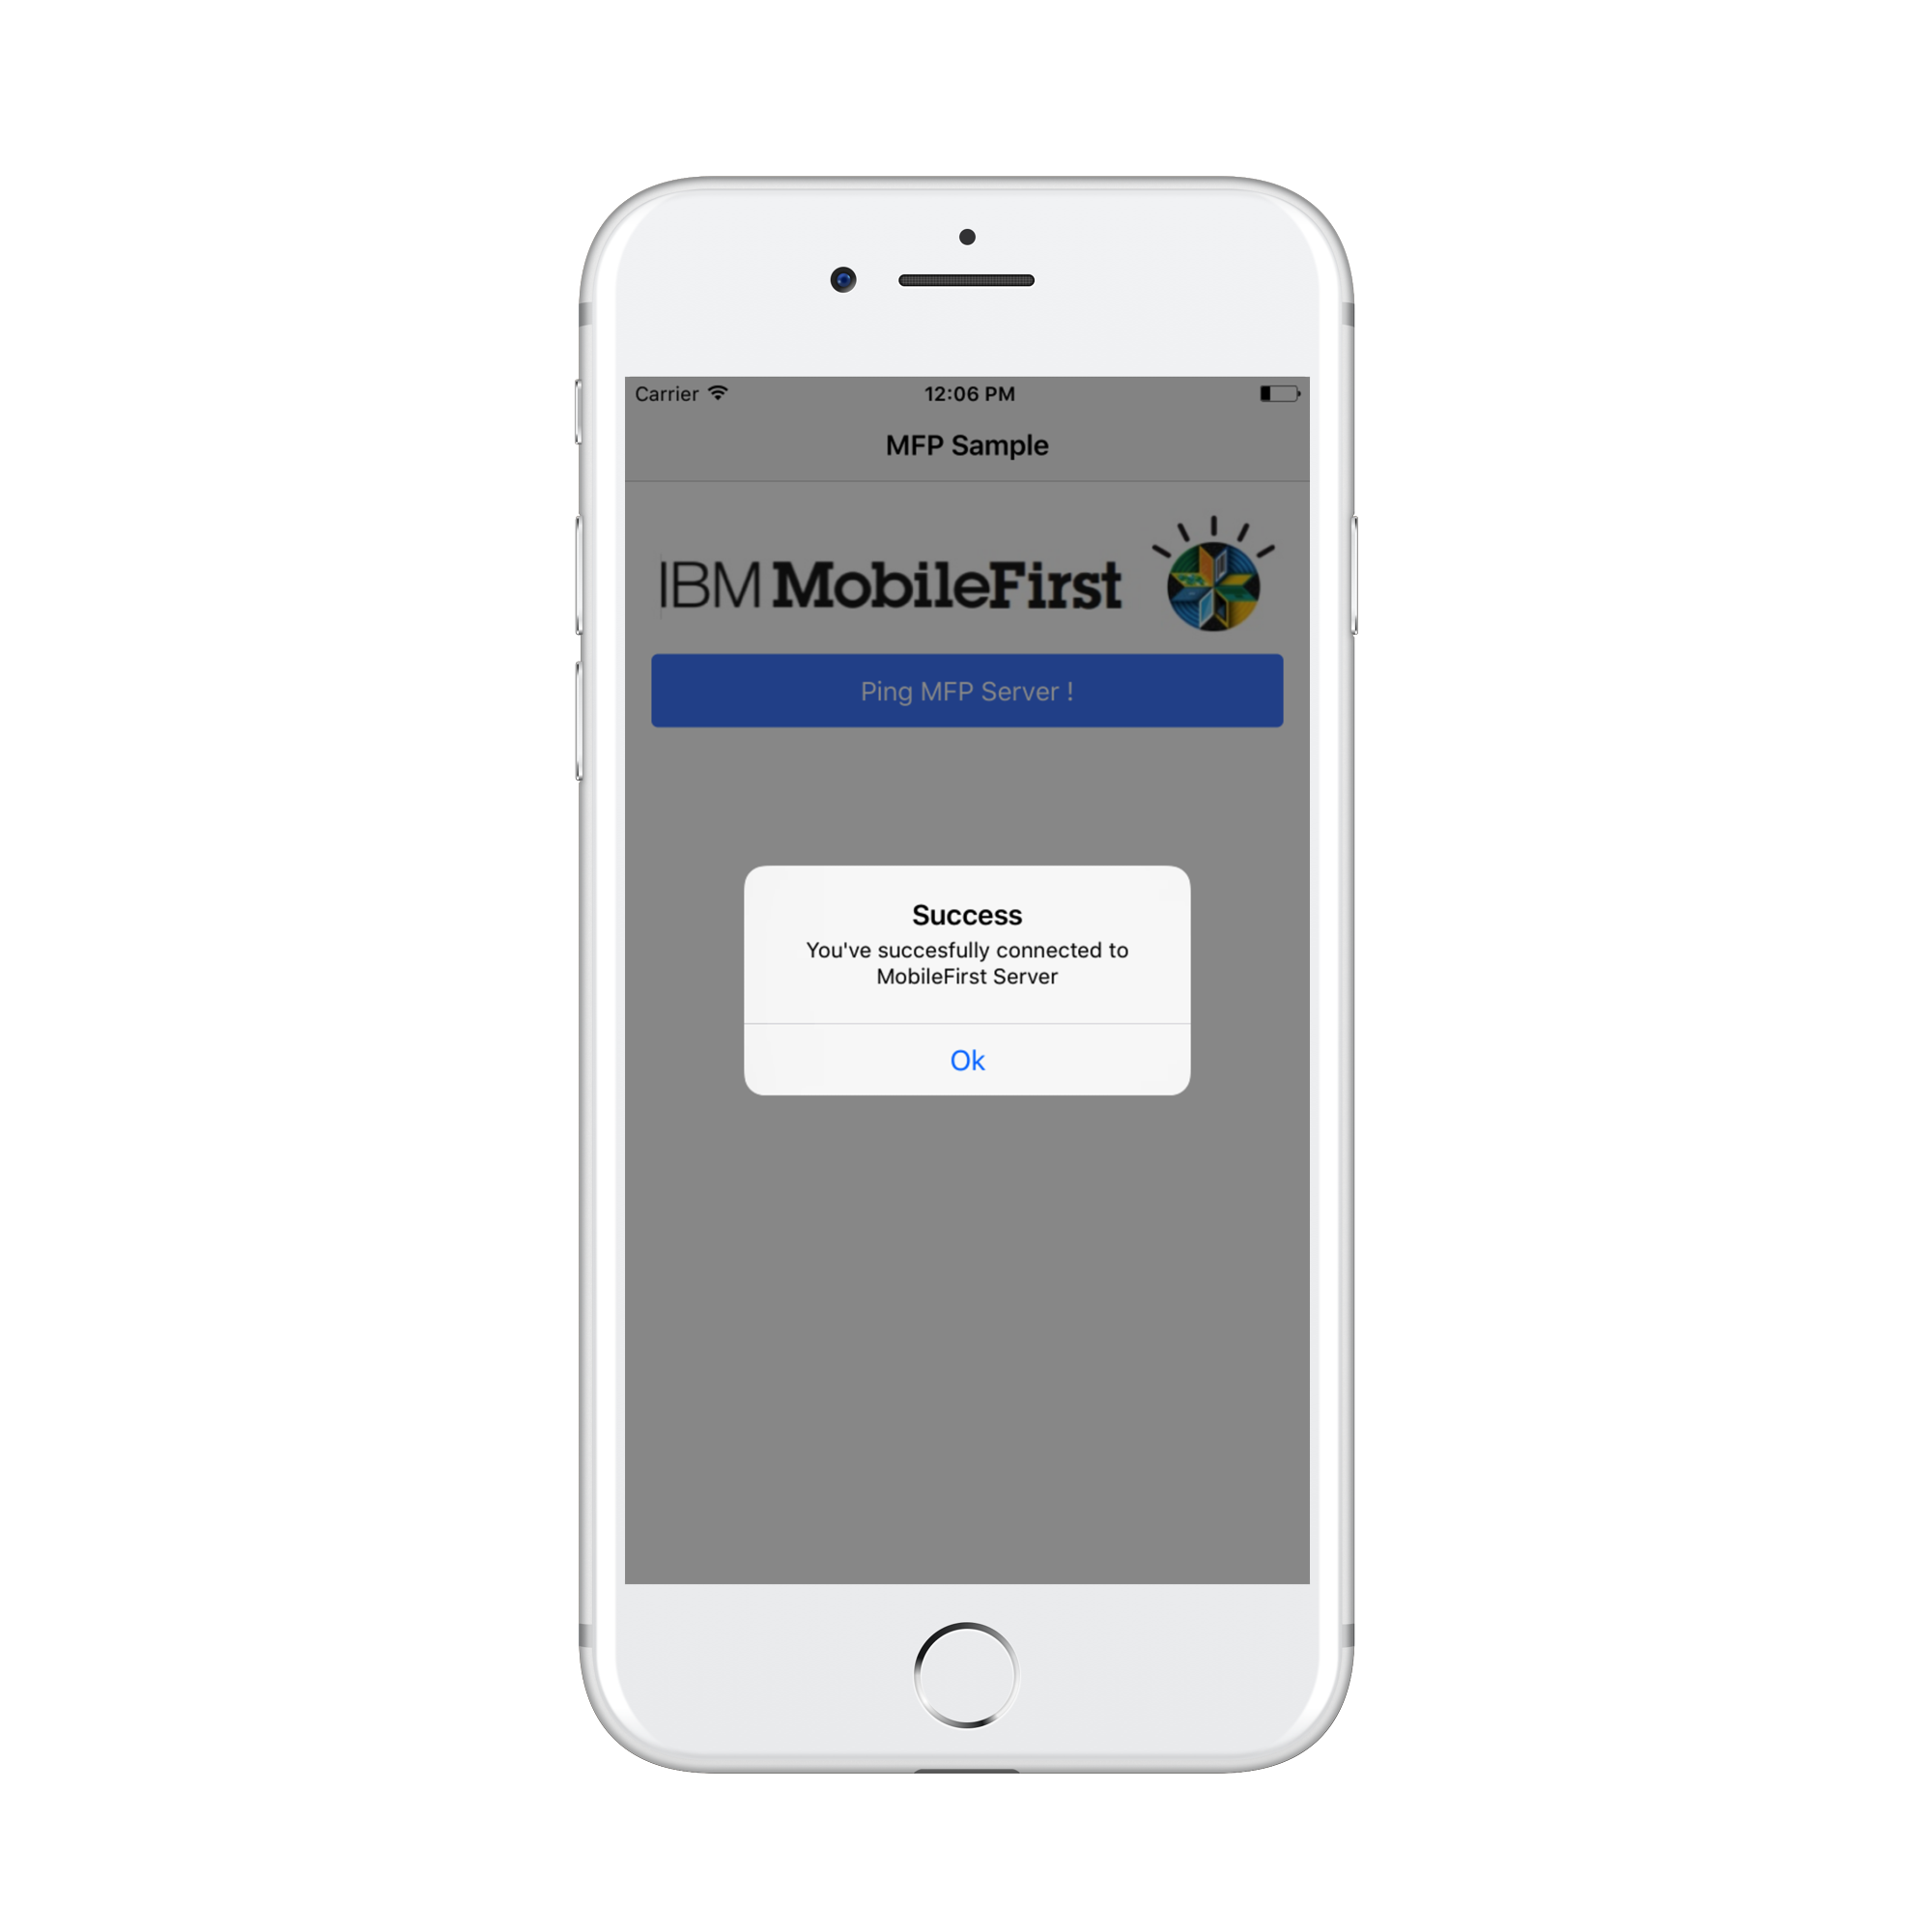
Add logic to do OAuth token call with MobileFirst Server in the typescript file of the page which is located at
src/pages/m-fpsample/m-fpsample.ts. The file contents look as below./// <reference path="../../../plugins/cordova-plugin-mfp/typings/worklight.d.ts" /> import { Component } from '@angular/core'; import { NavController } from 'ionic-angular'; @Component({ selector: 'page-m-fpsample', templateUrl: 'm-fpsample.html' }) export class MFPSamplePage { constructor(public navCtrl: NavController) { } ObtainToken() { WLAuthorizationManager.obtainAccessToken(null).then( function(accessToken) { WL.SimpleDialog.show("Success", "You've succesfully connected to MobileFirst Server", [{ text: 'Ok', handler: null }]); }, function(error) { WL.SimpleDialog.show("Failure", "Failed to connect MobileFirst Server", [{ text: 'Ok', handler: null }]); } ); } }This step adds the functionality of simple OAuth token fetch call with MobileFirst Server.
Note : Please make sure that you have added the Mobilefirst APIs typescript reference tag in the first line.
Building of the application is now complete, the next step is to create Mobile Foundation service instance on Bluemix and invoking it from the client application.
Create MobileFirst Foundation service, Register App and Test
-
Create a Mobile Foundation service on IBM Cloud following the steps mentioned in here.
-
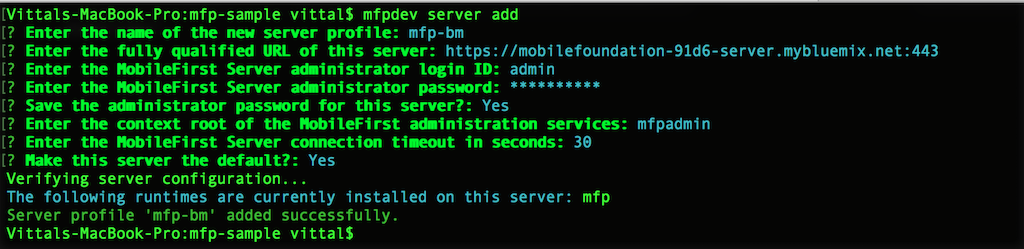
Register the server profile of newly created Mobile Foundation service in MobileFirst CLI by running the following command in the terminal:
mfpdev server addand make the server profile as default.
-
Now register the ionic app in MFP Server by running the following command in the terminal:
mfpdev app registerThis step registers the application in MobileFirst Server.

-
Prepare and build the ionic application by running the following command in the terminal:
  ionic cordova prepare
  ionic build ios
That is it! We are done building an application, let us test the application.
Open the application in Xcode IDE (mfpsample/platforms/ios/MyApp.xcodeproj) & test it on a simulator or a phone device.
 |
 |
 |
The entire process is described in the following video:
To include more IBM MobileFirst features to your Ionic application, refer to the tutorials here.
Inclusive terminology note: The Mobile First Platform team is making changes to support the IBM® initiative to replace racially biased and other discriminatory language in our code and content with more inclusive language. While IBM values the use of inclusive language, terms that are outside of IBM's direct influence are sometimes required for the sake of maintaining user understanding. As other industry leaders join IBM in embracing the use of inclusive language, IBM will continue to update the documentation to reflect those changes.