Beacons in iOS
improve this page | report issueOverview
This tutorial discusses the client-side API for working with beacons in iOS.
This tutorial is a continuation of Working with Beacons (introduction, setup, and server-side API).
The following topics are covered:
- Configuring you application
- Simplified APIs for ranging/monitoring iBeacons
- Running the sample application
Configuring your application
- On iOS 8 and later, to enable Location services, add
NSLocationAlwaysUsageDescriptionin the iOS projectInfo.plist.
- Copy the
iOSNativeiBeaconsLibraryfolder of the iOSNativeiBeacons project into your native iOS application. That folder contains the library that provides the simplified set of APIs for ranging/monitoring iBeacons.To request permission to use location services and local/push notifications, write the following code:
- (void) viewDidLoad {
	[super viewDidLoad];
	...
	[[WLBeaconsLocationManager sharedInstance] requestPermissionToUseLocationServices];
	[[WLBeaconsLocationManager sharedInstance] requestPermissionToUseNotifications];
}
Simplified APIs for ranging/monitoring iBeacons
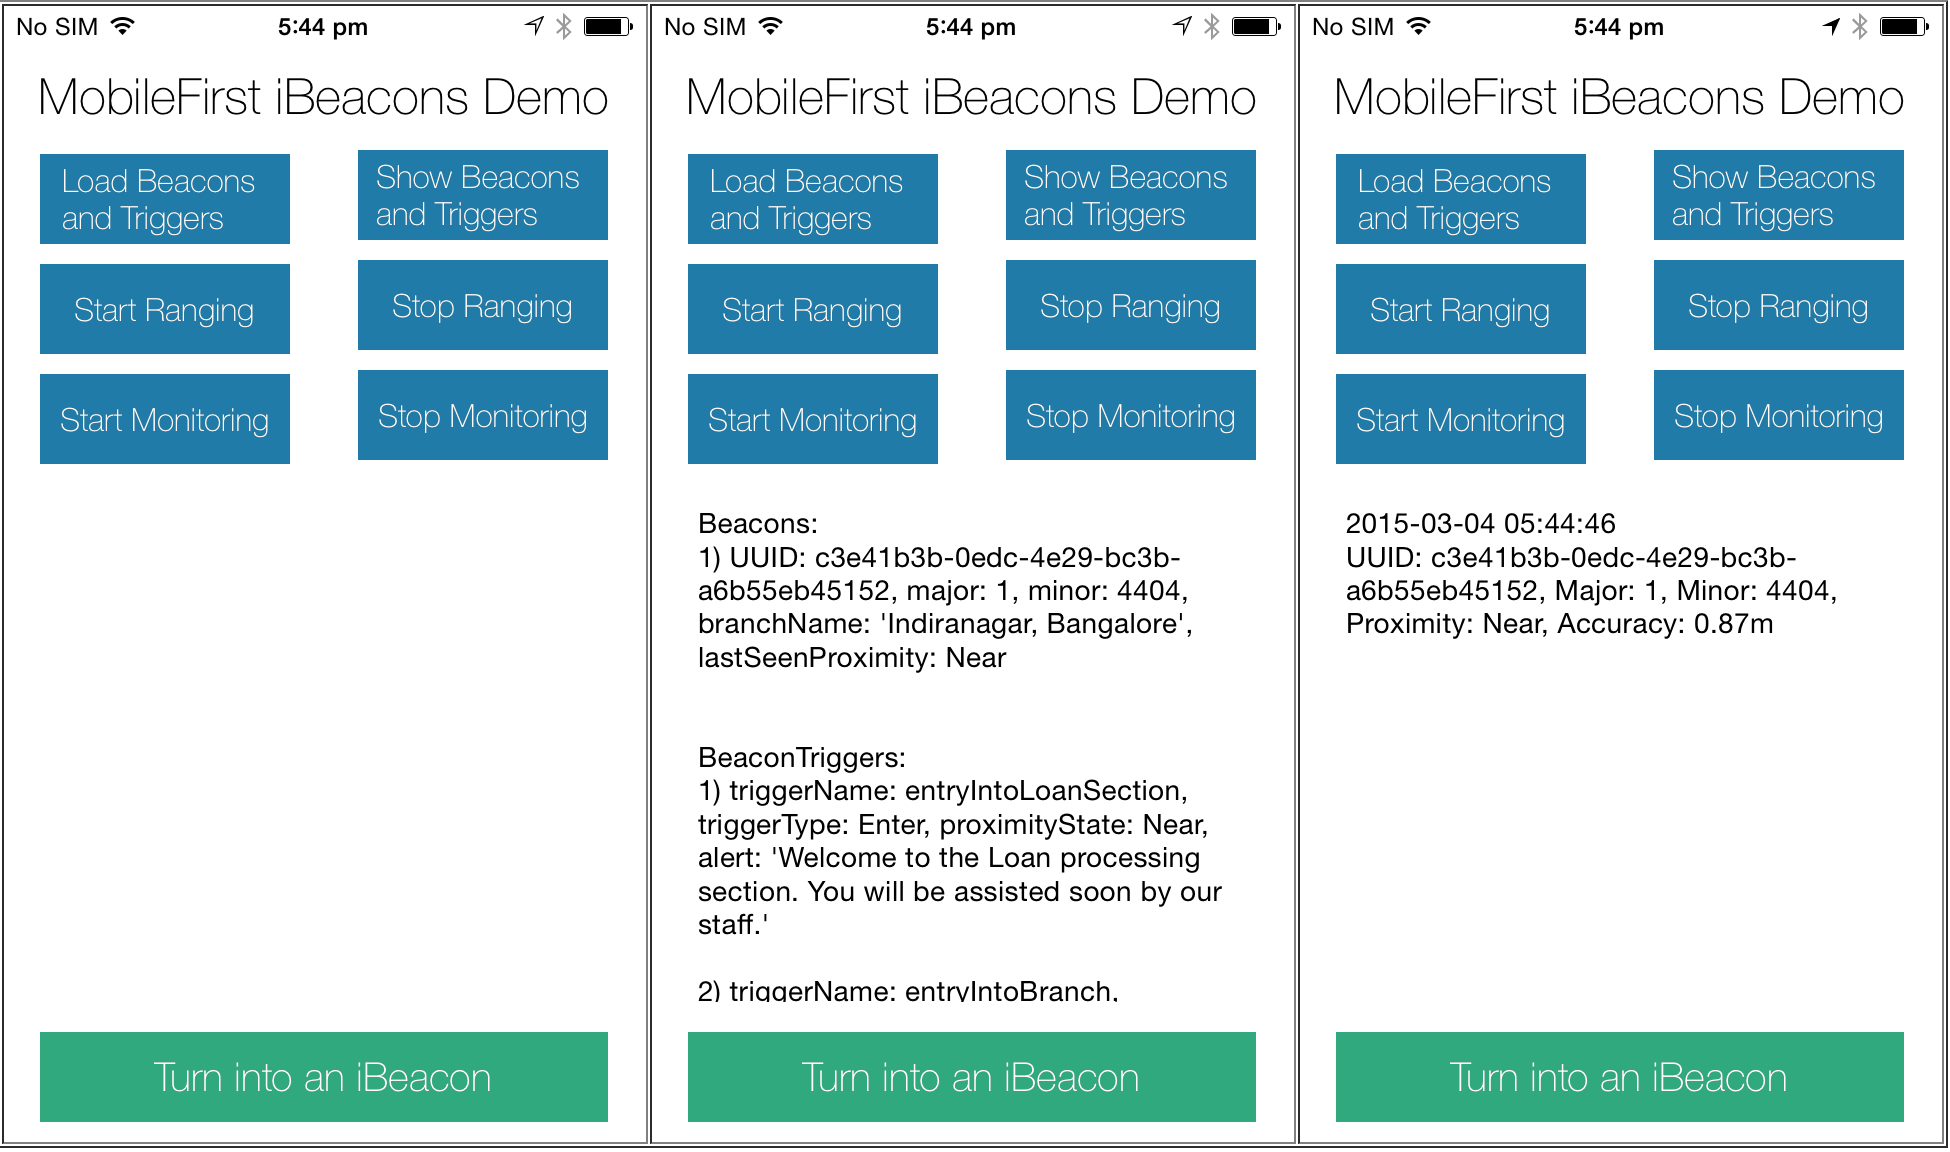
Loading beacons and triggers from the server
To load information pertaining to beacons, triggers, and their associations from the server and storing it in the application JSONStore, write the following code:
[[WLBeaconsAndTriggersJSONStoreManager sharedInstance] loadBeaconsAndTriggersFromAdapter:@"BeaconsAdapter" withProcedure:@"getBeaconsAndTriggers" withCompletionHandler:^(bool success, NSString *error) {
	if (success) {
		[self showBeaconsAndTriggers];
	} else {
		[self updateView:error];
	}
}];
Triggering actions
To set the monitoring/ranging of iBeacons and to fire trigger actions, write the following code:
/>
[[WLBeaconsLocationManager sharedInstance] startMonitoring];
To let the user opt out of iBeacon monitoring, write the following code:
[[WLBeaconsLocationManager sharedInstance] stopMonitoring];
	// Optionally reset monioring/ranging state
	[[WLBeaconsLocationManager sharedInstance] resetMonitoringRangingState];
Turning the device into an iBeacon
To turn a device into an iBeacon, write the following code:
NSString *uuidString = @"3d402cf0-3691-4bd9-97ff-0b0a93a160ef";
int major = 1;
int minor = 4417;

[[WLBeaconsLocationManager sharedInstance] turnIntoiBeaconWithUuid:uuidString withMajor:major withMinor:minor withStatusHandler:^(NSString *turnIntoiBeaconStatusDetails) {
	[self updateView:turnIntoiBeaconStatusDetails];<br />
}];
Generally, use this feature for testing and development purposes. The UUID string must match the UUID of the beacons that are registered on server.
Increasing the application running time
To increase the running time of the application when it runs in background (as part of iBeacon monitoring), write the following code:
- (void)applicationDidEnterBackground:(UIApplication *)application {
	...
	[[WLBeaconsLocationManager sharedInstance] notifyApplicationDidEnterBackground];
}
- (void)applicationDidBecomeActive:(UIApplication *)application {
	...
	[[WLBeaconsLocationManager sharedInstance] notifyApplicationDidBecomeActive];
}
This code increases the running time of the application up to 3 minutes from the default 10 seconds.Handling local notifications
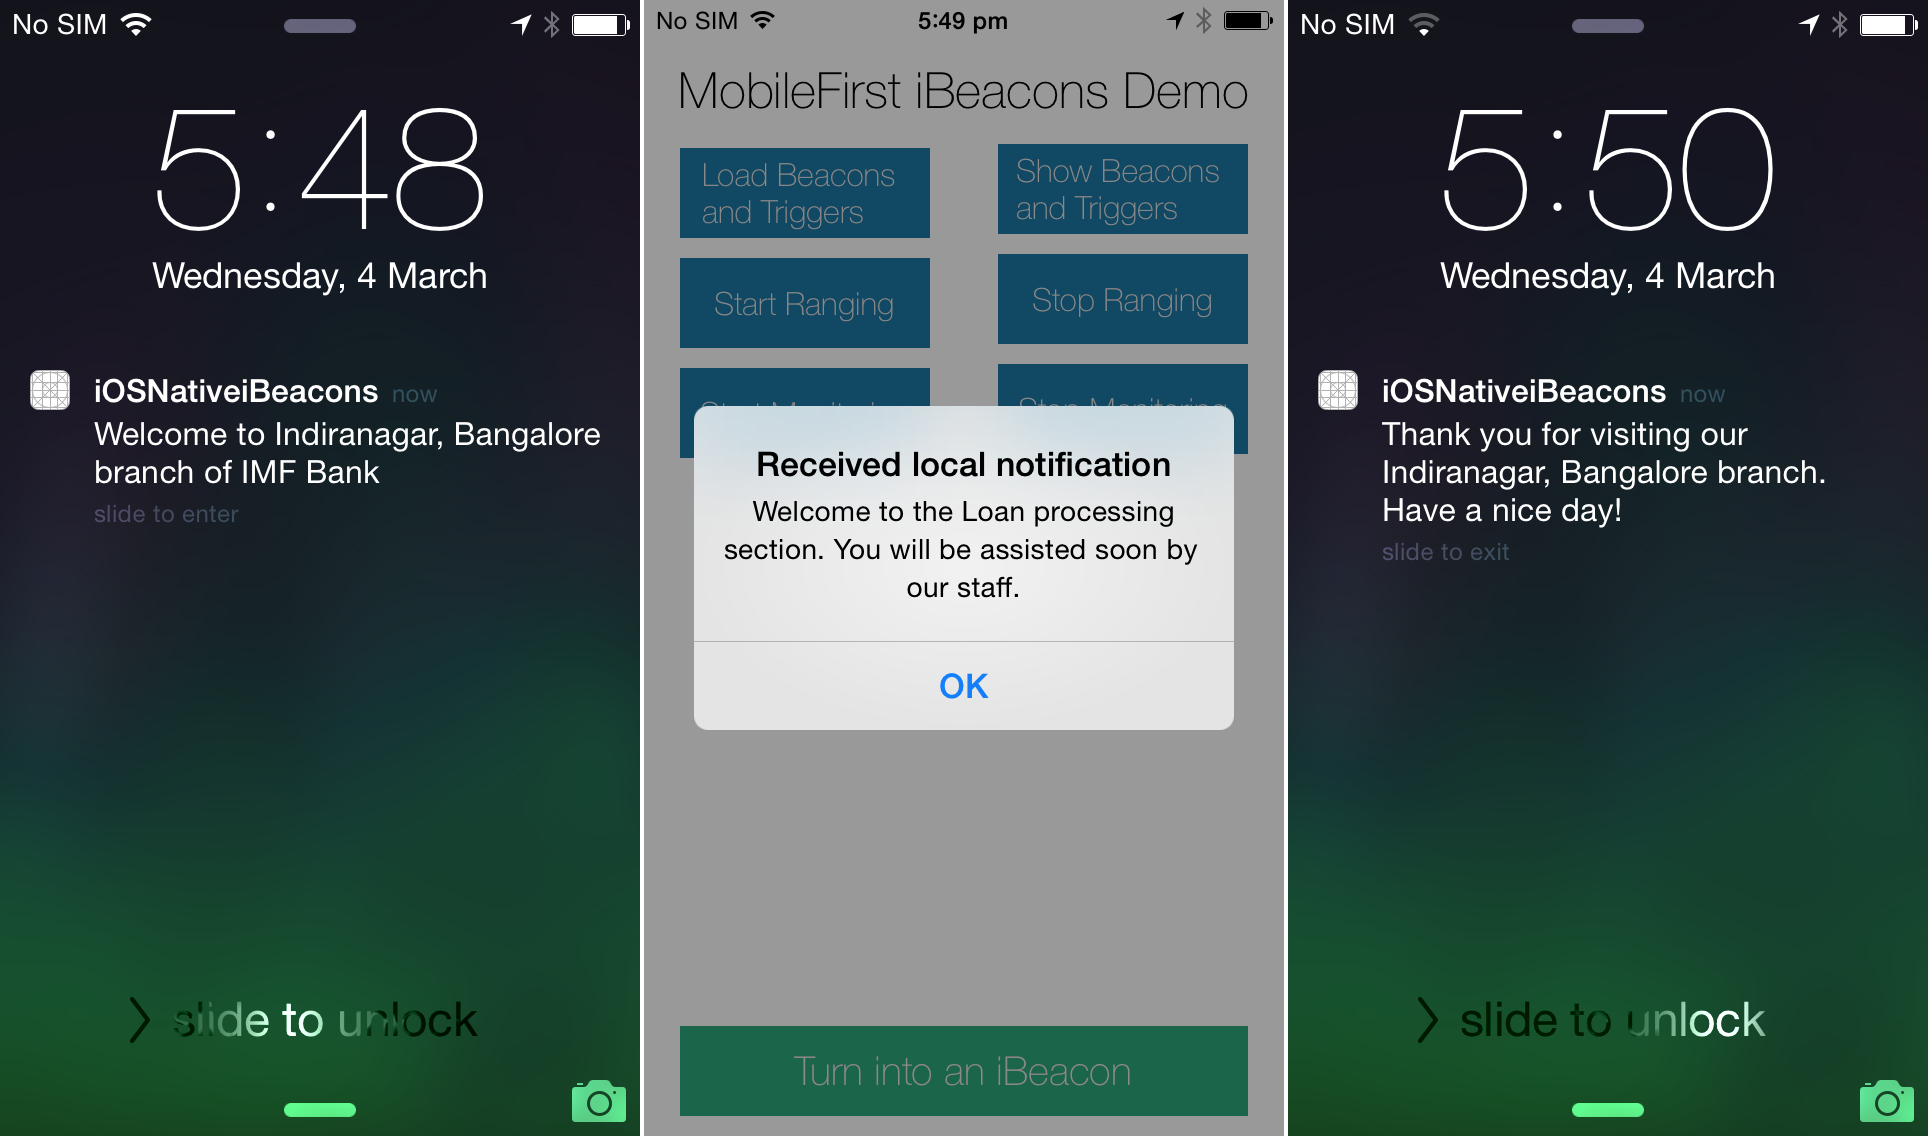
To handle local notifications that originate from the application, write the following code:
- (BOOL)application:(UIApplication *)application didFinishLaunchingWithOptions:(NSDictionary *)launchOptions {
	...
	UILocalNotification *localNotif = [launchOptions objectForKey:UIApplicationLaunchOptionsLocalNotificationKey];
	if (localNotif) {
		application.applicationIconBadgeNumber = application.applicationIconBadgeNumber - 1;
		[self processLocalNotification:localNotif];
	}
	return YES;
}

- (void)application:(UIApplication *)application didReceiveLocalNotification:(UILocalNotification *)notification {
	application.applicationIconBadgeNumber = application.applicationIconBadgeNumber - 1;
	[self processLocalNotification:notification];
}

- (void)processLocalNotification:(UILocalNotification *)notification {
	NSString *alertMessage = [notification.userInfo objectForKey:@"alertMessage"];
	UIAlertView *alert = [[UIAlertView alloc] initWithTitle:@"Received local notification" message:alertMessage delegate:nil cancelButtonTitle:@"OK" otherButtonTitles:nil, nil];
	[alert show];
}
Running the sample application
The sample is in two parts:
- The Beacons MobileFirst project contains a MobileFirst native API that you can deploy to your MobileFirst Server instance.
- The BeaconsObjC native project contains a native library that provides a simplified set of APIs for ranging/monitoring iBeacons and a native iOS application that demonstrates the usage of those APIs.
Make sure to update the
worklight.plistfile in iOSNativePush with the relevant server settings.The sample showcases a simple banking scenario where actions are triggered based on proximity:
- When the user enters a Bank branch, a notification action is triggered with a Welcome message.
- When the user enters the loan processing section, an alert is triggered with a message stating that a bank personnel will assist the user soon.
- When the user exits the Bank branch, a notification action is triggered with a message.

Inclusive terminology note: The Mobile First Platform team is making changes to support the IBM® initiative to replace racially biased and other discriminatory language in our code and content with more inclusive language. While IBM values the use of inclusive language, terms that are outside of IBM's direct influence are sometimes required for the sake of maintaining user understanding. As other industry leaders join IBM in embracing the use of inclusive language, IBM will continue to update the documentation to reflect those changes.