Push Notifications in Native Android Applications
improve this page | report issueOverview
This tutorial explains how to configure a MobileFirst Native Android application to support push notifications.
Also mentioned are the addresses and ports that are required for notifications to arrive to the supported Android Push Notification Service vendor (GCM).
Prerequisite: Make sure that you read the Configuring a native Android application with the MobileFirst Platform SDK tutorial first.
Setting up the project
-
Create a MobileFirst project and add a MobileFirst Android Native API.
In this tutorial and the accompanying sample, the application is called "androidnativepush". Be sure to replace this value with your own application name.
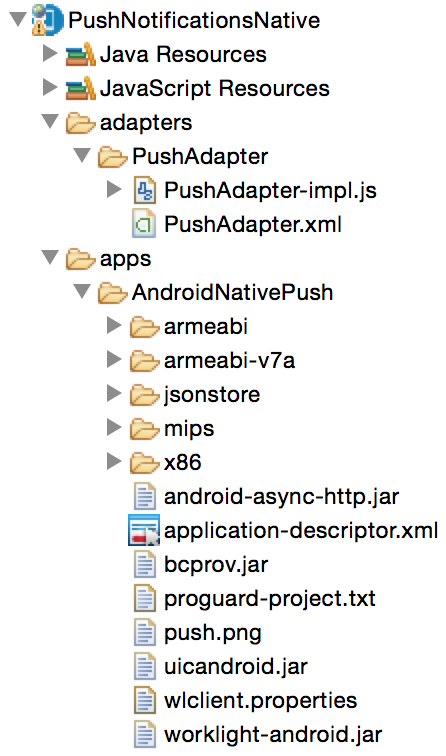
The native API includes the following push-related file:
- The
push.pngfile is an icon file that is displayed when a push notification arrives. Copy this file from your native API folder and put it in your native project'sres/drawablefolders.
- The
-
Edit the
application-descriptor.xmlfile.These settings are also editable with the Application Descriptor Editor in Design mode.
- Add the
pushSenderchild-element inside thenativeAndroidAppelement . Replace thekeyandsenderIdvalues with your API key and project number respectively. In case you do not have these, you can get them from the Google Developer Console.<nativeAndroidApp id="AppName" platformVersion="7.1.0.00.20150812-0731" version="1.0" xmlns="http://www.worklight.com/native-android-descriptor"> <displayName>AppName</displayName> <description>AppName</description> <publicSigningKey></publicSigningKey> <packageName></packageName> <accessTokenExpiration>3600</accessTokenExpiration> <userIdentityRealms></userIdentityRealms> <pushSender key="" senderId=""/> </nativeAndroidApp>
- Add the
-
Edit the
wlclient.propertiesfile.Edit the
wlclient.propertiesfile in your native Android project and enter appropriate values for the following fields:- wlServerHost – The hostname or IP address of MobileFirst Server.
- wlServerPort – The port on which MobileFirst Server is listening.
- GcmSenderId – The project number that you obtained through the Google API console.
wlServerProtocol = http
wlServerHost =
wlServerPort = 10080
wlServerContext = /MobileFirst-Project-Name/
wlAppId = MobileFirst-App-Name
wlAppVersion = 1.0
wlEnvironment = Androidnative
wlUid = wY/mbnwKTDDYQUvuQCdSgg==
wlPlatformVersion = 7.1.0.0
#languagePreferences = Add locales in order of preference (e.g. en, fr, fr-CA)
#For Push Notifications,uncomment below line and assign value to it
GcmSenderId =
Note: Google recently announced a move from GCM to FCM. The below instructions have been updated accordingly. Also note that existing in-the-field GCM configurations will continue to function however new GCM configurations will not, and FCM must be used instead.
Android devices use the Firebase Cloud Messaging (FCM) service for push notifications. To setup FCM:- Visit the Firebase Console.
- Create a new project and provide a project name.
- Click on the Settings "cog wheel" icon and select Project settings.
- Click the Cloud Messaging tab to generate a Server API Key and a Sender ID and click Save.
-
Add Google Play Services (optional)
For instructions about how to setup Google Play Services review the Setting Up Google Play Services topic at the Android Developer website.
-
Modify the native Android project.
Verify that the following permissions exist in the
AndroidManifest.xmlfile of your Android project.<permission android:name="com.example.project.permission.C2D_MESSAGE" android:protectionLevel="signature" /> <p> <uses-permission android:name="android.permission.INTERNET" /> <uses-permission android:name="android.permission.GET_TASKS"/> <uses-permission android:name="com.example.project.permission.C2D_MESSAGE" /> <uses-permission android:name="com.google.android.c2dm.permission.RECEIVE" /> <uses-permission android:name="android.permission.WAKE_LOCK" /> <uses-permission android:name="android.permission.GET_ACCOUNTS" /> <uses-permission android:name="android.permission.USE_CREDENTIALS" /> <uses-permission android:name="android.permission.WRITE_EXTERNAL_STORAGE" /> <uses-permission android:name="android.permission.ACCESS_WIFI_STATE"/>Replace all com.example.project with your Android project package name.
Add the
launchModeattribute to theapplicationelement. Set its value tosingleTask.<application android:allowBackup="true" android:icon="@drawable/ic_launcher" android:label="@string/app_name" android:theme="@style/AppTheme" android:launchMode="singleTask">Add an
intent-filterto theactivityelement for notifications.<activity android:name=".ActivityName"< android:label="@string/app_name"> <intent-filter> <action android:name="com.example.project.app_name.NOTIFICATION" /> <category android:name="android.intent.category.DEFAULT" /> </intent-filter>Replace the com.example.project.app_name with your Android project package name and the
app_namestring as it appears in theres/values/string.xmlfile. For example: com.sample.notifications.NativeAndroidNotifications.Add the
GCMIntentServiceand add an intent-filter for RECEIVE and REGISTRATION of notifications.<service android:name="com.worklight.wlclient.push.GCMIntentService" /> <receiver android:name="com.worklight.wlclient.push.WLBroadcastReceiver" android:permission="com.google.android.c2dm.permission.SEND"> <intent-filter> <action android:name="com.google.android.c2dm.intent.RECEIVE" /> <category android:name="com.example.project" /> </intent-filter> <intent-filter> <action android:name="com.google.android.c2dm.intent.REGISTRATION" /> <category android:name="com.example.project" /> </intent-filter> </receiver>Replace all com.example.project with your Android project package name.
Android Push Notifications Service
The following ports must be open: 443, 5228, 5229, and 5230. GCM typically uses only 5228, but it sometimes uses 5229 and 5230.
GCM does not provide specific IP addresses, so you must allow your firewall to accept outgoing connections to all IP addresses that are contained in the IP blocks listed in Google ASN of 15169.
Notification Types
▲- Event Source Notifications in Native Android Applications
- Tag and Broadcast Notifications in Native Android Applications
Inclusive terminology note: The Mobile First Platform team is making changes to support the IBM® initiative to replace racially biased and other discriminatory language in our code and content with more inclusive language. While IBM values the use of inclusive language, terms that are outside of IBM's direct influence are sometimes required for the sake of maintaining user understanding. As other industry leaders join IBM in embracing the use of inclusive language, IBM will continue to update the documentation to reflect those changes.