Android Quick Start demonstration
improve this page | report issueThe purpose of this demonstration is to make you experience an end-to-end flow where IBM MobileFirst Platform Foundation SDK for Android is integrated into an Android project and used to retrieve data by using a MobileFirst adapter.
To learn more about creating projects and applications, using adapters and lots more, visit the Native Android Development landing page.
Prerequisite: Make sure that you have installed the following software:
- MobileFirst Platform command line tool (download)
- Android Studio
-
Create a MobileFirst back-end project and adapter.
-
Create a back-end project in a location of your choice.
mfp create MyProject cd MyProject -
Add an HTTP adapter to the project.
mfp add adapter MyAdapter -t http
-
-
Deploy artifacts to the MobileFirst Server.
-
Start the MobileFirst Server and deploy the adapter.
mfp start
mfp push
-
-
Create an Android project in Android Studio.
-
Add the MobileFirst Android SDK to the Android Studio project
- In Project > Gradle scripts, select build.gradle (Module: app).
- After
apply plugin: 'com.android.application', add the following line:
repositories { jcenter() } - Inside
android, add the following lines:
packagingOptions { pickFirst 'META-INF/ASL2.0' pickFirst 'META-INF/LICENSE' pickFirst 'META-INF/NOTICE' } - Inside
dependencies, add the following lines:
compile group: 'com.ibm.mobile.foundation', name: 'ibmmobilefirstplatformfoundation', version: '7.1.0.0', ext: 'aar', transitive: true - Add the following permissions to the
AndroidManifest.xmlfile:
<uses-permission android:name="android.permission.INTERNET"/> <uses-permission android:name="android.permission.ACCESS_WIFI_STATE"/> <uses-permission android:name="android.permission.GET_TASKS" /> - Add the MobileFirst UI activity:
<activity android:name="com.worklight.wlclient.ui.UIActivity" /> - In Terminal, navigate to the root of the Android Studio project and add the required configuration files by running this command:
mfp push -
Implement MobileFirst adapter invocation.
-
Main
ActivityclassMake sure that your MainActivity class extends the
Activityclass:
public class MainActivity extends Activity {
...
Add the followingimportstatements:
import com.worklight.wlclient.api.*;
import android.util.Log;
import java.net.URI;
import java.net.URISyntaxException;
Add the following lines to the
onCreatemethod:
super.onCreate(savedInstanceState); setContentView(R.layout.activity_main); final WLClient client = WLClient.createInstance(this); client.connect(new WLResponseListener() { @Override public void onSuccess(WLResponse wlResponse) { URI adapterPath = null; try { adapterPath = new URI("/adapters/MyAdapter/getFeed"); } catch (URISyntaxException e) { e.printStackTrace(); } WLResourceRequest request = new WLResourceRequest(adapterPath,WLResourceRequest.GET); request.send(new MyInvokeListener()); } @Override public void onFailure(WLFailResponse wlFailResponse) { Log.i("MFPMyProject","Failed connecting to the MobileFirst Server: " + wlFailResponse.getErrorMsg()); } }); -
MyInvokeListenerclassAdd a new
MyInvokeListenerclass.
Add the followingimportstatements:
import com.worklight.wlclient.api.*;
import android.util.Log;
Paste the following lines:
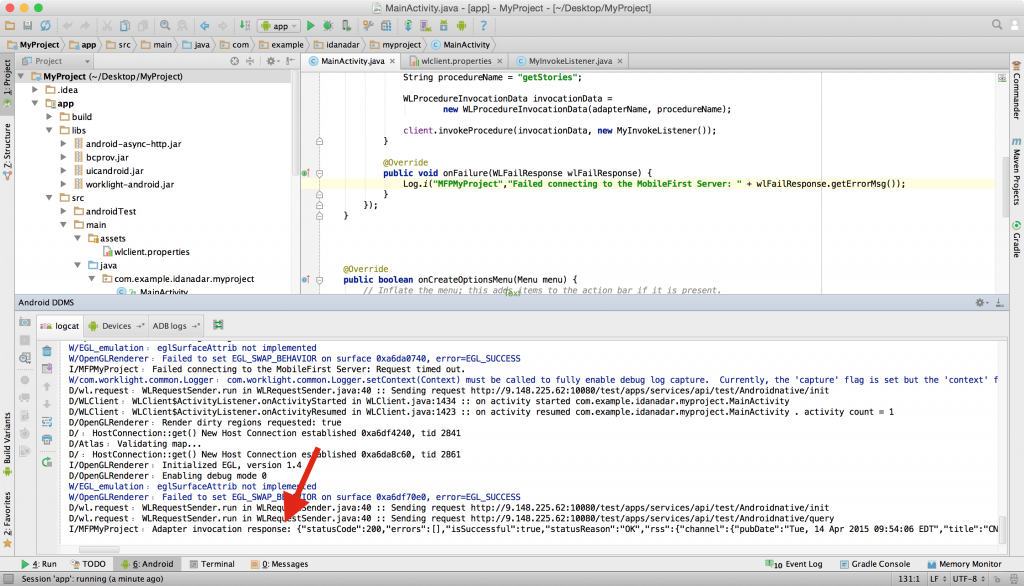
public class MyInvokeListener implements WLResponseListener {
    @Override
    public void onSuccess(WLResponse wlResponse) {
        Log.i("MFPMyProject","Adapter invocation response: " + wlResponse.getResponseJSON());
    }
    @Override
    public void onFailure(WLFailResponse wlFailResponse) {
        Log.i("MFPMyProject", "Adapter invocation response: " + wlFailResponse.getErrorMsg());
    }
}
-
-
Final configurations
- Create an Android Virtual Device (AVD).
-
Click Run.
Review the LogCat view for the data retrieved by the adapter request.
Inclusive terminology note: The Mobile First Platform team is making changes to support the IBM® initiative to replace racially biased and other discriminatory language in our code and content with more inclusive language. While IBM values the use of inclusive language, terms that are outside of IBM's direct influence are sometimes required for the sake of maintaining user understanding. As other industry leaders join IBM in embracing the use of inclusive language, IBM will continue to update the documentation to reflect those changes.