The Application Center console
improve this page | report issueOverview
With the Application Center console, you can manage the repository of the Application Center and your applications.
The Application Center console is a web application to manage the repository of the Application Center. The Application Center repository is the central location where you store the mobile applications that can be installed on mobile devices.
Use the Application Center console to:
- Upload applications that are written for these operating systems: Android, iOS, Windows 8 (Windows Store packages only), Windows Phone 8, or Windows 10 Universal.
- Manage several different versions of mobile applications.
- Review the feedback of testers of mobile applications.
- Define the users who have the rights to list and install an application on the mobile devices.
- Track which applications are installed on which devices.
Notes:
- Only users with the administrator role can log in to the Application Center console.
- Multicultural support: the user interface of the Application Center console has not been translated.
Jump to
- Starting the Application Center console
- Troubleshooting a corrupted login page (Apache Tomcat)
- Troubleshooting a corrupted login page in Safari browsers
- Application Management
- Adding a mobile application
- Adding an application from a public app store
- Application properties
- Editing application properties
- Upgrading a mobile application in MobileFirst Server and the Application Center
- Downloading an application file
In the Application Center console, you can see reviews about mobile application versions sent by users.
- User and group management
- Access control
- Managing access control
- Device Management
- Application enrollment tokens in Windows 8 Universal
- Signing out of the Application Center console
Starting the Application Center console
You can start the Application Center with your web browser and log in if you have the administrator role.
- Start a web browser session on your desktop.
- Contact your system administrator to obtain the address and port of the server where the Application Center is installed.
- Enter the following URL:
http://server/appcenterconsole - Where server is the address and port of the server where the Application Center is installed:
http://localhost:9080/appcenterconsole
Log in to the Application Center console. Contact your system administrator to get your credentials so that you can log in to the Application Center console.
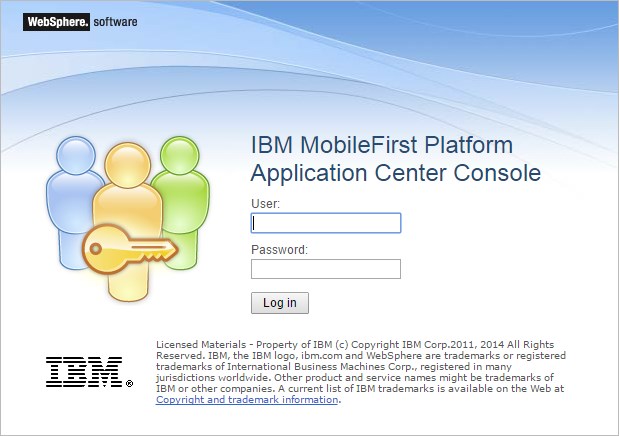
Note: Only users with the administrator role can log in to the Application Center console.
Troubleshooting a corrupted login page (Apache Tomcat)
You can recover from a corrupted login page of the Application Center console when the Application Center is running in Apache Tomcat.
When the Application Center is running in Apache Tomcat, the use of a wrong user name or password might corrupt the login page of the Application Center console.
When you try to log in to the console with an incorrect user name or an incorrect password, you receive an error message. When you correct the user name or password, instead of a successful login, you have one of the following errors; the message depends on your web browser.
- The same error message as before
- The message The connection was reset
- The message The time allowed for login exceeded
The behavior is linked to the management by Apache Tomcat of the j_security_check servlet. This behavior is specific to Apache Tomcat and does not occur in any of the WebSphere Application Server profiles.
The workaround is to click the refresh button of the browser to refresh the web page after a login failure. Then, enter the correct credentials.
Troubleshooting a corrupted login page in Safari browsers
You can recover from a corrupted login page of the Application Center console when you use the Safari browser.
When the Application Center console is open in a Safari browser, you might navigate away from the console. When you come back to the console, you might see the login page. Even though you enter the correct login details, you see the following message instead of a successful login: HTTP Status 404 - appcenterconsole/j_security_check.
The behavior is linked to a caching problem in the Safari browser.
The workaround is to trigger a forced reload when you see the login page without entered or autocompleted credentials. Here is how to trigger a forced reload:
- On a Mac computer, press Shift + the Refresh button.
- On an iPad or iPhone device: Double-click the refresh button or clean the cache by closing Safari: you double-click the home button and then swipe Safari away.
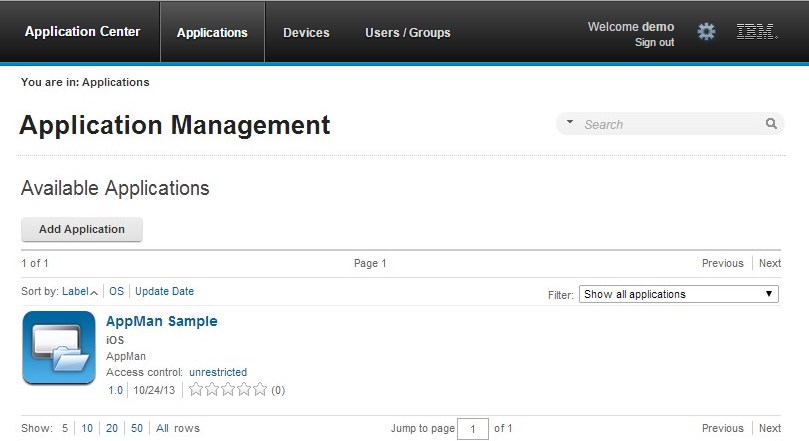
Application Management
You can use Application Management to add new applications and versions and to manage those applications.
The Application Center enables you to add new applications and versions and to manage those applications.
Click Applications to access Application Management.
Application Center installed on WebSphere Application Server Liberty profile or on Apache Tomcat
Installations of the Application Center on these application servers, during installation of IBM Mobile Foundation with the IBM Installation Manager package, have two different users defined that you can use to get started.
- User with login demo and password demo
- User with login appcenteradmin and password admin
WebSphere Application Server full profile
If you installed the Application Center on WebSphere Application Server full profile, one user named appcenteradmin is created by default with the password indicated by the installer.
Adding a mobile application
You can add applications to the repository on the server by using the Application Center console. These applications can then be installed on mobile devices by using the mobile client.
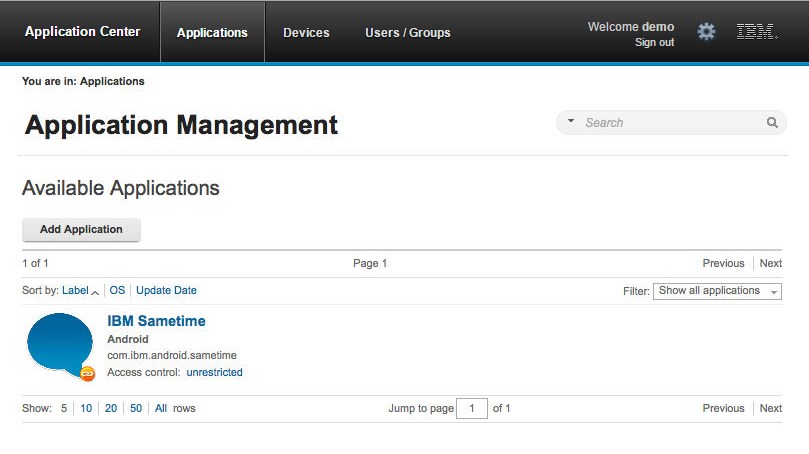
In the Applications view, you can add applications to Application Center. Initially the list of applications is empty and you must upload an application file. Application files are described in this procedure.
To add an application to make it available for installation on mobile devices:
- Click Add Application.
- Click Upload.
-
Select the application file to upload to the Application Center repository.
Android
The application file name extension is .apk.
iOS
The application file name extension is .ipa for normal iOS applications.
Windows Phone 8
The application file name extension is .xap. The application must be signed with a company account. The application enrollment token for this company account must be made available to Windows Phone 8 devices before the application can be installed on the devices. See Application enrollment tokens in Windows 8 Universal for details.
Windows 8
The application is provided as a Windows Store package; the file extension is .appx.
Windows Store .appx packages can depend on one or more Windows component library app packages, also known as “framework” packages. MobileFirst hybrid applications for Windows 8 depend on the Microsoft.WinJS framework package. When you use Microsoft Visual Studio to generate the application package, the dependencies packages are also generated and packaged as separate .appx files. To successfully install such applications by using the mobile client, you must upload the application .appx package and any other dependency package onto the Application Center server. When you upload a dependency package, it appears as inactive in the Application Center console. This behavior is expected, so that the framework package does not appear as an installable application in the client. Later, when a user installs an application, the mobile client checks whether the dependency is already installed on the device. If the dependency package is not installed, the client automatically retrieves the dependency package from the Application Center server and installs it on the device. For more information about dependencies, see Dependencies in the Windows developer documentation about packages and deployment of applications.
Windows 10 universal
The application file name extension is .appx.
- Click Next to access the properties to complete the definition of the application.
- Complete the properties to define the application. See Application properties for information about how to complete property values.
- Click Finish.
Adding an application from a public app store
Application Center supports adding to the catalog applications that are stored in third-party application stores, such as Google play or Apple iTunes.
Applications from third-party app stores appear in the Application Center catalog like any other application, but users are directed to the corresponding public app store to install the application. You add an application from a public app store in the console, in the same place where you add an application that was created within your own enterprise. See Adding a mobile application.
Note: Currently, the Application Center supports only Google Play and Apple iTunes. Windows Phone Store and Windows Store are not yet supported.
Instead of the application executable file, you must provide a URL to the third-party application store where the application is stored. To find the correct application link more easily, the console provides direct links in the Add an application page to the supported third-party application store websites.
The Google play store address is https://play.google.com/store/apps.
The Apple iTunes store address is https://linkmaker.itunes.apple.com/; use the linkmaker site rather than the iTunes site, because you can search this site for all kinds of iTunes items, including songs, podcasts, and other items that are supported by Apple. Only selecting iOS applications provides you with compatible links to create application links.
- Click the URL of the public app store that you want to browse.
- Copy the URL of the application in the third-party app store to the Application URL text field in the Add an application page of the Application Center console.
- Google Play:
- Select an application in the store.
- Click the detail page of the application.
- Copy the address bar URL.
- Apple iTunes:
-
When the list of items is returned in the search result, select the item that you want.
-
At the bottom of the selected application, click Direct Link to open the application details page.
-
Copy the address bar URL.
Note: Do not copy the Direct Link to the Application Center. Direct Link is a URL with redirection, you will need to get the URL it redirects to.
-
- Google Play:
- When the application link is in the Application URL text field of the console, click Next to validate the creation of the application link.
- If the validation is unsuccessful, an error message is displayed in the Add an application page. You can either try another link or cancel the attempt to create the current link.
- If the validation is successful, this action displays the application properties. You can then modify the application description in the application properties before you move to the next step.
-
Click Done to create the application link.
This action makes the application available to the corresponding version of the Application Center mobile client. A small link icon appears on the application icon to show that this application is stored in a public app store and is different from a binary app.
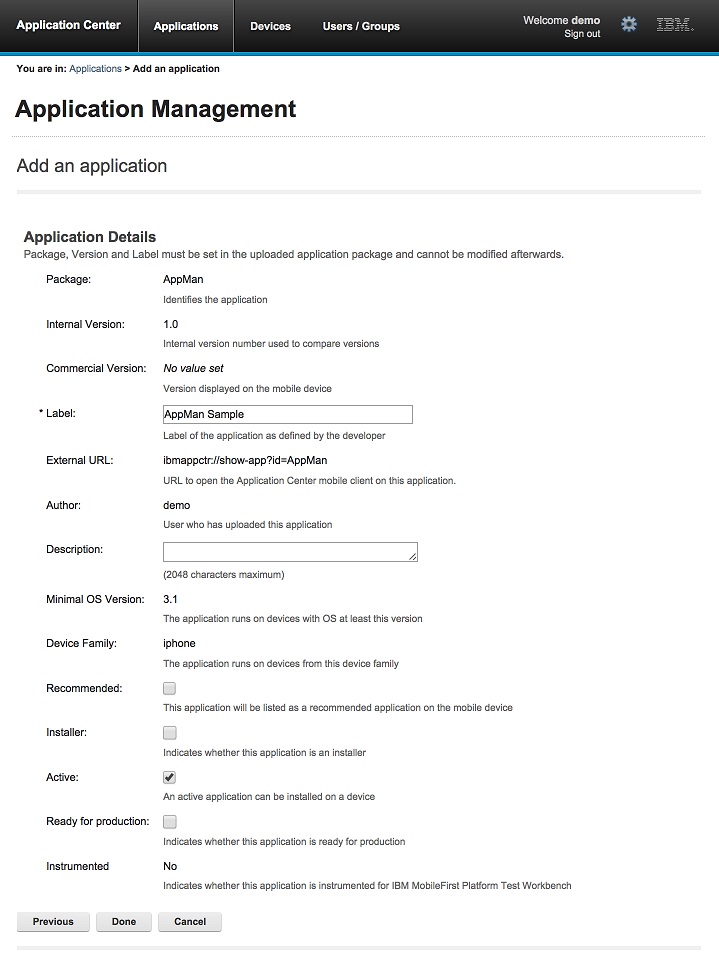
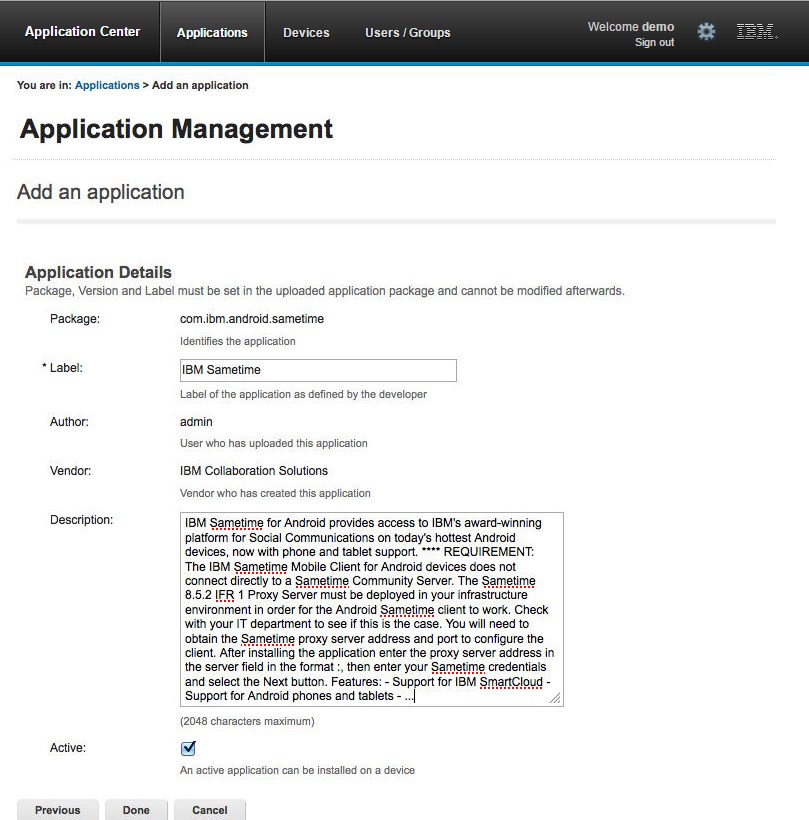
Application properties
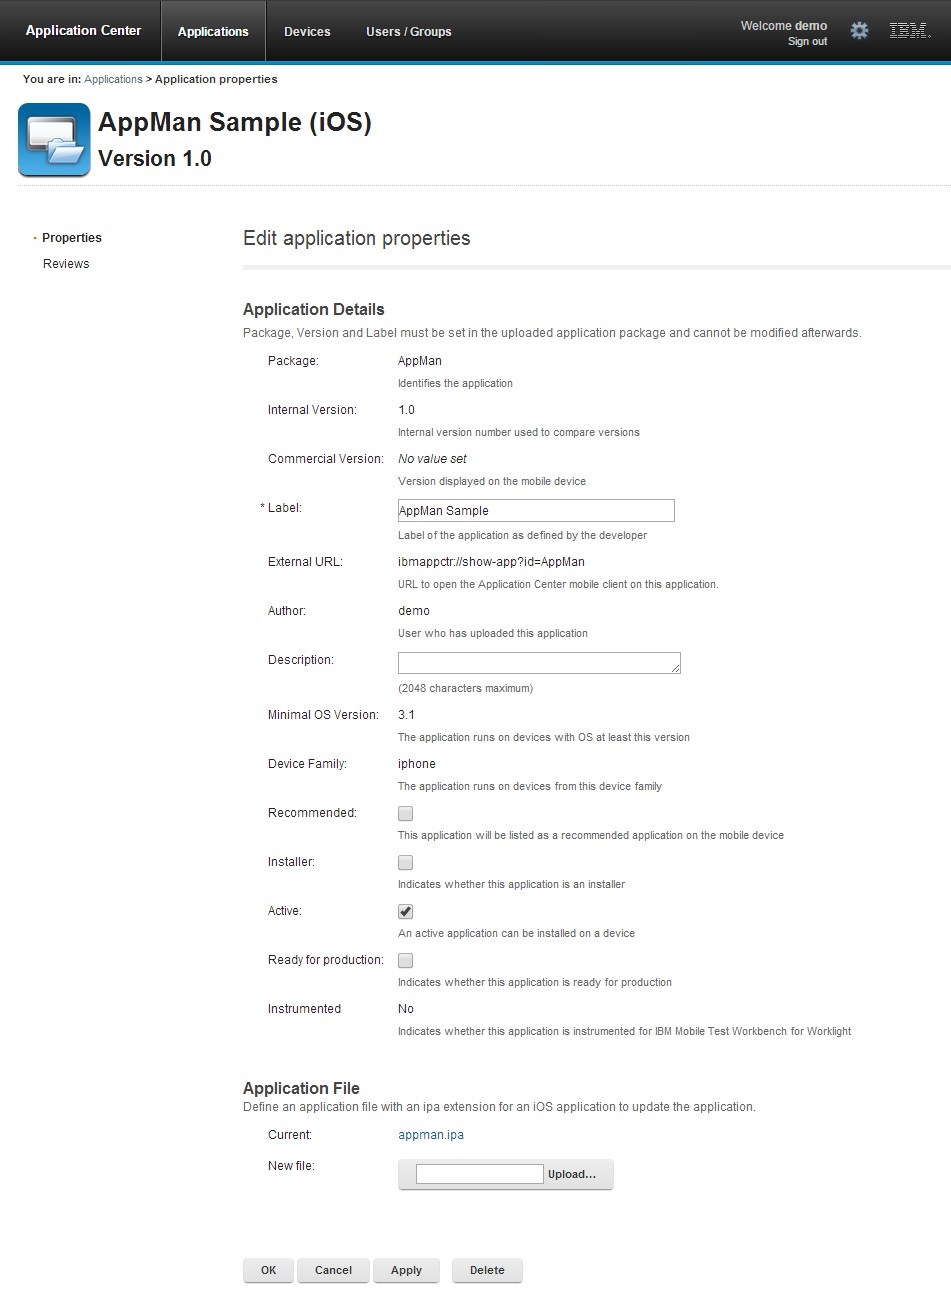
Applications have their own sets of properties, which depend on the operating system on the mobile device and cannot be edited. Applications also have a common property and editable properties.
The values of the following fields are taken from the application and you cannot edit them.
- Package.
- Internal Version.
- Commercial Version.
- Label.
- External URL; this property is supported for applications that run on Android, iOS, and Windows Phone 8.
Properties of Android applications
For more information about the following properties, see the Android SDK documentation.
- Package is the package name of the application; package attribute of the manifest element in the manifest file of the application.
- Internal Version is the internal version identification of the application; android:versionCode attribute of the manifest element in the manifest file of the application.
- Commercial Version is the published version of the application.
- Label is the label of the application; android:label attribute of the application element in the manifest file of the application.
- External URL is a URL that you can use to have the mobile client of the Application Center started automatically in the Details view of the latest version of the current application.
Properties of iOS applications
For more information about the following properties, see the iOS SDK documentation.
- Package is the company identifier and the product name; CFBundleIdentifier key.
- Internal Version is the build number of the application; CFBundleVersion key of the application.
- Commercial Version is the published version of the application.
- Label is the label of the application; CFBundleDisplayName key of the application.
- External URL is a URL that you can use to have the mobile client of the Application Center started automatically in the Details view of the latest version of the current application.
Properties of Windows Phone 8 applications
For more information about the following properties, see the Windows Phone documentation.
- Package is the product identifier of the application; ProductID attribute of the App element in the manifest file of the application.
- Internal Version is the version identification of the application; Version attribute of the App element in the manifest file of the application.
- Commercial Version, like Internal Version, is the version of the application.
- Label() is the title of the application; Title attribute of the App element in the manifest file of the application.
- Vendor is the vendor who created the application; Publisher attribute of the App element in the manifest file of the application.
- External URL is a URL that you can use to have the mobile client of the Application Center started automatically in the Details view of the latest version of the current application.
- Commercial Version, like Internal Version, is the version of the application.
Properties of Windows Store applications
For more information about the following properties, see the Windows Store documentation about application development.
- Package is the product identifier of the application; Package name attribute in the manifest file of the application.
- Internal Version is the version identification of the application; Version attribute in the manifest file of the application.
- Commercial Version, like Internal Version, is the version of the application.
- Label is the title of the application; Package display name attribute in the manifest file of the application.
- Vendor is the vendor who created the application; Publisher attribute in the manifest file of the application.
Properties of Windows 10 Universal applications
- Package is the product identifier of the application; Package name attribute in the manifest file of the application.
- Internal Version is the version identification of the application; Version attribute in the manifest file of the application.
- Commercial Version, like Internal Version, is the version of the application.
- Label is the title of the application; Package display name attribute in the manifest file of the application.
- Vendor is the vendor who created the application; Publisher attribute in the manifest file of the application
Common property: Author
The Author field is read-only. It displays the username attribute of the user who uploads the application.
Editable properties
You can edit the following fields:
Description
Use this field to describe the application to the mobile user.
Recommended
Select Recommended to indicate that you encourage users to install this application. Recommended applications appear as a special list in the mobile client.
Installer
For the Administrator only: This property indicates that the application is used to install other applications on the mobile device and send feedback on an application from the mobile device to the Application Center. Usually only one application is qualified as Installer and is called the mobile client. This application is documented in The mobile client.
Active
Select Active to indicate that an application can be installed on a mobile device.
- If you do not select Active, the mobile user does not see the application in the list of available applications that is displayed on the device and the application is inactive.
- In the list of available applications in Application Management, if Show inactive is selected, the application is disabled. If Show inactive is not selected, the application does not appear in the list of available applications.
Ready for production
Select Ready for production to indicate that an application is ready to be deployed in a production environment and is therefore suitable to be managed by Tivoli Endpoint Manager through its application store. Applications for which this property is selected are the only ones that are flagged to Tivoli Endpoint Manager.
Editing application properties
You can edit the properties of an application in the list of uploaded applications.
To edit the properties of an uploaded application:
- Select Applications to see the list of uploaded applications: Available Applications.
- Click the version of the application to edit the properties: Application Details.
-
Edit any of the editable properties that you want. See Application properties for details about these properties. The name of the current application file is shown after the properties.
Important: If you want to update the file, it must belong to the same package and be the same version number. If either of these properties is not the same you must go back to the application list and add the new version first.
- Click OK to save your changes and return to Available Applications or Apply to save and keep Application Details open.
Upgrading a mobile application in MobileFirst Server and the Application Center
This is only supported for Android, iOS, and Windows Phone and is currently not supported for Windows 10 Universal, or Windows 8 Universal.
You can easily upgrade deployed mobile applications by using a combination of MobileFirst Operations Console and the Application Center.
The mobile client of the Application Center must be installed on the mobile device. The HelloWorld application must be installed on the mobile device and must connect to MobileFirst Server when the application is running.
You can use this procedure to update Android, iOS, and Windows Phone applications that have been deployed on MobileFirst Server and also in the Application Center. In this task, the application HelloWorld version 1.0 is already deployed on MobileFirst Server and in the Application Center.
HelloWorld version 2.0 is released and you would like users of version 1.0 to upgrade to the later version. To deploy the new version of the application:
- Deploy HelloWorld 2.0 in the Application Center. See Adding a mobile application.
-
From the Application Details page, copy the setting of the external URL.
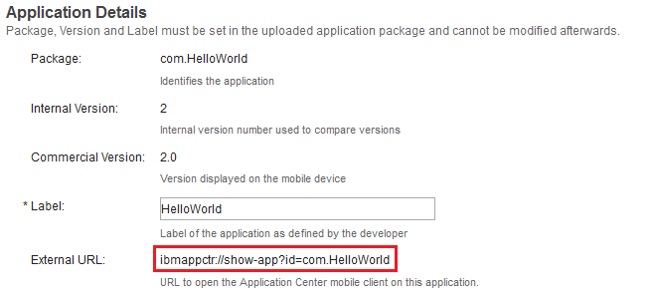
- When the external URL is copied to the clipboard, open the MobileFirst Operations Console.
- Change the access rule of HelloWorld version 1.0 to “Access Disabled”.
-
Paste the external URL into the URL field.
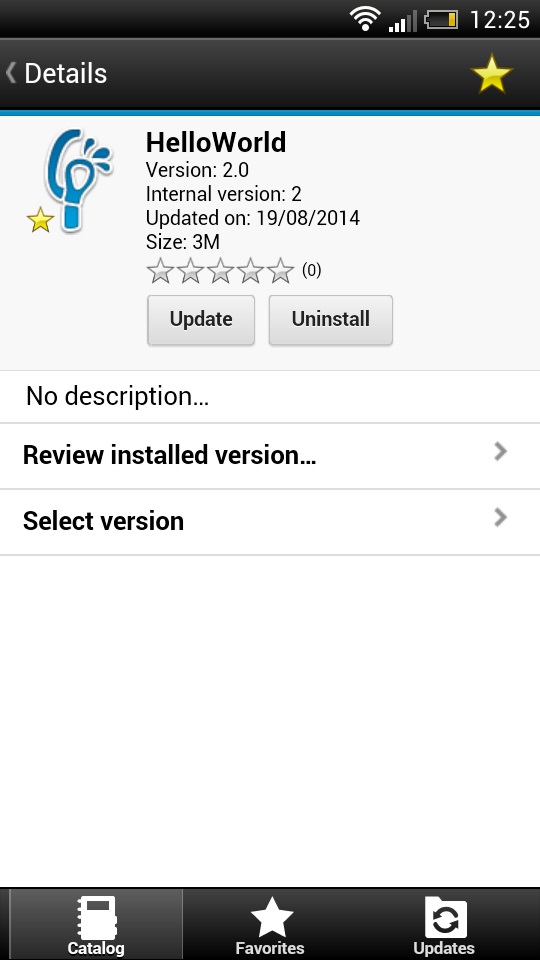
Running the client: When a mobile device connects to MobileFirst Server to try to run HelloWorld version 1.0, the device user is requested to upgrade the version of the application.
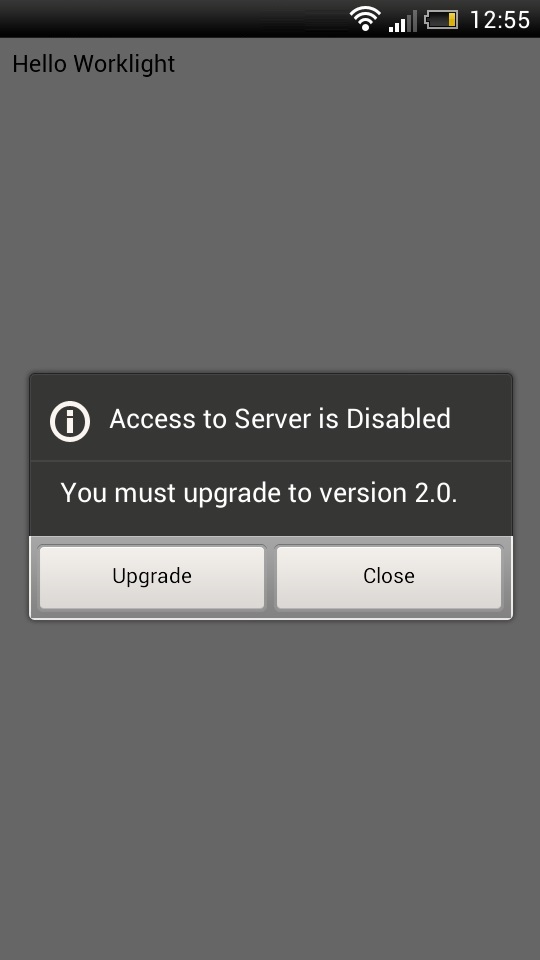
-
Click Upgrade to open the Application Center client. When the login details are correctly completed, you access the Details page of HelloWorld version 2.0 directly.
Downloading an application file
You can download the file of an application registered in the Application Center.
- Select Applications to see the list of uploaded applications: Available Applications.
- Tap the version of the application under Application Details.
- Tap the file name in the “Application File” section.
Viewing application reviews
In the Application Center console, you can see reviews about mobile application versions sent by users.
Users of mobile applications can write a review, which includes a rating and a comment, and submit the review through the Application Center client. Reviews are available in the Application Center console and the client. Individual reviews are always associated with a particular version of an application.
To view reviews from mobile users or testers about an application version:
- Select Applications to see the list of uploaded applications: Available Applications.
- Select the version of the application.
-
In the menu, select Reviews.
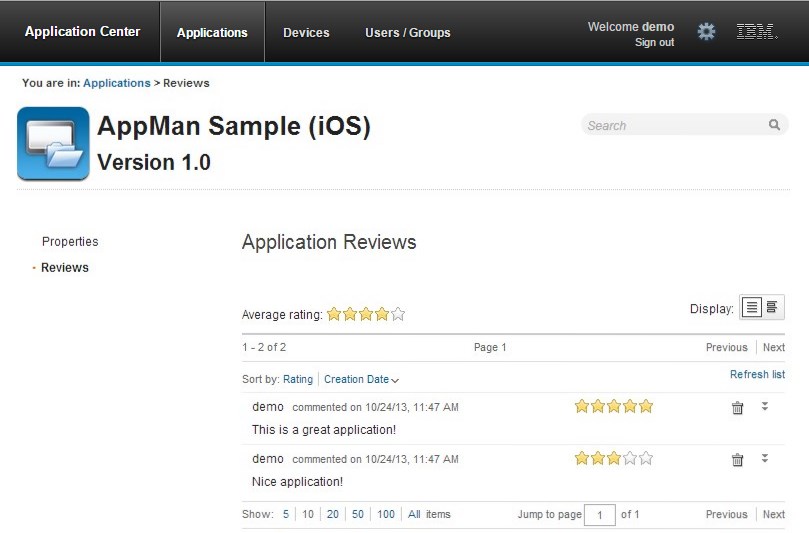
The rating is an average of the ratings in all recorded reviews. It consists of one to five stars, where one star represents the lowest level of appreciation and five stars represent the highest level of appreciation. The client cannot send a zero star rating.
The average rating gives an indication of how the application satisfies the intended use of the application.
-
Click the two arrow heads
 to expand the comment that is part of the review and to view the details of the mobile device where the review is generated.
For example, the comment can give the reason for submitting the review, such as failure to install. If you want to delete the review, click the trash can icon to the right of the review that you want to delete.
User and group management
You can use users and groups to define who has access to some features of the Application Center, such as installing applications on mobile devices.
Use users and groups in the definition of access control lists (ACL).
Managing registered users
To manage registered users, click the Users/Groups tab and select Registered users. You obtain a list of registered users of the Application Center that includes:
- Mobile client users
- Console users
- Local group members
- Members of an access control list

If the Application Center is connected to an LDAP repository, you cannot edit the user display names. If the repository is not LDAP, you can change a user display name by selecting it and editing it.
To register new users, click Register User, enter the login name and the display name, and click OK.
To unregister a user, click the trash icon next to the user name.
- Removing feedback given by the user
- Removing the user from the access control lists
- Removing the user from local groups
Note: When you unregister a user, the user is not removed from the application server or the LDAP repository.
Managing local groups
To manage local groups, click the Users/Groups tab and select User group.
To create a local group, click Create group. Enter the name of the new group and click OK.
If the Application Center is connected to an LDAP repository, the search includes local groups as well as the groups defined in the LDAP repository. If the repository is not LDAP, only local groups are available to the search.
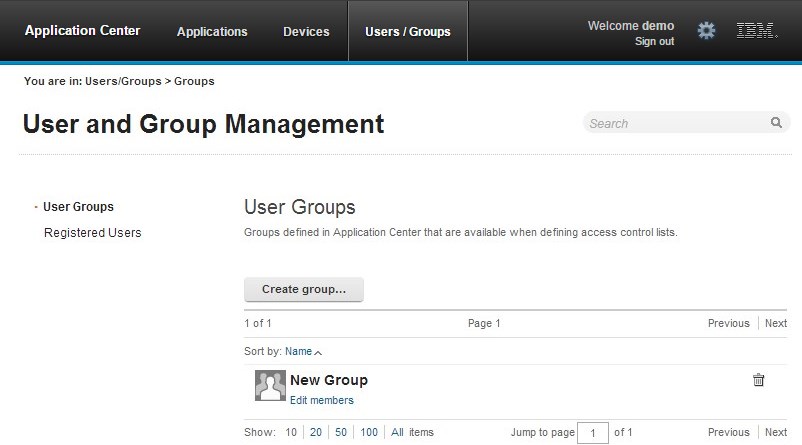
To delete a group, click the trash icon next to the group name. The group is also removed from the access control lists.
To add or remove members of a group, click the Edit members link of the group.
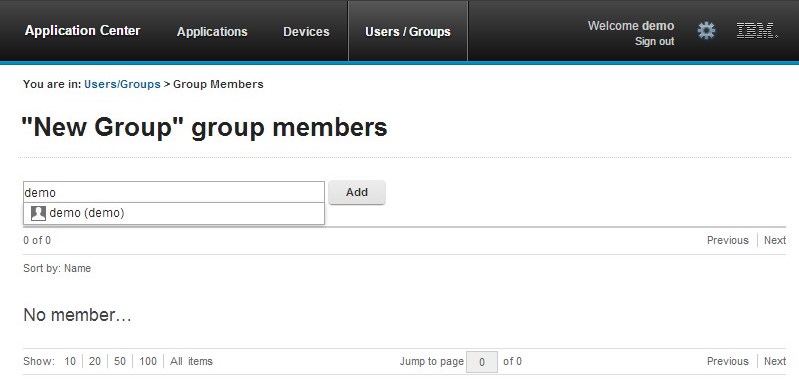
To add a new member, search for the user by entering the user display name, select the user, and click Add.
If the Application Center is connected to an LDAP repository, the search for the user is performed in the LDAP repository. If the repository is not LDAP, the search is performed in the list of registered users.
To remove a member from a group, click the cross icon to the right of the user name.
Access control
You can decide whether installation of an application on mobile devices is open to any users or whether you want to restrict the ability to install an application.
Installation of applications on a mobile device can be limited to specific users or available to any users.
Access control is defined at the application level and not at the version level.
By default, after an application is uploaded, any user has the right to install the application on a mobile device.
The current access control for an application is displayed in Available Applications for each application. The unrestricted or restricted access status for installation is shown as a link to the page for editing access control.
Installation rights are only about the installation of the application on the mobile device. If access control is not enabled, everybody has access to the application.
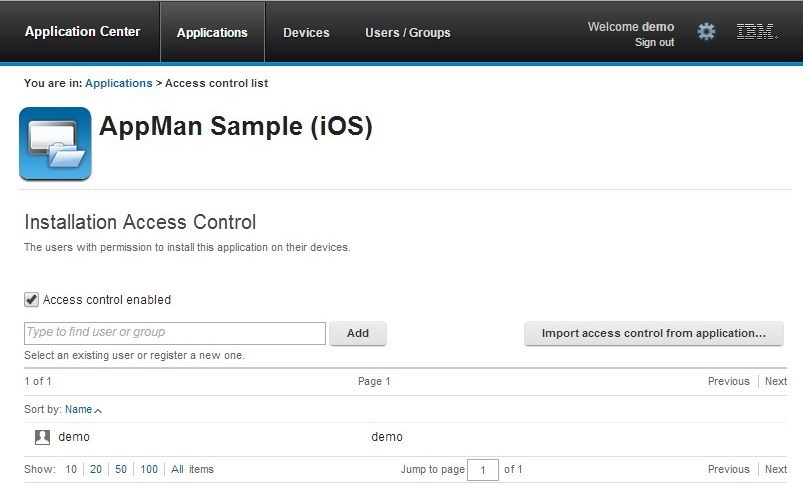
Managing access control
You can add or remove access for users or groups to install an application on mobile devices.
You can edit access control:
-
In Application Management under Available Applications, click the unrestricted or restricted state of Installation of an application.

- Select Access control enabled to enable access control.
- Add users or groups to the access list.
To add a single user or group, enter a name, select the entry in the matching entries found, and click Add.
If the Application Center is connected to an LDAP repository, you can search for users and groups in the repository as well as locally defined groups. If the repository is not LDAP, you can search only local groups and registered users. Local groups are exclusively defined in the Users/Groups tab. When you use the Liberty profile federated registry, you can only search for users by using the login name; the result is limited to a maximum of 15 users and 15 groups (instead of 50 users and 50 groups).
To register a user at the same time as you add the user to the access list, enter the name and click Add. Then you must specify the login name and the display name of the user.
To add all the users of an application, click Add users from application and select the appropriate application.
To remove access from a user or group, click the cross icon on the right of the name.
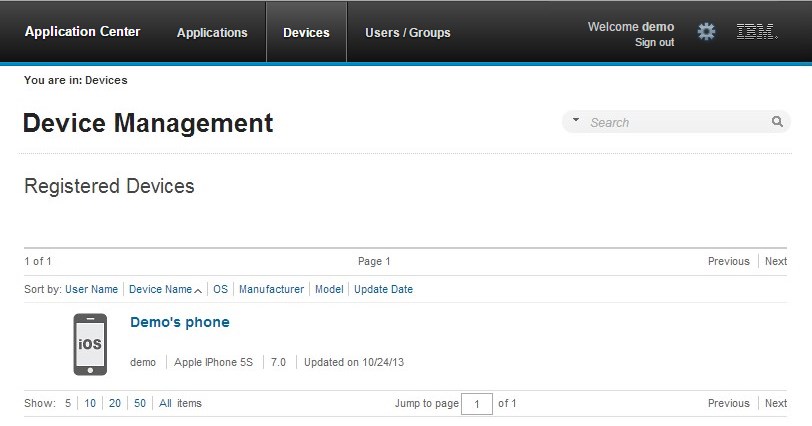
Device Management
You can see the devices that connected to the Application Center from the Application Center mobile client and their properties.
Device Management shows under the Registered Devices the list of devices that have connected to the Application Center at least once from the Application Center mobile client.
Device properties
Click a device in the list of devices to view the properties of the device or the applications installed on that device.
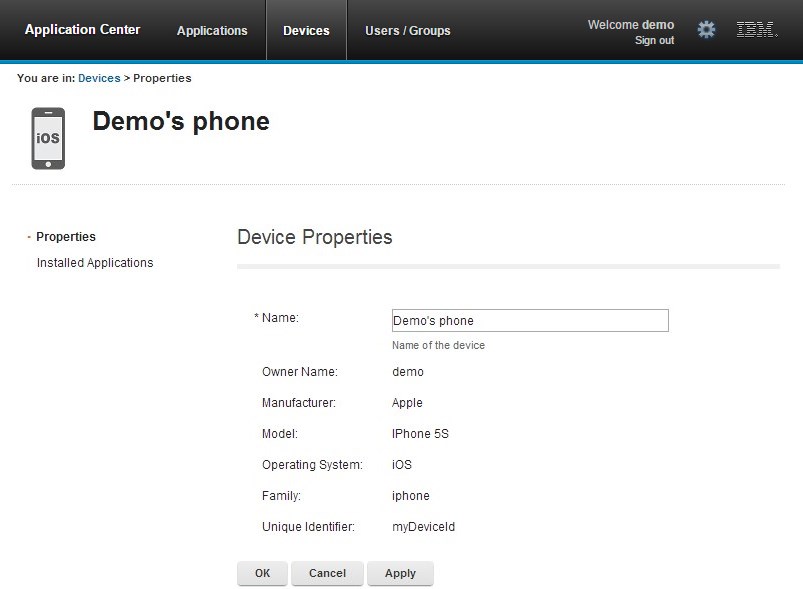
Select Properties to view the device properties.
Name
The name of the device. You can edit this property.
Note: on iOS, the user can define this name in the settings of the device in Settings > General > Information > Name. The same name is displayed on iTunes.
User Name
The name of the first user who logged into the device.
Manufacturer
The manufacturer of the device.
Model
The model identifier.
Operating System
The operating system of the mobile device.
Unique identifier
The unique identifier of the mobile device.
If you edit the device name, click OK to save the name and return to Registered Devices or Apply to save and keep Edit Device Properties open.
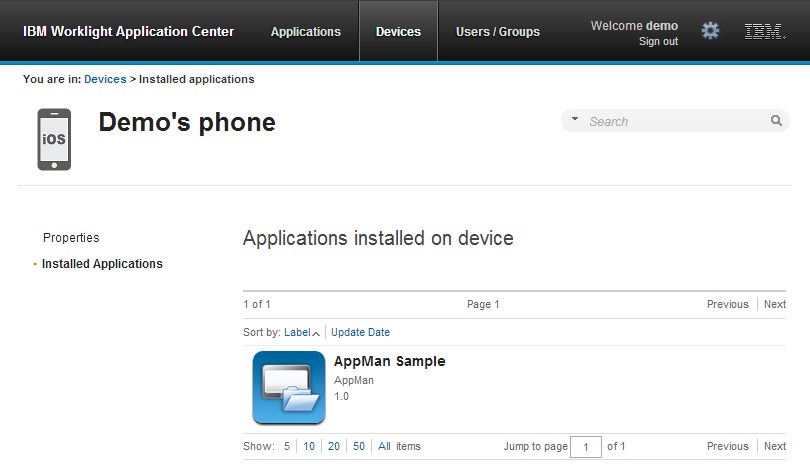
Applications installed on device
Select Applications installed on device to list all the applications installed on the device.
Application enrollment tokens in Windows 8 Universal
The Windows 8 Universal operating system requires users to enroll each device with the company before users can install company applications on their devices. One way to enroll devices is by using an application enrollment token.
Application enrollment tokens enable you to install company applications on a Windows 8 Universal device. You must first install the enrollment token for a specified company on the device to enroll the device with the company. Then, you can install applications that are created and signed by the corresponding company. The Application Center simplifies the delivery of the enrollment token. In your role of administrator of the Application Center catalog, you can manage the enrollment tokens from the Application Center console. Once the enrollment tokens are declared in the Application Center console, they are available for Application Center users to enroll their devices.
The enrollment tokens interface available from the Application Center console in the Settings view enables you to manage application enrollment tokens for Windows 8 Universal by registering, updating, or deleting them.
Managing application enrollment tokens
In your role of administrator of the Application Center, you can access the list of registered tokens by clicking the gear icon in the screen header to display Application Center Settings. Then, select Enrollment Tokens to display the list of registered tokens.
To enroll a device, the device user must upload and install the token file before installing the Application Center mobile client. The mobile client is also a company application. Therefore, the device must be enrolled before the mobile client can be installed.
The registered tokens are available through the bootstrap page at http://hostname:portnumber/applicationcenter/installers.html, where hostname is the host name of the server hosting the Application Center and portnumber is the corresponding port number.
To register a token in the Application Center console, click Upload Token and select a token file. The token file extension is aetx.
To update the certificate subject of a token, select the token name in the list, change the value, and click OK.
To delete a token, click the trash can icon on the right side of the token in the list.
Signing out of the Application Center console
For security purposes, you must sign out of the console when you have finished your administrative tasks.
To log out of the secure sign-on to the Application Center console.
To sign out of the Application Center console, click Sign out next to the Welcome message that is displayed in the banner of every page.
Inclusive terminology note: The Mobile First Platform team is making changes to support the IBM® initiative to replace racially biased and other discriminatory language in our code and content with more inclusive language. While IBM values the use of inclusive language, terms that are outside of IBM's direct influence are sometimes required for the sake of maintaining user understanding. As other industry leaders join IBM in embracing the use of inclusive language, IBM will continue to update the documentation to reflect those changes.