Protecting API resources using MobileFirst OAuth server
improve this page | report issueIBM API Connect is a cloud-based API Management solution that allows you to design, control, secure, publish, manage, analyze, and scale your API with its simple-to-use configuration and coding platform. Learn more about IBM API Connect.
IBM Mobile Foundation integrates its security capabilities with IBM API Connect by using the IBM Mobile Foundation OAuth Provider API template, which allows you to,
- Protect API Connect endpoints with the MobileFirst Server as the authorization server.
- Proxy MobileFirst client non-resource requests and responses through API Connect to the MobileFirst Server located behind the DMZ.
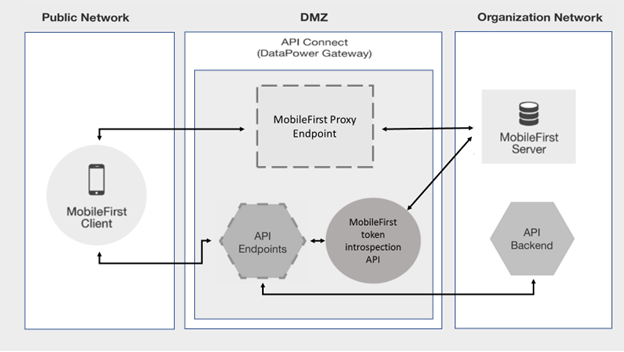
The Introspection endpoint of MobileFirst server (MFP) can validate and extract data from a MobileFirst OAuth token. The MobileFirst token introspection API provided with the MobileFirst OAuth Provider template can be used to protect API endpoints deployed to API Connect.
- Mobile client application invokes API endpoint using MobileFirst client SDK API
WLResourceRequest. - Since the API is protected, API Connect validates the incoming token by passing the token to MobileFirst Foundation token introspection API. If the token is active, the client is given access to the requested resource. If not, an error message is sent back to the client, which can be handled by the client to obtain a new token.
- MobileFirst Foundation adapters can also be exposed as APIs in API Connect. Client can use
WLResourceRequest, MobileFirst client SDK API to consume these adapter APIs as well. Currently, the security integration of MobileFirst and API Connect is supported only when DataPower is used as the Gateway server (Edge Gateway).
The security integration is supported for both API Connect on-premise deployment and API Connect service on IBM Cloud. Steps in this tutorial have been verified with API Connect service and MobileFirst Foundation service on IBM Cloud.
Prerequisites
- API Connect service on IBM Cloud.
- Mobile Foundation service on IBM Cloud.
- Download the
MFPOAuthLoginApplicationsample andMFPOAuthProvidertemplate yaml files. - Download the
SecurityCheckadapter sample.
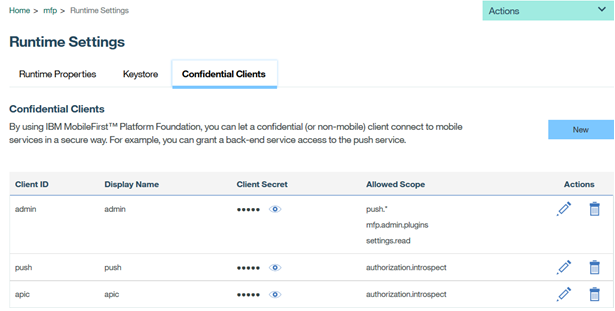
Define Confidential Client in MobileFirst Operations Console
Follow the steps below to define the Confidential Client in MobileFirst Operations console.
- Launch the MobileFirst Operations Console.
- In the Runtime Settings choose the Confidential Clients tab.
- Click New.
- Provide the following values and save:
- Display Name: API Connect
- ID: apic
- Secret:
<confidential-client-password> - Allowed Scope: authorization.introspect
Note: Please make a note of the confidential-client-password, which will be used later in the MobileFirst token introspection API configuration.
Import the MFPOAuth REST API template in API Connect
In the API Designer, create MFPOAuth REST API by importing the Swagger template YAML file mfpoauth_1.0.0.yaml (see Prerequisites).
After completing the import, you will see different configuration options are displayed and the Design tab selected. Navigate to the Assemble tab. In the assembly flow, you will see the components as shown in the image below:

Configure the MFPOAuth REST API template
Use the API Designer to configure the imported API.
- From the Assemble tab choose the
GetAuthBearerTokencomponent. -
In the
GetAuthBearerTokencomponent, update the following variable values:-
URL: The MobileFirst Server URL in the format
<protocol>://<server-host>:<port>/mfp/api/az/v1/token.
For example,https://mobile-server.bluemix.net/mfp/api/az/v1/token. -
username: apic, as configured in the MobileFirst Operations Console.
Runtime Settings -> Confidential Clients for the authorization.introspect scope. -
password:
<confidential-client-password>, as configured in the MobileFirst Operations Console.
Runtime Settings -> Confidential Clients for the authorization.introspect scope. -
HTTPMethod: POST
-
-
In the
InvokeIntrospectioncomponent, update the following variable values:-
URL: The MobileFirst Server URL in the format
<protocol>://<server-host>:<port>/mfp/api/az/v1/introspection.
For example,https://mobile-server.bluemix.net/mfp/api/az/v1/introspection. -
HTTPMethod: POST
-
Import the MFPProxy REST API template in APIConnect
In the API Designer, create MFPProxy REST API by importing the Swagger template YAML file mfpproxy_1.0.0.yaml (see Prerequisites).
After completing the import, you will see different configuration options are displayed and the Design tab selected. Navigate to the Assemble tab.
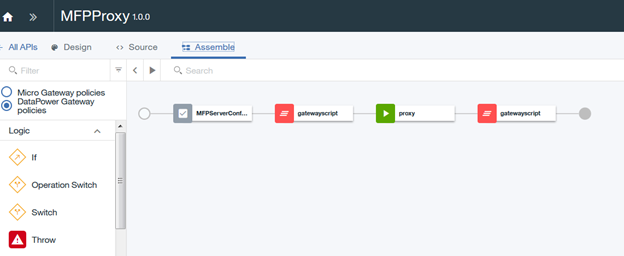
You will see the following components in the assembly flow for the MobileFirst OAuth Provider API:
- MobileFirst Configuration
- gatewayscript
- proxy
- gatewayscript
Configure the MFPProxy REST API Template
Use the API Designer to configure the imported API.
- From the Assemble tab choose the MobileFirst Configuration component.
- In the MobileFirst Configuration component, update the following variable values:
- mfp-server-url: The MobileFirst Server URL in the format
<protocol>://<server-host>:<port>.
For example,https://mobile-server.bluemix.net. - mfp-server-context: The MobileFirst Server context.
For example, mfp
- mfp-server-url: The MobileFirst Server URL in the format
Create a Simple REST API in API Connect
In this example, we create an API called InvokeBackend and a product called Bank (Based on API Connect’s tutorial for Creating an invoke REST API definition).
Note: You can import this API by importing the Swagger template YAML file
invokebackend_1.0.0.yaml(see Prerequisites).
You can also follow the steps below to create the API from scratch.
From the API Connect Designer APIs tab:
-
Click Add and then select New API to create a REST API definition.
- Configure the following parameters and click Add to create the API:
- Title: InvokeBackend
- Name: invokebackend
- Base Path: /invokebackend
- Version: 1.0.0
- The Design tab of the REST API will be displayed.
- In the Base Path section, verify that the field has the value /invokebackend.
- Go to the Paths section and create a path by clicking the Add Path icon.
-
In the Path field provide /details (GET method is created by default).
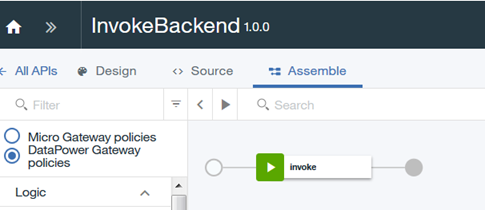
- Go to the Assemble tab and click the invoke policy component that appears in the Assemble pane.
- In the properties sheet pane, populate the URL field with the back-end resource URL to be protected with MobileFirst. The other values are optional. Learn more.
- Click Save to save the API definition.
Protect the API using the MobileFirst OAuth Security Definition
Protect the newly created InvokeBackend API by defining a Security Definition.
-
In the newly created
InvokeBackendAPI, choose Security Definition from the design list, click the button to add a definition of the type OAuth.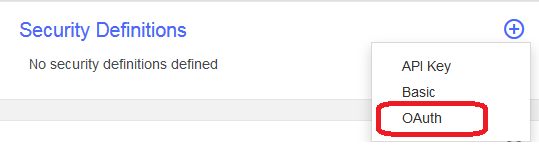
- Set the values:
- Flow: Choose Implicit.
- Introspection URL: Use the full URL path of the deployed
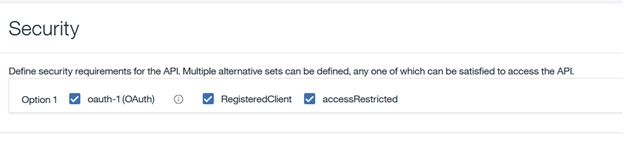
MFPOAuthAPI, which should be likehttps://{GatewayHostName}/{organizationName}/{catalogName}/mfpoauth/introspect - Scopes: RegisteredClient and accessRestricted
Note: RegisteredClient is the default scope of MFP server.
- Go to the Paths section and choose the /details path.
- Click the GET method and expand it.
- In the Security section, uncheck Use API security definitions and check the newly created MobileFirst OAuth Security Definition from the list.
-
Click Save.
Add the APIs to product and publish it
In the API Connect Designer Products tab, carry out the following steps:
- To create a Product definition, click Add and then select New Product.
- Configure the following parameters:
- Title: Bank
- Name: bank
- Version: 1.0.0
- Click Create product to create the API. The Design tab of the Product will be displayed.
-
Go to the APIs section click Add.
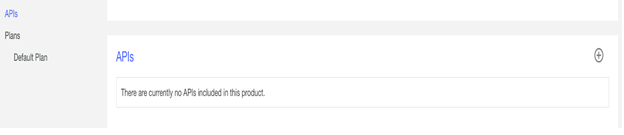
- Add all the three newly created APIs
MFPOAuth,MFPProxy, andInvokeBackendto this Product. - Save the Product.
- Stage the Product. See Staging a Product.
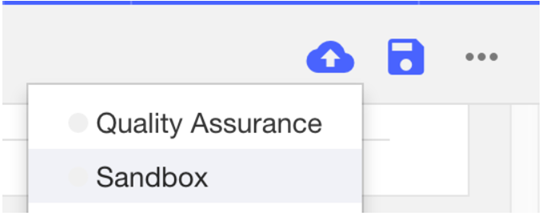
- To publish the Product, go to the Catalog Dashboard and choose Bank product to publish. See Publishing a Product.

Set up MFPOAuthLoginApplication sample
Follow the steps described below to set up the MFPOAuthLoginApplication sample.
1. Update the mfpclient.properties file
Open MFPOAuthLoginApplication sample (see Prerequisites) in Android Studio, update the mfpclient.properties to send all MobileFirst requests directly to API Connect. The client application requests are proxied by the API Connect endpoints which are exposed by the MobileFirst OAuthProvider.
Make the following changes in mfpclient.properties file to enable the proxy:
- wlServerProtocol: Change to https.
- wlServerHost: Change to API Connect hostname (or IP) as it appears in the base URL.
- wlServerPort: Change to 443.
- wlServerContext: Change to the relative base path of the MobileFirst OAuthProvider. For example, /{organizationName}/{catalogName}/mfp/
Please note /mfp used in the context root is the base path where the MFPProxy API endpoint is deployed.
2. Update the WLResourceRequest call
Change the following in the ProtectedActivity.java file:
      apicPathUri = new
                   URI("https://<gateway-host-name>/<orgname>/<catalogname>/invokebackend/getdetails");
For apicPathUri supply the full URL, constructed as follows:
https://{GatewayHostName}/{organizationName}/{catalogName}/invokebackend/getdetails.
3. Update the APIC Client Id
Replace APIC-CLIENT-ID in the ProtectedActivity.java file:
request.addHeader("X-IBM-Client-Id","APIC-CLIENT-ID");
The actual client Id is obtained from the APIC developer portal after registering the application, which subscribes to the APIs deployed (explained earlier in this tutorial). Read how to register applications in APIC developer portal.
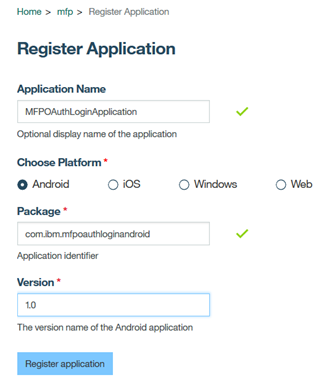
4. Register application
Register the MFPOAuthLoginApplication sample with MFP server.
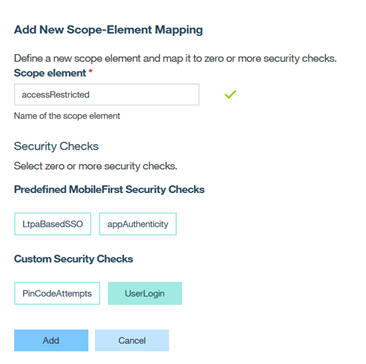
Map the scope accessRestricted to UserLogin securitycheck in the Scope-Elements Mapping section of the deployed application in the MobileFirst Foundation console.
5. Deploy adapters
Deploy the SecurityCheck sample adapters – UserLogin and ResourceAdapter to MobileFirst server. See here for details.
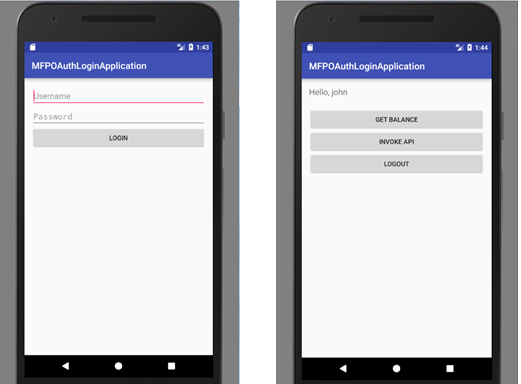
Execute the application
Now execute MFPOAuthLoginApplication. Log in using john/john as the username/password.
- Get Balance invokes the /balance endpoint of
ResourceAdapterdeployed to MobileFirst Server. This resource is protected by accessRestricted scope. - Invoke API invokes
InvokeBackendAPI deployed to API Connect. This resource is also protected by accessRestricted scope. - The token obtained for one of the above invoke calls is used for the other as well and both are authorized by MobileFirst server.
Summary
This tutorial described how to use MobileFirst as the OAuth server to protect the API Connect endpoints.
▲Inclusive terminology note: The Mobile First Platform team is making changes to support the IBM® initiative to replace racially biased and other discriminatory language in our code and content with more inclusive language. While IBM values the use of inclusive language, terms that are outside of IBM's direct influence are sometimes required for the sake of maintaining user understanding. As other industry leaders join IBM in embracing the use of inclusive language, IBM will continue to update the documentation to reflect those changes.