Sending Notifications
improve this page | report issueOverview
In order to send push or SMS notifications to iOS, Android or Windows devices, the MobileFirst Server first needs to be configured with the FCM details for Android, an APNS certificate for iOS or WNS credentials for Windows 8.1 Universal / Windows 10 UWP. Notifications can then be sent to: all devices (broadcast), devices that registered to specific tags, a single Device ID, User Ids, only iOS devices, only Android devices, only Windows devices, or based on the authenticated user.
Prerequisite: Make sure to read the Notifications overview tutorial.
Jump to
- Setting-up Notifications
- Defining Tags
- Sending Notifications
- HTTP/2 Support for APNs Push Notifications
- Proxy Support
- Tutorials to follow next
Setting up Notifications
Enabling notifications support involves several configuration steps in both MobileFirst Server and the client application.
Continue reading for the server-side setup, or jump to Client-side setup.
On the server-side, required set-up includes: configuring the needed vendor (APNS, FCM or WNS) and mapping the “push.mobileclient” scope.
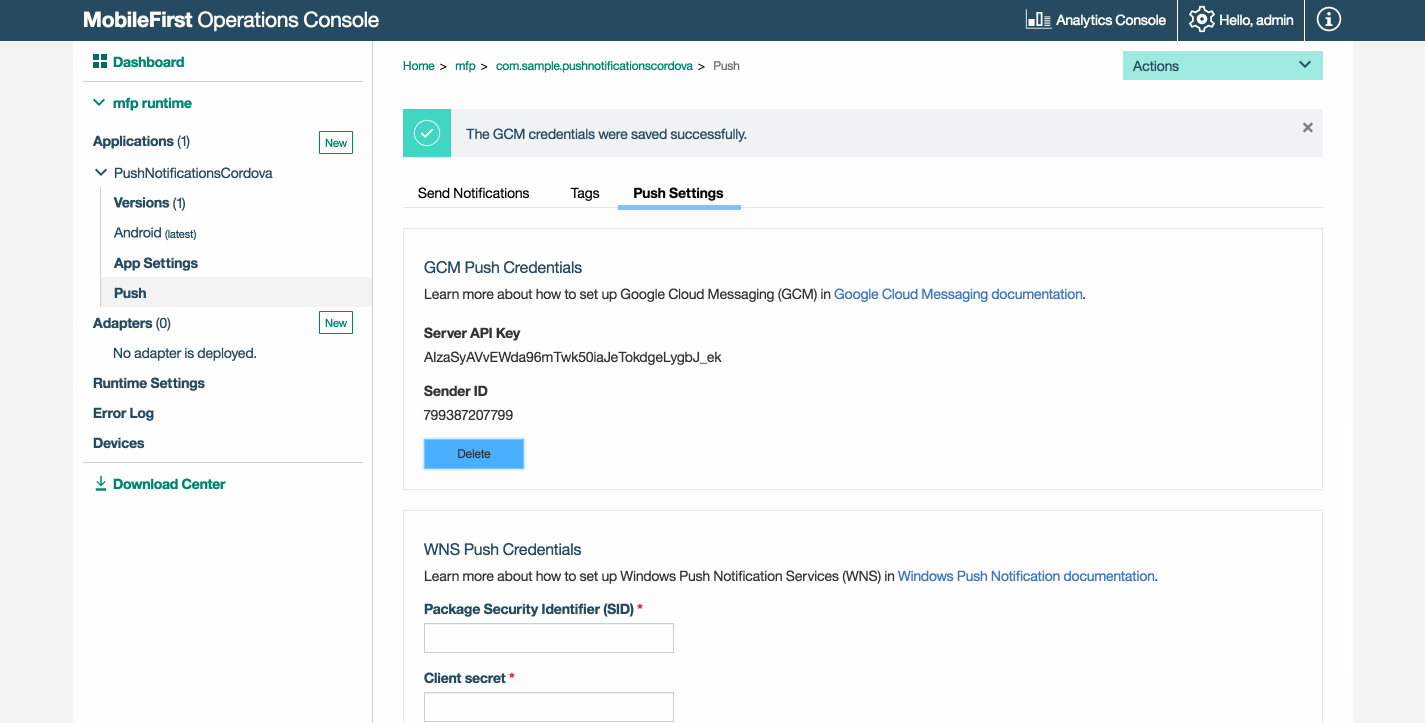
Firebase Cloud Messaging
Note: Google has deprecated GCM and has integrated Cloud Messaging with Firebase. If you are using a GCM project, ensure that you migrate the GCM client apps on Android to FCM .
Android devices use the Firebase Cloud Messaging (FCM) service for push notifications.
To setup FCM:
- Visit the Firebase Console.
- Create a new project and provide a project name.
- Click on the Settings “cog wheel” icon and select Project settings.
- Click the Cloud Messaging tab to generate a Server API Key and a Sender ID and click Save.
You can also setup FCM using either the REST API for the MobileFirst Push service or the REST API for the MobileFirst administration service
Notes
If your organization has a firewall that restricts the traffic to or from the Internet, you must go through the following steps:
- Configure the firewall to allow connectivity with FCM in order for your FCM client apps to receive messages.
- The ports to open are 5228, 5229, and 5230. FCM typically uses only 5228, but it sometimes uses 5229 and 5230.
- FCM does not provide specific IP, so you must allow your firewall to accept outgoing connections to all IP addresses contained in the IP blocks listed in Google’s ASN of 15169.
- Ensure that your firewall accepts outgoing connections from MobileFirst Server to fcm.googleapis.com on port 443.
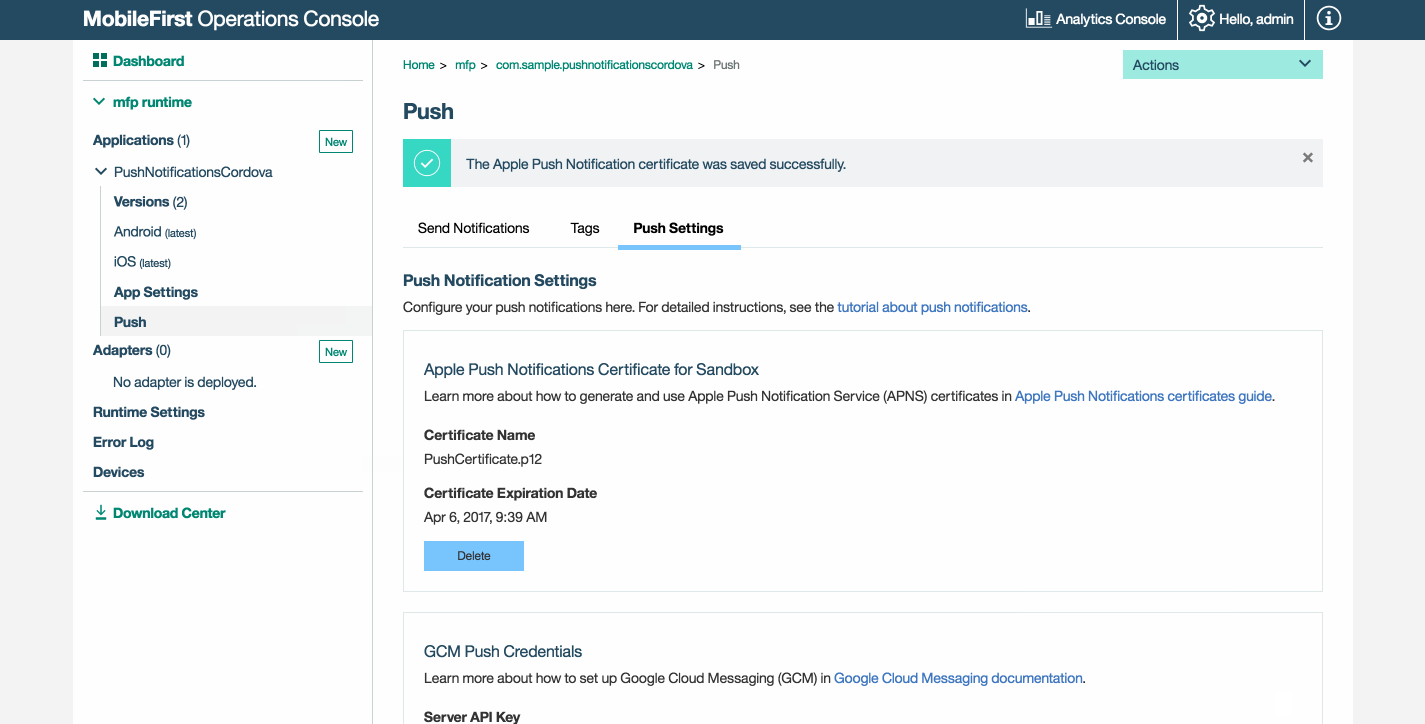
Apple Push Notifications Service
iOS devices use Apple’s Push Notification Service (APNS) for push notifications.
To setup APNS:
- Generate a push notification certificate for development or production. For detailed steps, refer the
For iOSsection here. - In the MobileFirst Operations Console → [your application] → Push → Push Settings, select the certificate type and provide the certificate’s file and password. Then, click Save.
Notes
- For push notifications to be sent, the following servers must be accessible from a MobileFirst Server instance:
- Sandbox servers:
- gateway.sandbox.push.apple.com:2195
- feedback.sandbox.push.apple.com:2196
- Production servers:
- gateway.push.apple.com:2195
- Feedback.push.apple.com:2196
- 1-courier.push.apple.com 5223
- Sandbox servers:
- During the development phase, use the apns-certificate-sandbox.p12 sandbox certificate file.
- During the production phase, use the apns-certificate-production.p12 production certificate file.
- The APNS production certificate can only be tested once the application that utilizes it has been successfully submitted to the Apple App Store.
Note: MobileFirst does not support Universal certificates.
You can also setup APNS using either the REST API for the MobileFirst Push service or the REST API for the MobileFirst administration service
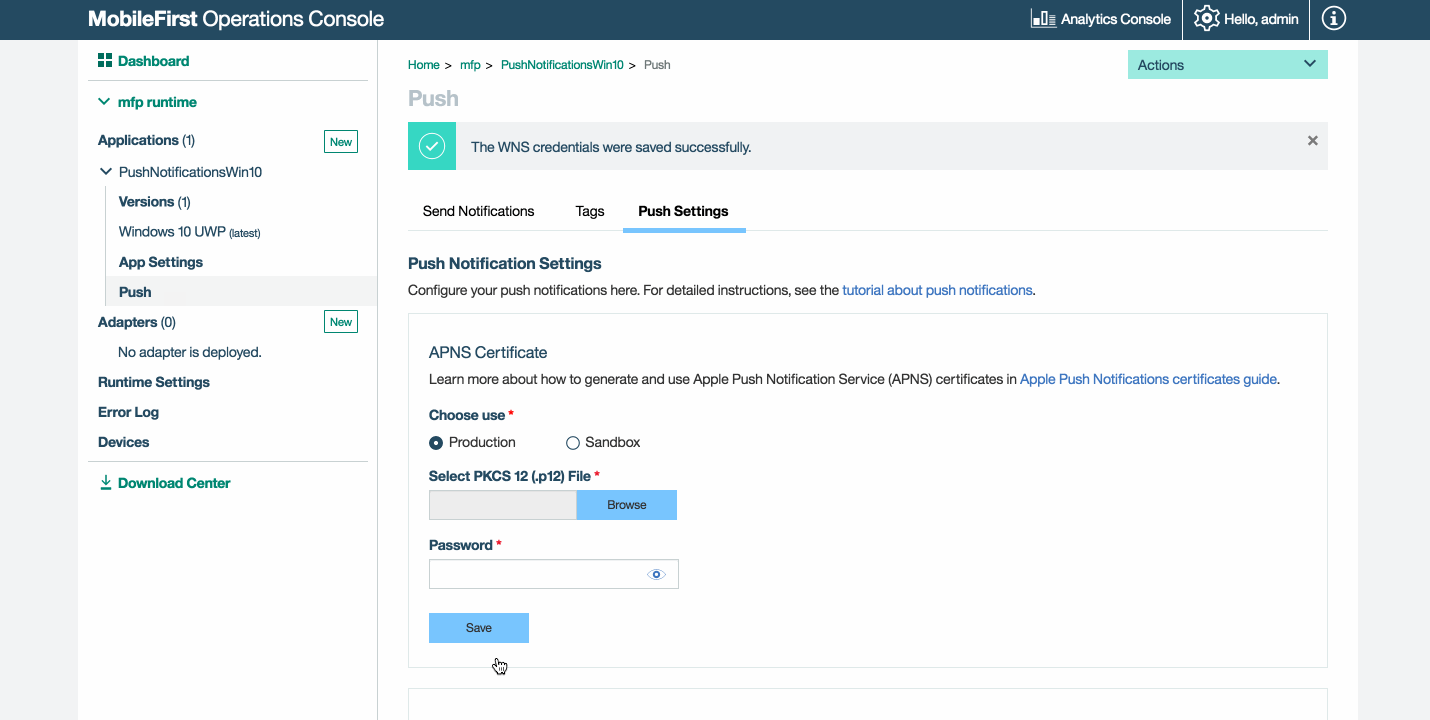
Windows Push Notifications Service
Windows devices use the Windows Push Notifications Service (WNS) for push notifications.
To setup WNS:
- Follow the instructions provided by Microsoft to generate the Package Security Identifier (SID) and Client secret values.
- In the MobileFirst Operations Console → [your application] → Push → Push Settings, add these values and click Save.
You can also setup WNS using either the REST API for the MobileFirst Push service or the REST API for the MobileFirst administration service
SMS Notification Service
The following JSON is used to setup the SMS gateway for sending SMS notifications. Use the smsConf REST API to update the MobileFirst Server with the SMS gateway configuration
{
	"host": "2by0.com",
	"name": "dummy",
	"port": "80",
	"programName": "gateway/add.php",
	"parameters": [{
		"name": "xmlHttp",
		"value": "false",
		"encode": "true"
	}, {
		"name": "httpsEnabled",
		"value": "false",
		"encode": "true"
	}]

}
Find more SMS-related REST APIs in the Push Service API Reference
Scope mapping
Map the push.mobileclient scope element to the application.
- Load the MobileFirst Operations Console and navigate to [your application] → Security → Scope-Elements Mapping, click on New.
-
Write “push.mobileclient” in the Scope element field. Then, click Add.
Close sectionScope Description apps.read Permission to read application resource. apps.write Permission to create, update, delete application resource. gcmConf.read Permission to read GCM configuration settings (API Key and SenderId). gcmConf.write Permission to update, delete GCM configuration settings. apnsConf.read Permission to read APNs configuration settings. apnsConf.write Permission to update, delete APNs configuration settings. devices.read Permission to read device. devices.write Permission to create, update delete device. subscriptions.read Permission to read subscriptions. subscriptions.write Permission to create, update, delete subscriptions. messages.write Permission to send push notifications. webhooks.read Permission to read event-notifications. webhooks.write Permission to send event-notifications. smsConf.read Permission to read SMS configuration settings. smsConf.write Permission to update, delete SMS configuration settings. wnsConf.read Permission to read WNS configuration settings. wnsConf.write Permission to update, delete WNS configuration settings. 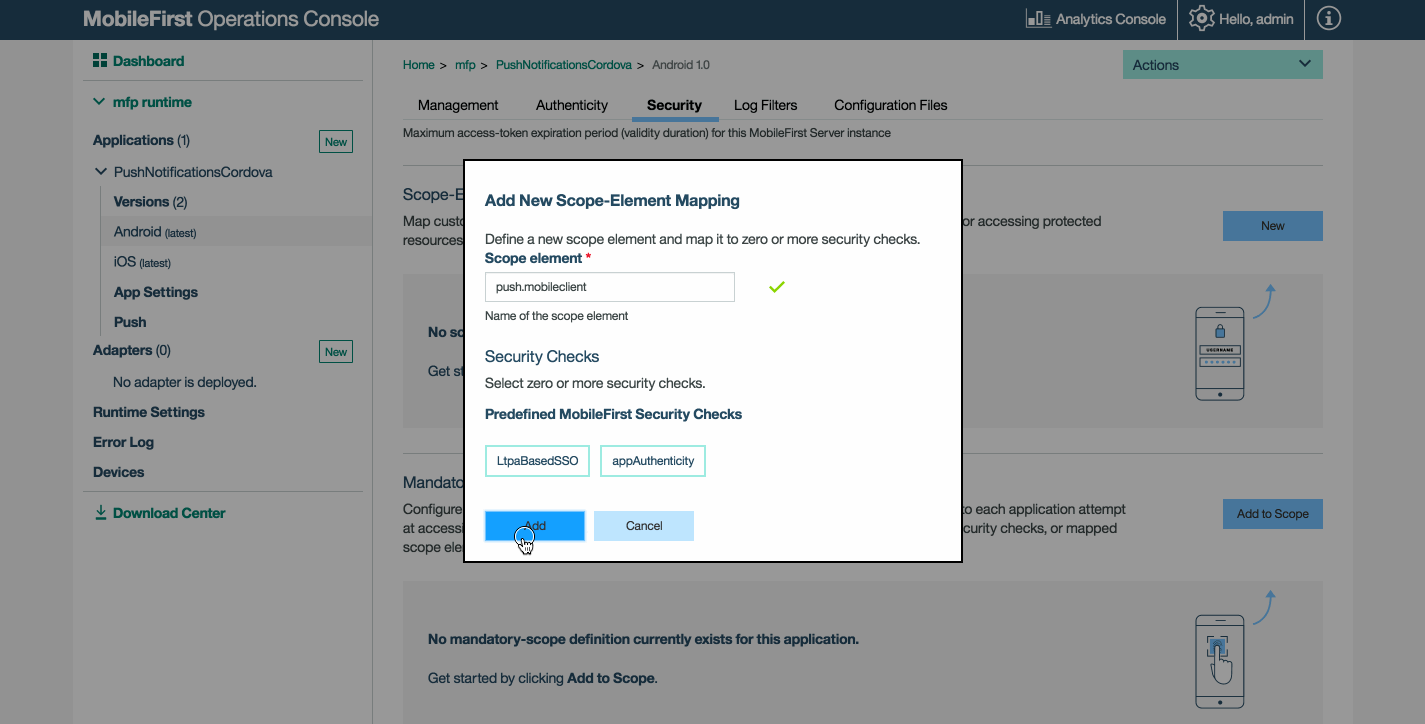
Authenticated Notifications
Authenticated notifications are notifications that are sent to one or more userIds.
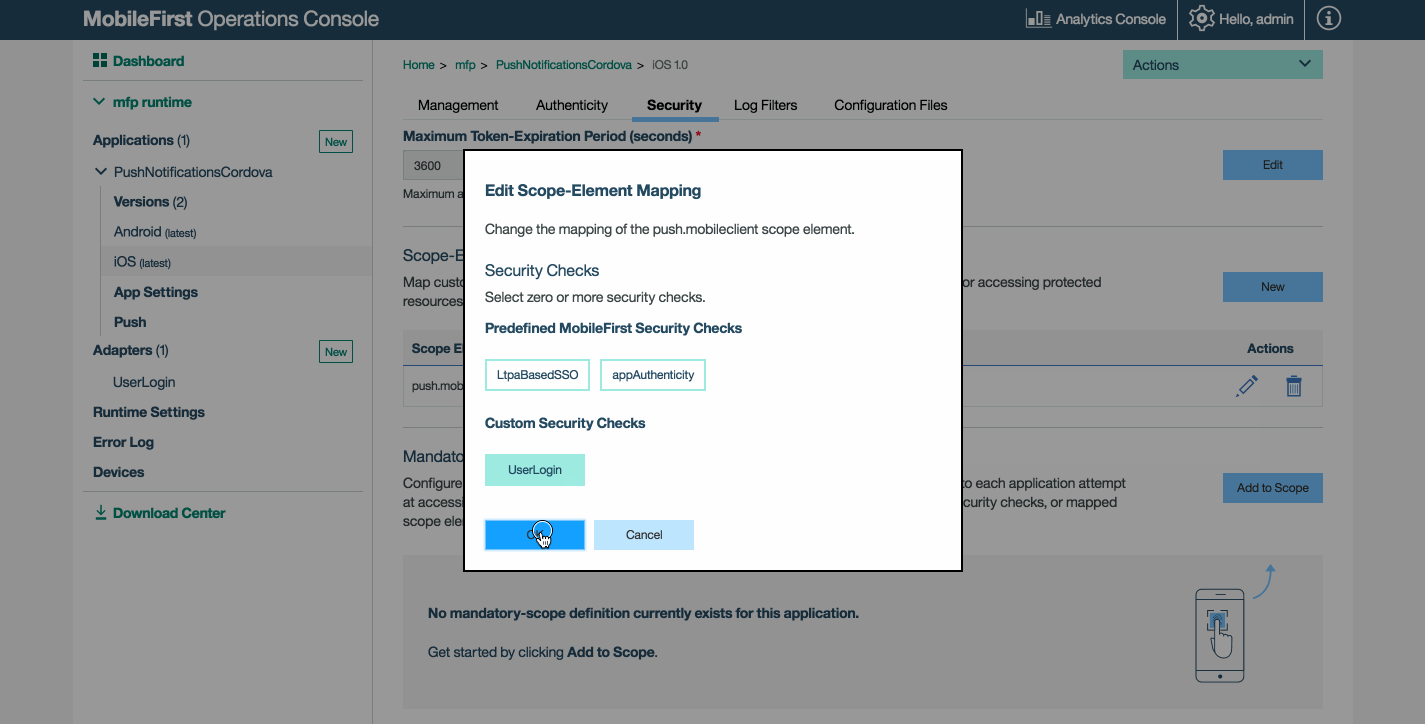
Map the push.mobileclient scope element to the security check used for the application.
- Load the MobileFirst Operations Console and navigate to [your application] → Security → Scope-Elements Mapping, click on New or edit an existing scope mapping entry.
-
Select a security check. Then, click Add.
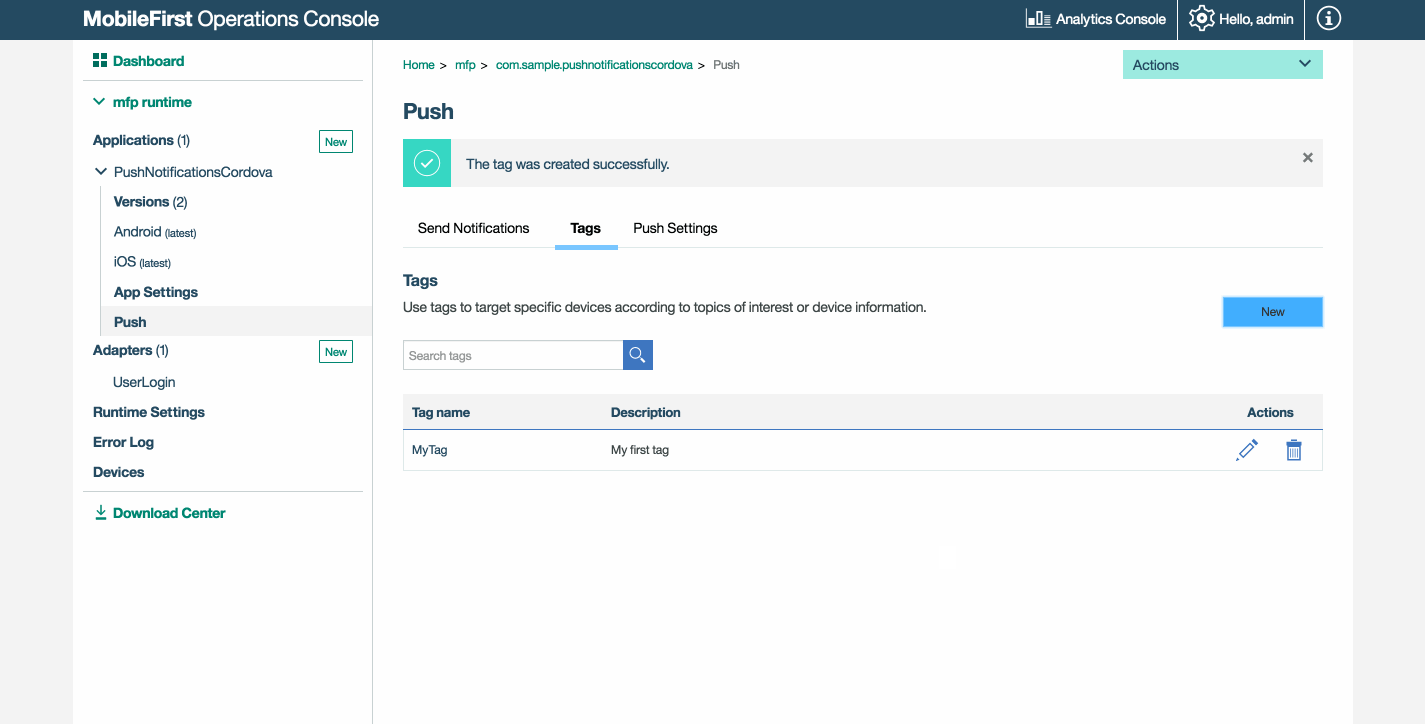
Defining Tags
In the MobileFirst Operations Console → [your application] → Push → Tags, click New.
Provide the appropriate Tag Name and Description and click Save.
Subscriptions tie together a device registration and a tag. When a device is unregistered from a tag, all associated subscriptions are automatically unsubscribed from the device itself. In a scenario where there are multiple users of a device, subscriptions should be implemented in mobile applications based on user log-in criteria. For example, the subscribe call is made after a user successfully logs in to an application and the unsubscribe call is made explicitly as part of the logout action handling.
Sending Notifications
Push notifications can be sent either from the MobileFirst Operations Console or via REST APIs.
- With the MobileFirst Operations Console, two types of notifications can be sent: tag and broadcast.
- With the REST APIs, all forms of notifications can be sent: tag, broadcast and authenticated.
MobileFirst Operations Console
Notifications can be sent to a single Device ID, a single or several User IDs, only iOS devices or only Android devices, or to devices subscribed to tags.
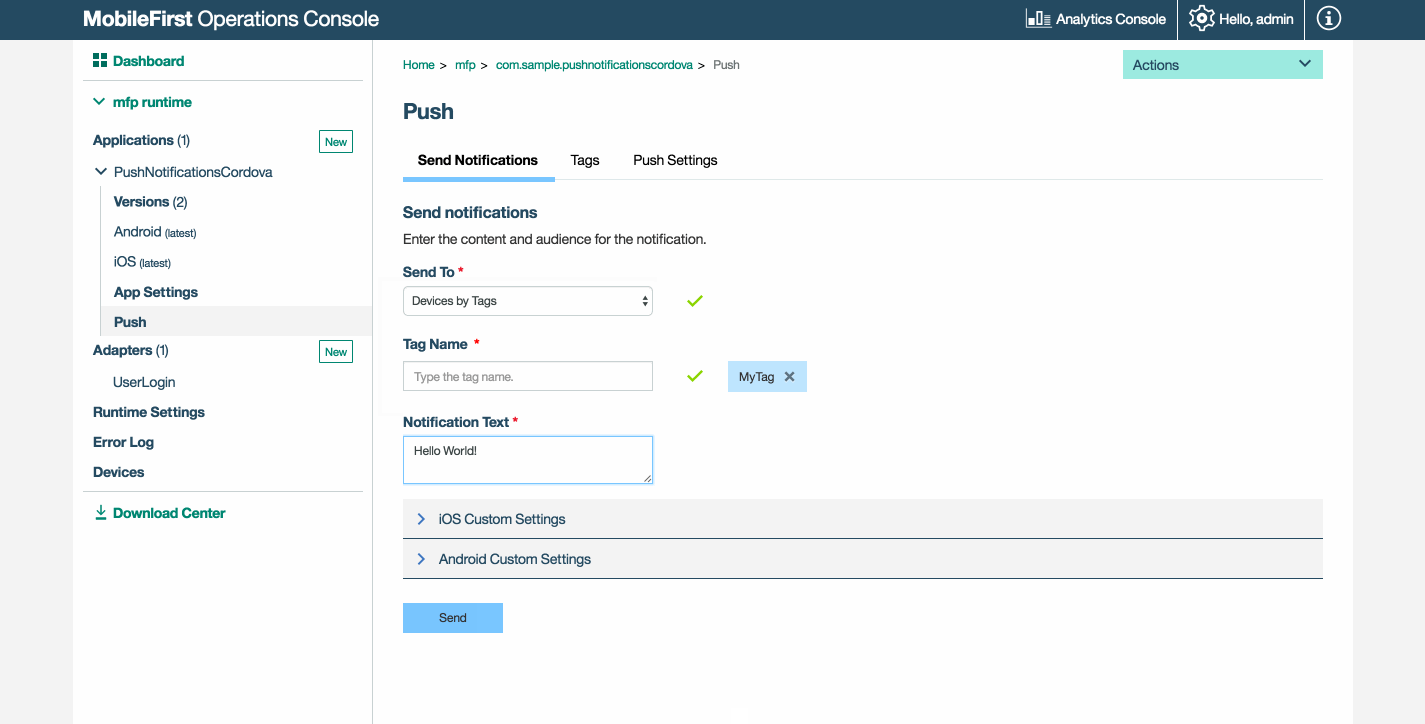
Tag notifications
Tag notifications are notification messages that are targeted to all the devices that are subscribed to a particular tag. Tags represent topics of interest to the user and provide the ability to receive notifications according to the chosen interest.
In the MobileFirst Operations Console → [your application] → Push → Send Notifications tab, select Devices By Tags from the Send To tab and provide the Notification Text. Then, click Send.
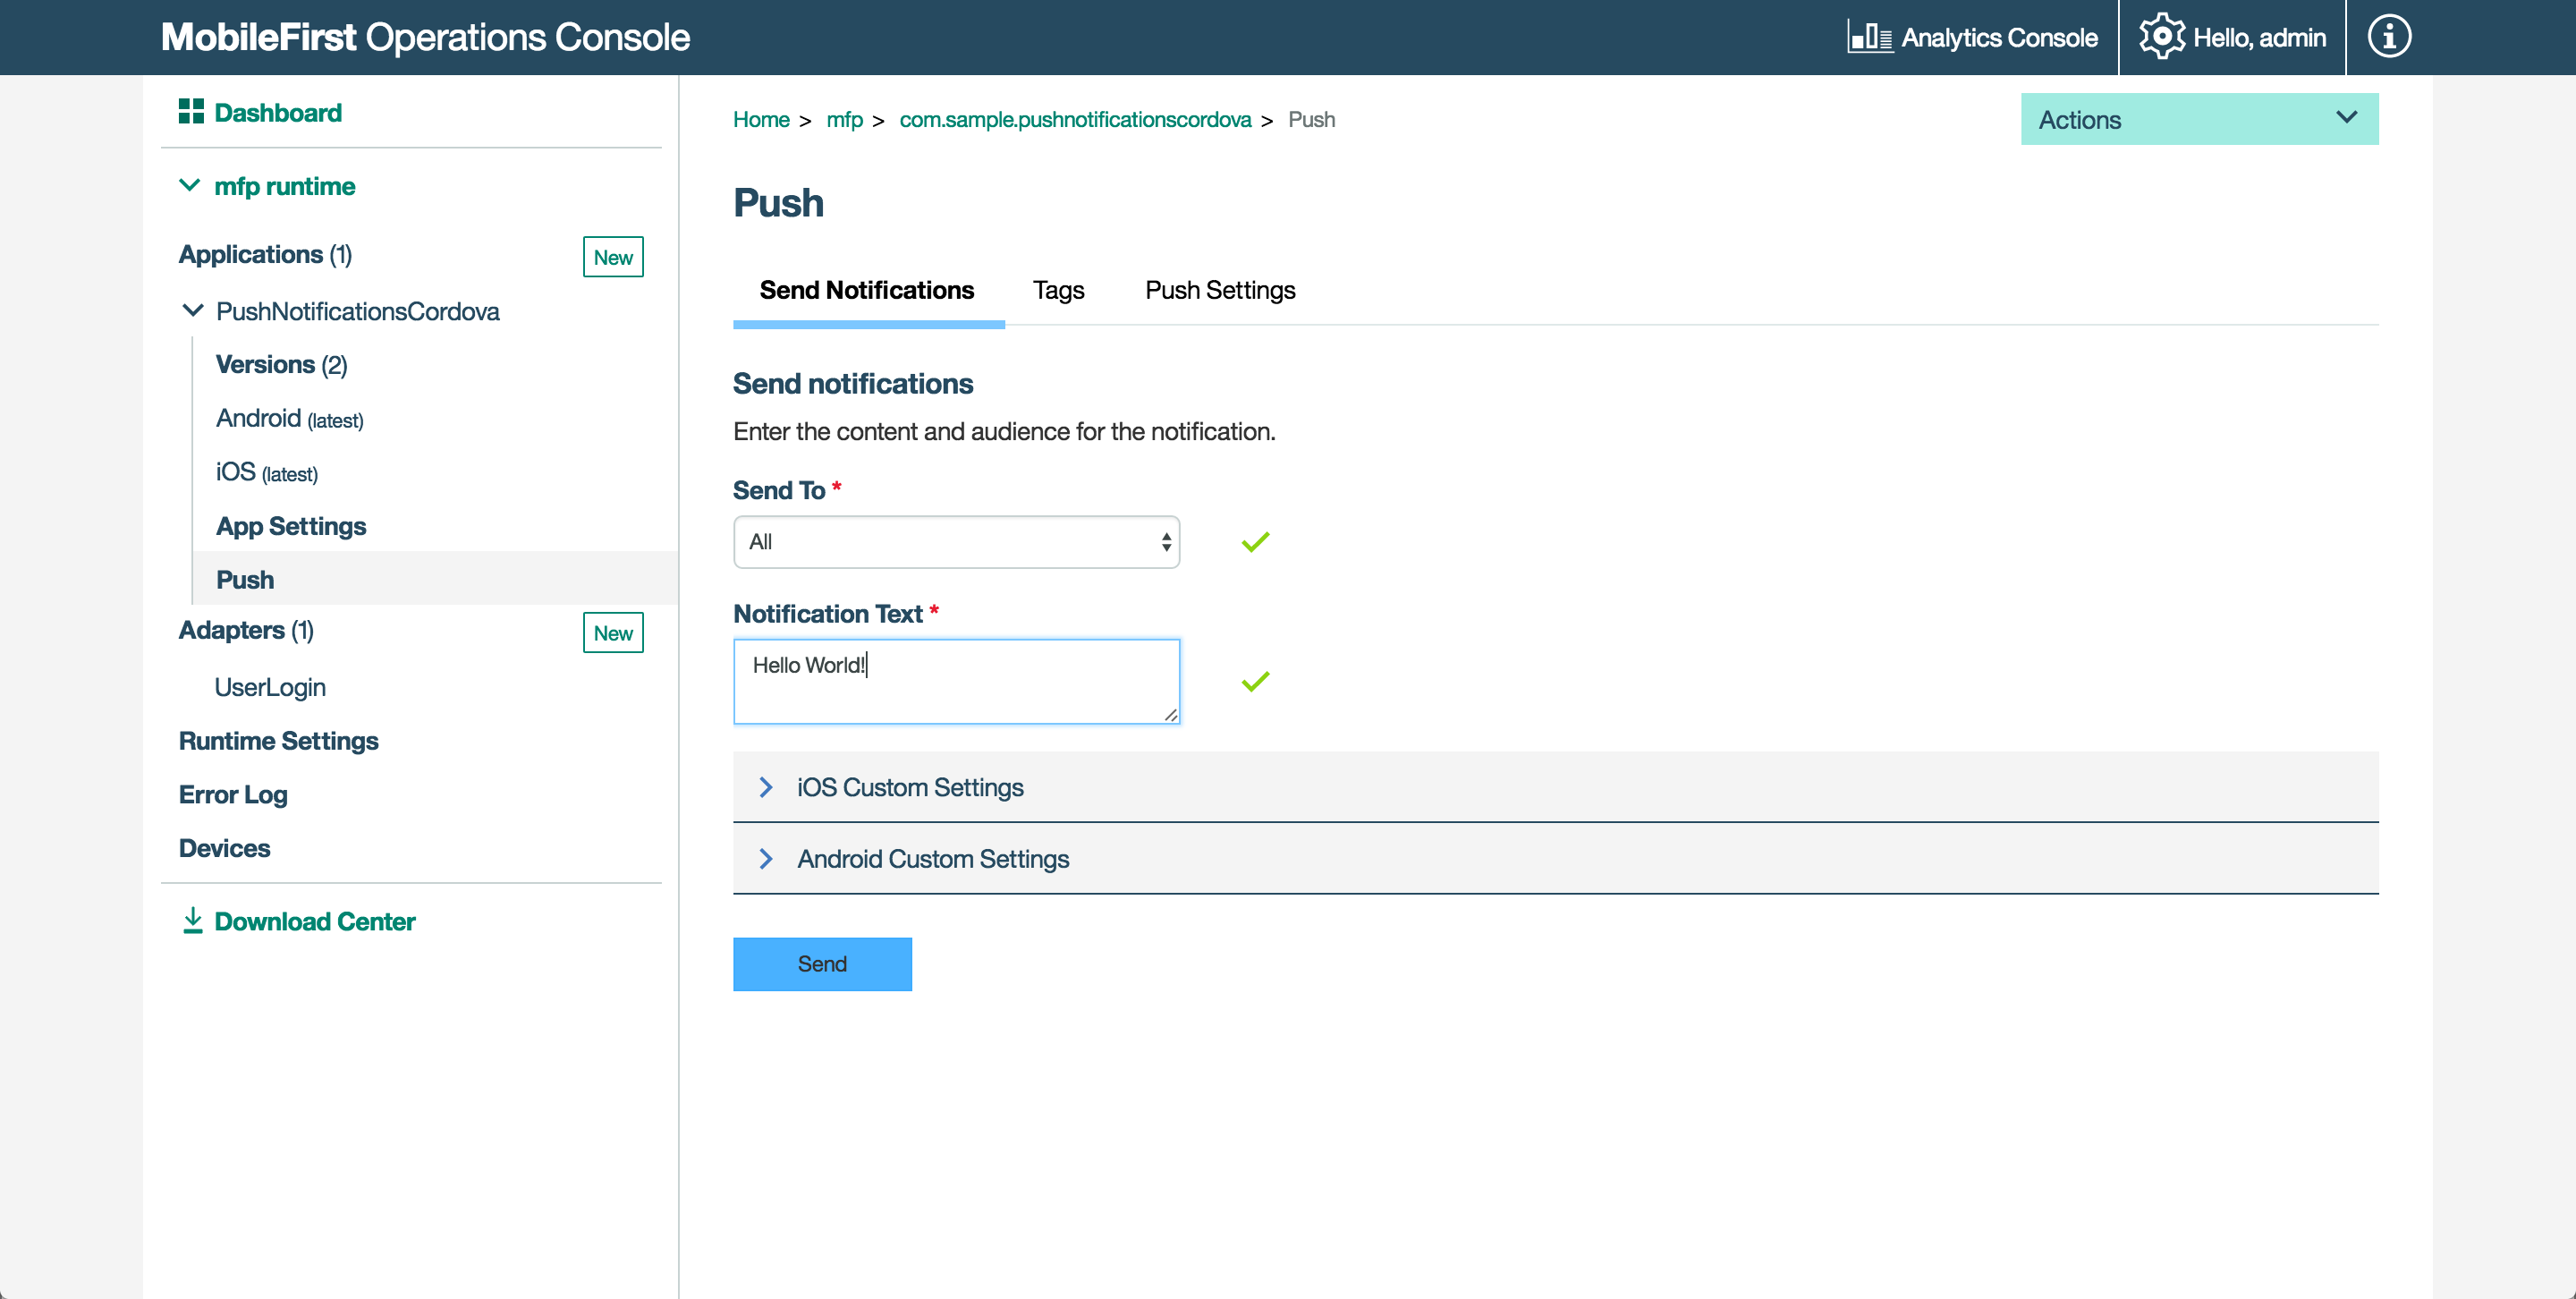
Broadcast notifications
Broadcast notifications are a form of tag push notifications that are targeted to all subscribed devices. Broadcast notifications are enabled by default for any push-enabled MobileFirst application by a subscription to a reserved Push.all tag (auto-created for every device). The Push.all tag can be programmatically unsubscribed.
In the MobileFirst Operations Console → [your application] → Push → Send Notifications tab, select All from the Send To tab and provide the Notification Text. Then, click Send.
REST APIs
When using the REST APIs to send notifications, all forms of notifications can be sent: tag & broadcast notifications, and authenticated notifications.
To send a notification, a request is made using POST to the REST endpoint: imfpush/v1/apps/<application-identifier>/messages.
Example URL:
https://myserver.com:443/imfpush/v1/apps/com.sample.PinCodeSwift/messages
To review all Push Notifications REST APIs, see the REST API Runtime Services topic in the user documentation.
Notification payload
The request can contain the following payload properties:
| Payload Properties | Definition |
|---|---|
| message | The alert message to be sent |
| settings | The settings are the different attributes of the notification. |
| target | Set of targets can be consumer Ids, devices, platforms, or tags. Only one of the targets can be set. |
| deviceIds | An array of the devices represented by the device identifiers. Devices with these ids receive the notification. This is a unicast notification. |
| notificationType | Integer value to indicate the channel (Push/SMS) used to send message. Allowed values are 1 (only Push), 2 (only SMS) and 3 (Push and SMS) |
| platforms | An array of device platforms. Devices running on these platforms receive the notification. Supported values are A (Apple/iOS), G (Google/Android) and M (Microsoft/Windows). |
| tagNames | An array of tags specified as tagNames. Devices that are subscribed to these tags receive the notification. Use this type of target for tag based notifications. |
| userIds | An array of users represented by their userIds to send the notification. This is a unicast notification. |
| phoneNumber | The phone number used for registering the device and receiving notifications. This is a unicast notification. |
Push Notifications Payload JSON Example
{
    "message" : {
    "alert" : "Test message",
  },
  "settings" : {
    "apns" : {
      "badge" : 1,
      "iosActionKey" : "Ok",
      "payload" : "",
      "sound" : "song.mp3",
      "type" : "SILENT",
    },
    "gcm" : {
      "delayWhileIdle" : ,
      "payload" : "",
      "sound" : "song.mp3",
      "timeToLive" : ,
    },
  },
  "target" : {
    // The list below is for demonstration purposes only - per the documentation only 1 target is allowed to be used at a time.
    "deviceIds" : [ "MyDeviceId1", ... ],
    "platforms" : [ "A,G", ... ],
    "tagNames" : [ "Gold", ... ],
    "userIds" : [ "MyUserId", ... ],
  },
}
SMS Notification Payload JSON Example
{
  "message": {
    "alert": "Hello World from an SMS message"
  },
  "notificationType":3,
   "target" : {
     "deviceIds" : ["38cc1c62-03bb-36d8-be8e-af165e671cf4"]
   }
}
Sending the notification
The notification can be sent using different tools.
For testing purposes, Postman is used as described below:
-
Configure a Confidential Client.
Sending a Push Notification via the REST API uses the space-separated scope elementsmessages.writeandpush.application.<applicationId>.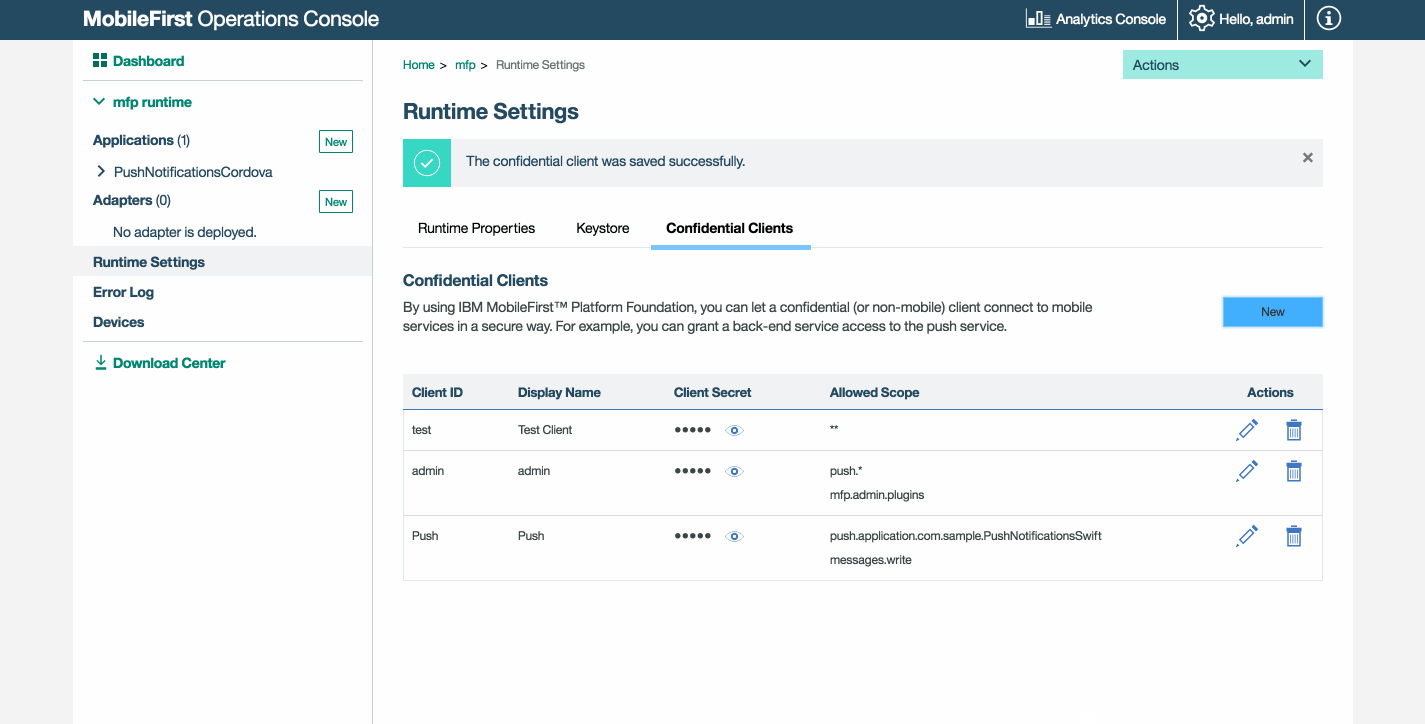
- Make a POST request to http://localhost:9080/imfpush/v1/apps/com.sample.PushNotificationsAndroid/messages
- If using a remote MobileFirst, replace the
hostnameandportvalues with your own. - Update the application identifier value with your own.
- If using a remote MobileFirst, replace the
- Set a Header:
- Authorization:
Bearer eyJhbGciOiJSUzI1NiIsImp ... - Replace the value after “Bearer” with the value of your access token from step (1) above.
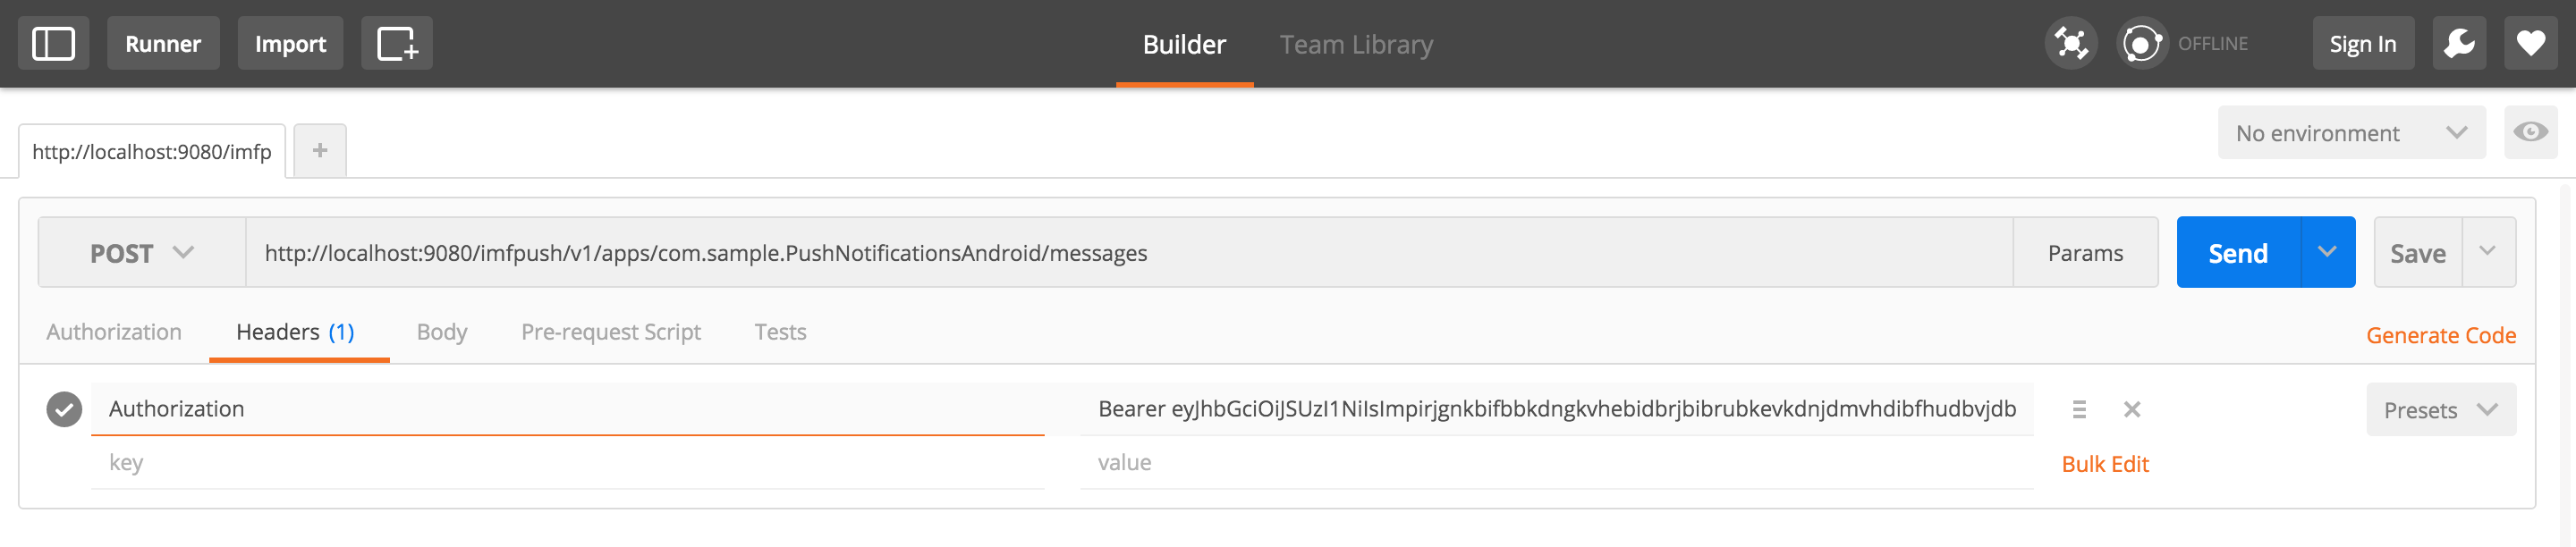
- Authorization:
- Set a Body:
- Update its properties as described in Notification payload above.
- For example, by adding the target property with the userIds attribute, you can send a notification to specific registered users.
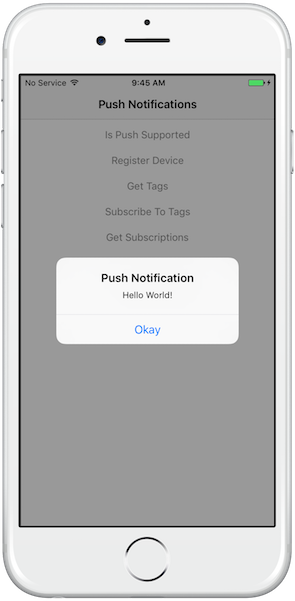
{
     "message" : {
         "alert" : "Hello World!"
     }
}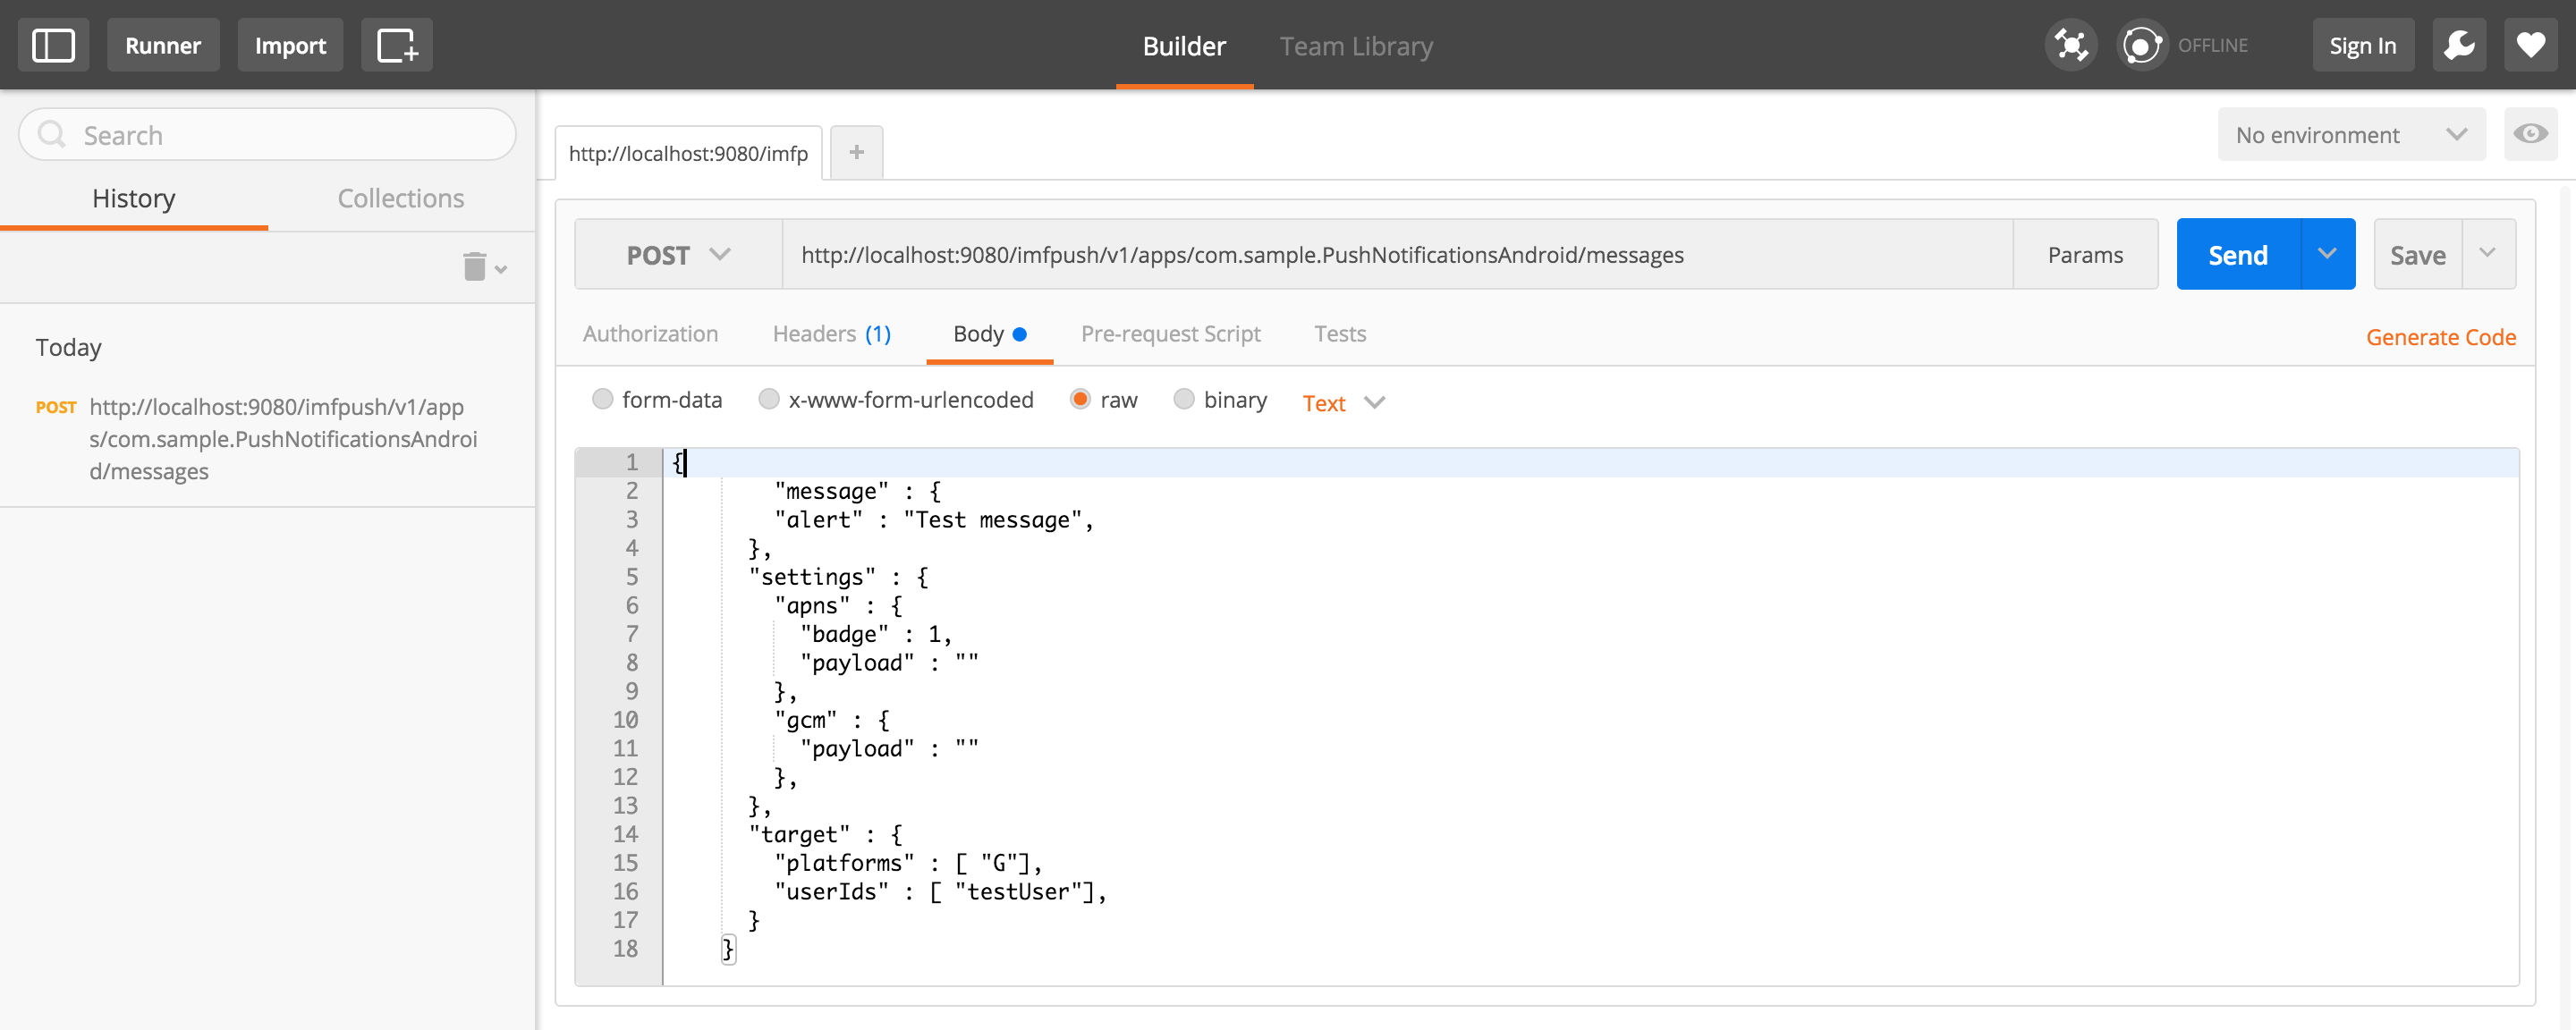
After clicking on the Send button, the device should have now received a notification:
Customizing Notifications
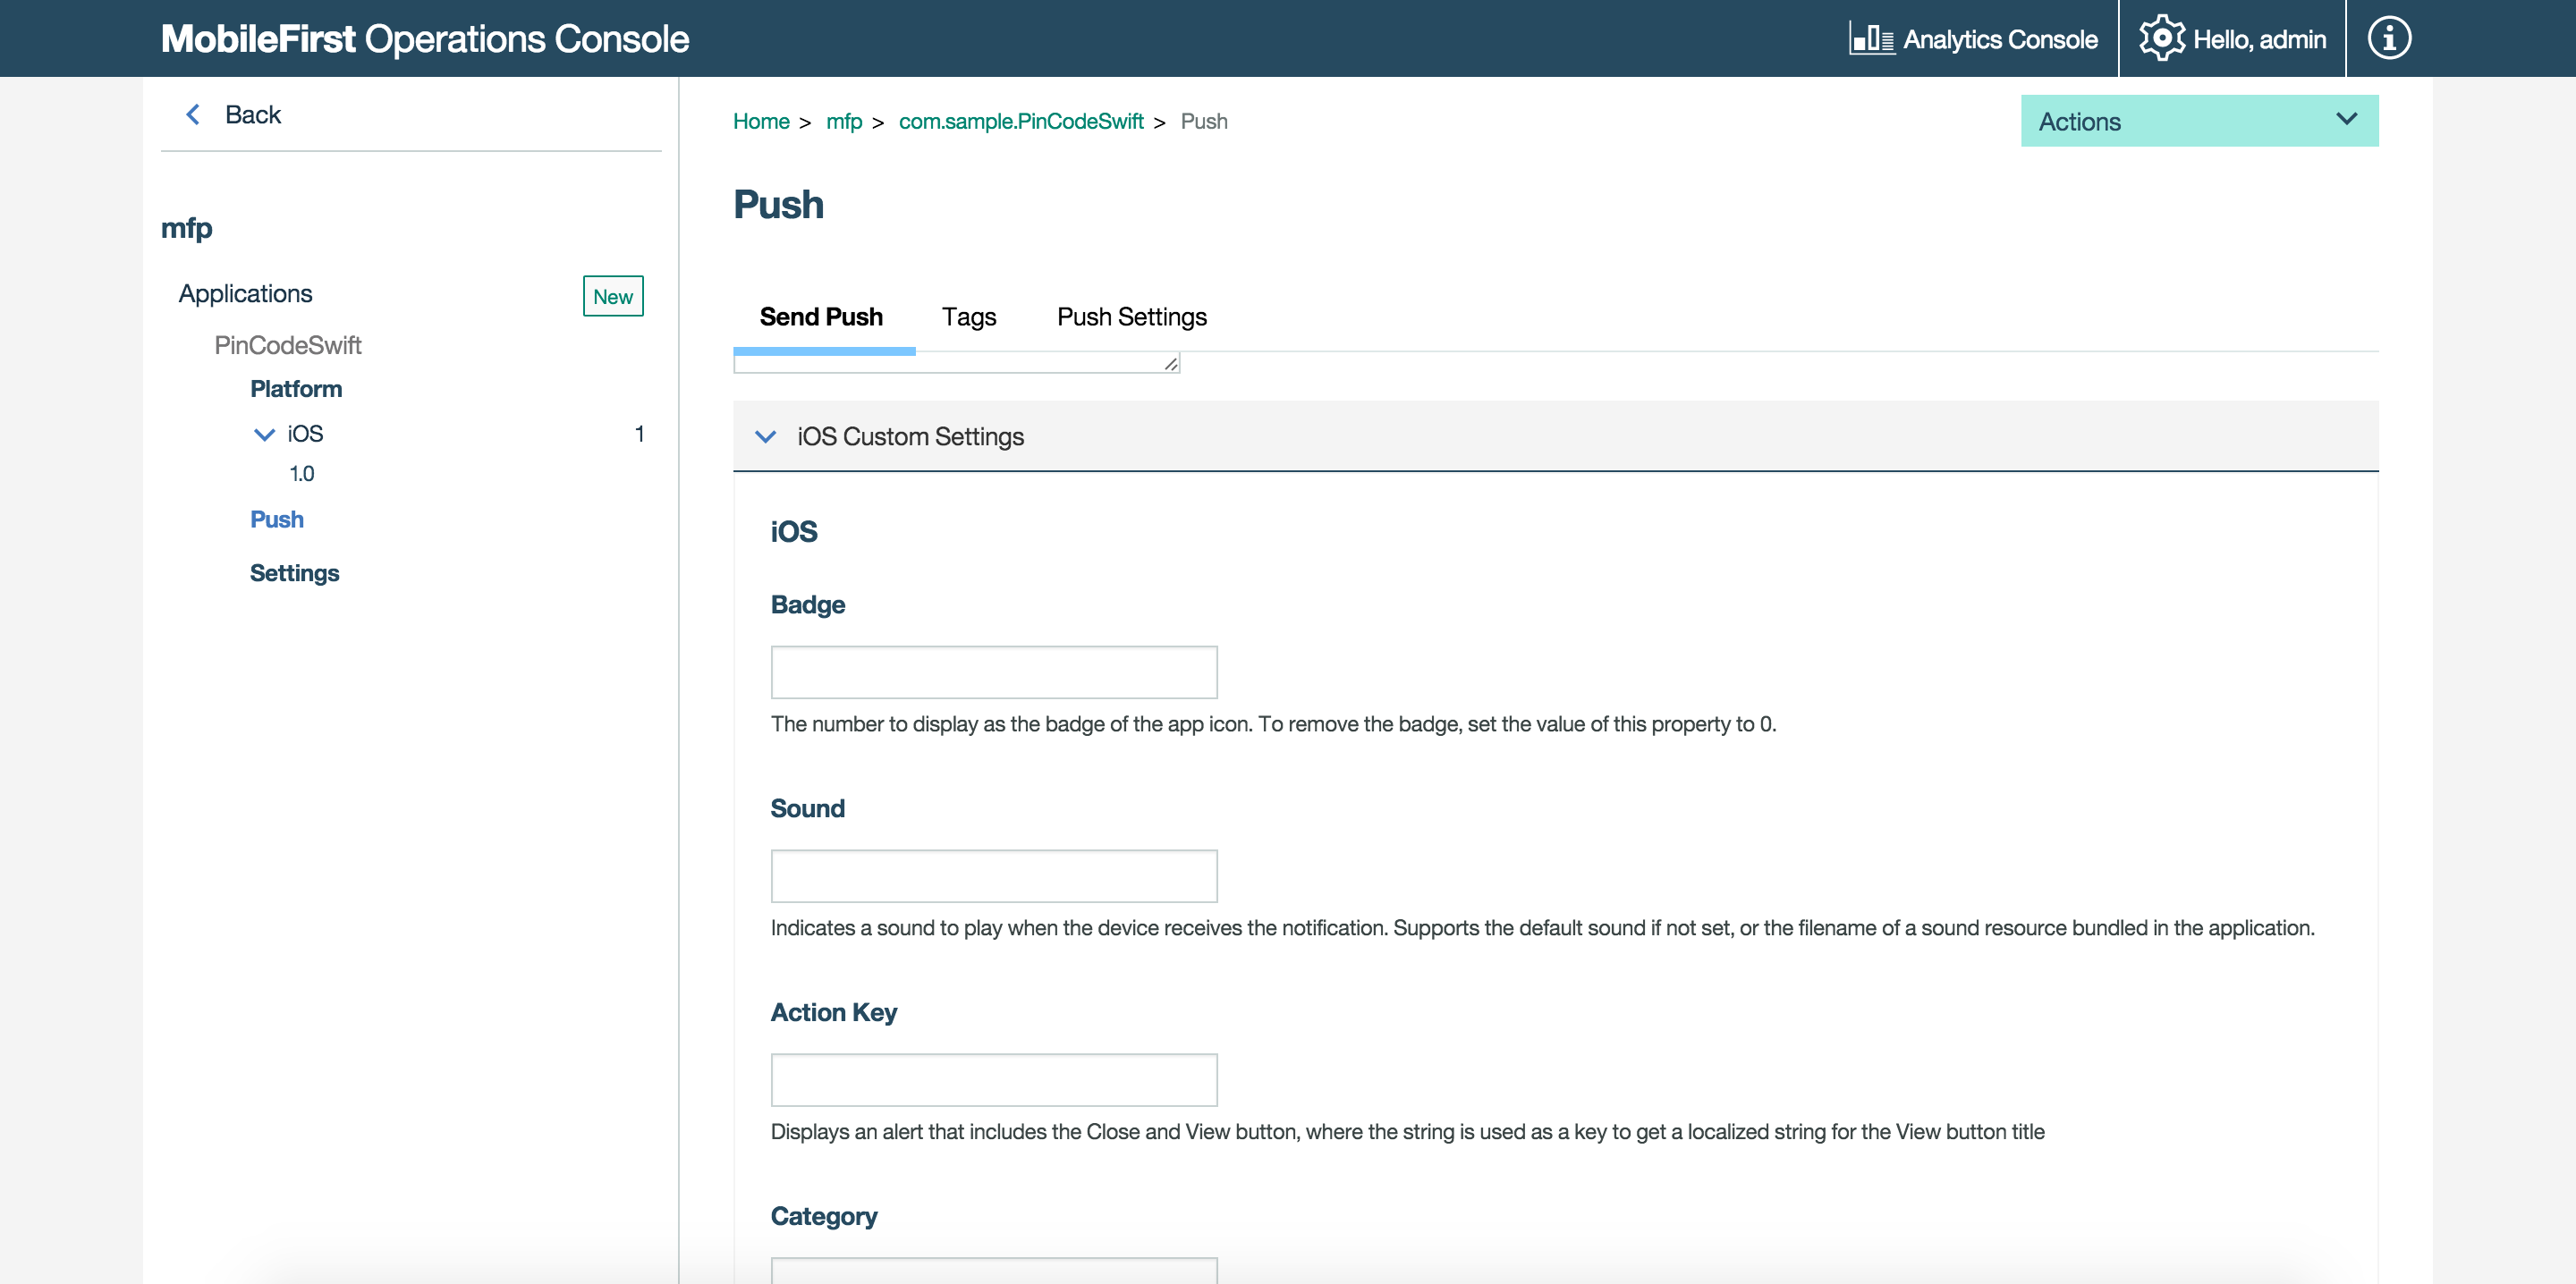
Before sending the notification message, you can also customize the following notification attributes.
In the MobileFirst Operations Console → [your application] → Push → Tags → Send Notifications tab, expend the iOS/Android Custom Settings section to change notification attributes.
Android
- Notification sound, how long a notification can be stored in the FCM storage, custom payload and more.
- If you want to change the notification title, then add
push_notification_tilein the Android project’s strings.xml file.
iOS
- Notification sound, custom payload, action key title, notification type and badge number.
HTTP/2 Support for APNs Push Notifications
Apple Push Notification service (APNs) supports a new API based on HTTP/2 network protocol. Support for HTTP/2 provides many benefits, including those listed below:
- Message length increased from 2 KB to 4 KB, which enables to add extra content to notifications.
- Eliminates the need for multiple connections between client and server, this improves the throughput.
- Universal Push Notification Client SSL Certificate support.
Push Notifications in MobileFirst now supports the HTTP/2 based APNs Push Notifications along with the legacy TCP Socket based notifications.
Enabling HTTP/2
HTTP/2 based notifications can be enabled using a JNDI Property.
<jndiEntry jndiName="imfpush/mfp.push.apns.http2.enabled" value= "true"/>
Note: If the above JNDI property is added, legacy TCP Socket based notifications will not be used and only the HTTP/2 based notifications will be enabled.
Proxy Support for HTTP/2
HTTP/2 based notifications can be sent via a HTTP Proxy. To enable routing of the notifications via a proxy, see here.
Proxy Support
You can make use proxy settings to set the optional proxy through which notifications are sent to Android and iOS devices. You can set the proxy by using the push.apns.proxy. and push.gcm.proxy. configuration properties. For more information, see List of JNDI properties for MobileFirst Server push service.
Tutorials to follow next
With the server-side now set-up, setup the client-side and handle received notifications.
- Handling push notifications
- Handling SMS notifications
Inclusive terminology note: The Mobile First Platform team is making changes to support the IBM® initiative to replace racially biased and other discriminatory language in our code and content with more inclusive language. While IBM values the use of inclusive language, terms that are outside of IBM's direct influence are sometimes required for the sake of maintaining user understanding. As other industry leaders join IBM in embracing the use of inclusive language, IBM will continue to update the documentation to reflect those changes.