MobileFirst Analytics Receiver Server Installation Guide
improve this page | report issueOverview
MobileFirst Analytics Receiver Server is implemented and shipped as Java EE standard web application archive (WAR) file. Therefore, it can be installed in any one of the following supported application servers: WebSphere Application Server, WebSphere Application Server Liberty, or Apache Tomcat (WAR files only).
Jump to
- System requirements
- Capacity considerations
- Installing MobileFirst Analytics Receiver on WebSphere Application Server Liberty
- Installing MobileFirst Analytics Receiver on Tomcat
- Installing MobileFirst Analytics Receiver on WebSphere Application Server
- Installing MobileFirst Analytics Receiver with Ant tasks
System requirements
Operating systems
- CentOS/RHEL 6.x/7.x
- Oracle Enterprise Linux 6/7 with RHEL Kernel only
- Ubuntu 12.04/14.04
- SLES 11/12
- OpenSuSE 13.2
- Windows Server 2012/R2
- Debian 7
JVM
- Oracle JVM 1.7u55+
- Oracle JVM 1.8u20+
- IcedTea OpenJDK 1.7.0.55+
Hardware
- RAM: More RAM is better, but no more than 64 GB per node. 32 GB and 16 GB are also acceptable. Less than 8 GB requires many small nodes in the cluster, and 64 GB is wasteful and problematic due to the way Java uses memory for pointers.
- Disk: Use SSDs when possible, or fast spinning traditional disks in RAID 0 configuration if SSDs are not possible.
- CPU: CPU tends not to be the performance bottleneck. Use systems with 2 to 8 cores.
- Network: When you need to scale out horizontally, you need a fast and reliable data center with 1 GbE to 10 GbE supported speeds.
Hardware configuration
- Give your JVM ample size to scale the in-memory queue with a size of 10000 (i.e., minimum Xmx as 6 GB).
- If you use BSDs and Linux, ensure that your operating system I/O scheduler is set to deadline or noop, not cfq.
Capacity considerations
Capacity is the single-most common question. How much RAM do you need? How much disk space? How many nodes? The answer is always subjective.
IBM MobileFirst Analytics Receiver does not require disk space since it just receives logs from mobile applications and forwards them to analytics server, there is no storage of events data.
Installing MobileFirst Analytics Receiver on WebSphere Application Server Liberty
Ensure that you already have the MobileFirst Analytics Receiver WAR file. For more information on the installation artifacts, see Installing MobileFirst Server to an application server. The analytics-receiver.war file is found in the <mf_server_install_dir>\analyticsreceiver folder. For more information about how to download and install WebSphere Application Server Liberty, see the About WebSphere Liberty article on IBM developerWorks .
-
Create a server by running the following command in your
./wlp/binfolder../server create <serverName> -
Install features by running the following command from your
./binfolder../featureManager install jsp-2.2 ssl-1.0 appSecurity-1.0 localConnector-1.0 - Add the analytics-receiver.war file to the
./usr/servers/<serverName>/appsfolder of your Liberty Server. -
Replace the contents of the **
** tag of the `./usr/servers/ /server.xml` file with the following content: <featureManager> <feature>jsp-2.2</feature> <feature>ssl-1.0</feature> <feature>appSecurity-1.0</feature> <feature>localConnector-1.0</feature> </featureManager> -
Configure analytics-receiver.war as an application with role-based security in the
server.xmlfile. The following example creates a basic hardcoded user registry and assigns a user to each of the different analytics roles.<application id="analytics-receiver" name="analytics-receiver" location="analytics-receiver.war" type="war"> <application-bnd> <security-role name="analytics_administrator"> <user name="admin"/> </security-role> <security-role name="analytics_infrastructure"> <user name="infrastructure"/> </security-role> <security-role name="analytics_support"> <user name="support"/> </security-role> <security-role name="analytics_developer"> <user name="developer"/> </security-role> <security-role name="analytics_business"> <user name="business"/> </security-role> </application-bnd> </application> <basicRegistry id="worklight" realm="worklightRealm"> <user name="business" password="demo"/> <user name="developer" password="demo"/> <user name="support" password="demo"/> <user name="infrastructure" password="demo"/> <user name="admin" password="admin"/> </basicRegistry>For more information on how to configure other user registry types, such as LDAP, see the Configuring a user registry for Liberty topic in the WebSphere Application Server product documentation.
-
Start the Liberty Server by running the following command inside your bin folder
./server start <serverName> -
Verify the service by invoking health url
http://localhost:9080/analytics-receiver/rest/data/health
For more information on administering WebSphere Application Server Liberty, see the Administering Liberty from the command line topic in the WebSphere Application Server product documentation.
Installing MobileFirst Analytics Receiver on Tomcat
Ensure that you already have the MobileFirst Analytics Receiver WAR files. For more information on the installation artifacts, see Installing MobileFirst Server to an application server. The analytics-receiver.war file is found in the <mf_server_install_dir>\analyticsreceiver folder. For more information on how to download and install Tomcat, see Apache Tomcat. Ensure that you download the version that supports Java 7 or higher. For more information about which version of Tomcat supports Java 7, see Apache Tomcat Versions.
- Add analytics-receiver.war file to the Tomcat
webappsfolder. -
Uncomment the following section in the
conf/server.xmlfile, which is commented out, in a newly downloaded Tomcat archive.<Valve className ="org.apache.catalina.authenticator.SingleSignOn"/> -
Declare the two war files in the
conf/server.xmlfile, and define a user registry.<Context docBase ="analytics-receiver-service" path ="/analytics-receiver"></Context> <Realm className ="org.apache.catalina.realm.MemoryRealm"/>The MemoryRealm recognizes the users that are defined in the
conf/tomcat-users.xmlfile. For information on other available options, see Apache Tomcat Realm Configuration HOW-TO. - Add the following sections to the
conf/tomcat-users.xmlfile to configure a MemoryRealm.-
Add the security roles.
<role rolename="analytics_administrator"/> <role rolename="analytics_infrastructure"/> <role rolename="analytics_support"/> <role rolename="analytics_developer"/> <role rolename="analytics_business"/> -
Add a few users with the roles you want.
<user name="admin" password="admin" roles="analytics_administrator"/> <user name="support" password="demo" roles="analytics_support"/> <user name="business" password="demo" roles="analytics_business"/> <user name="developer" password="demo" roles="analytics_developer"/> <user name="infrastructure" password="demo" roles="analytics_infrastructure"/> -
Start your Tomcat Server and verify the service by invoking the health url.
http://localhost:8080/analytics-receiver/rest/data/health
For more information about how to start the Tomcat Server, see the official Tomcat site. For example, Apache Tomcat 7, for Tomcat 7.0.
-
Installing MobileFirst Analytics Receiver on WebSphere Application Server
For information on initial installation steps for acquiring the installation artifacts (JAR and EAR files), see Installing MobileFirst Server to an application server. The analytics-receiver.war file is found in the <mf_server_install_dir>\analyticsreceiver folder.
The following steps describe how to install and run the Analytics EAR file on WebSphere Application Server. If you are installing the individual WAR files on WebSphere Application Server, follow only steps 2 to 7 on the analytics-receiver WAR file after you deploy.
-
Deploy the WAR file to the application server, but do not start it. For information about how to install an EAR file on WebSphere Application Server, see the Installing enterprise application files with the console topic in the WebSphere Application Server product documentation.
-
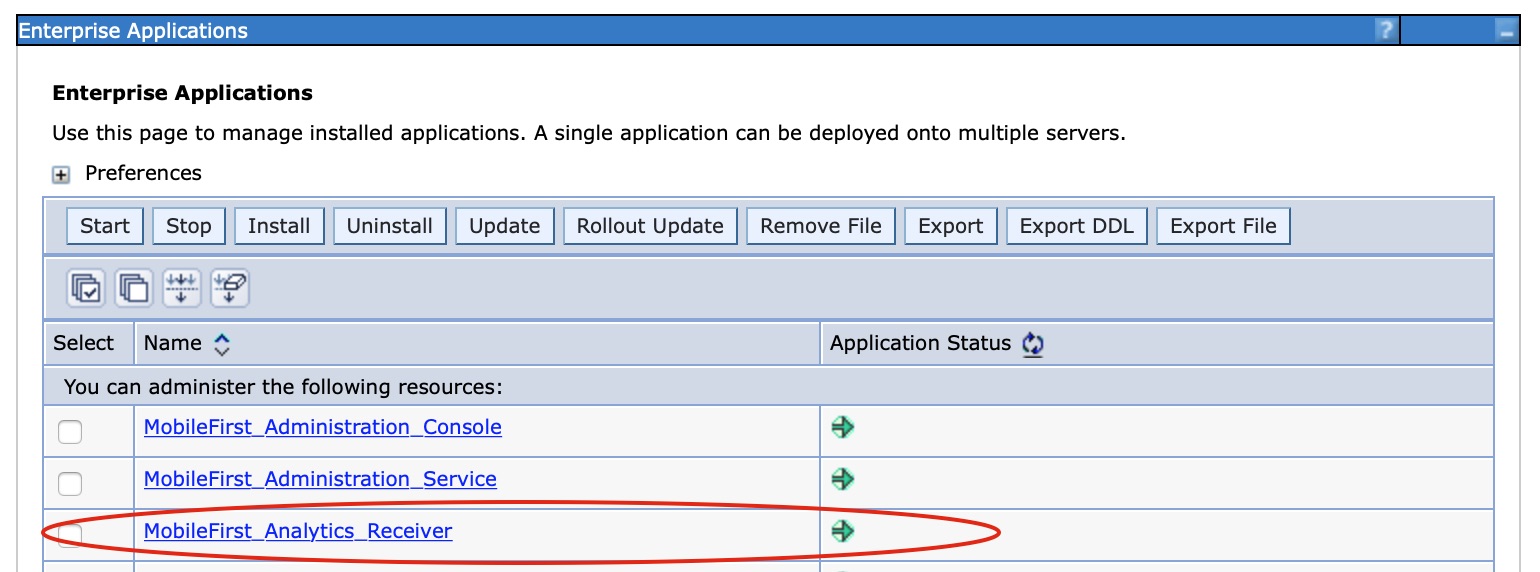
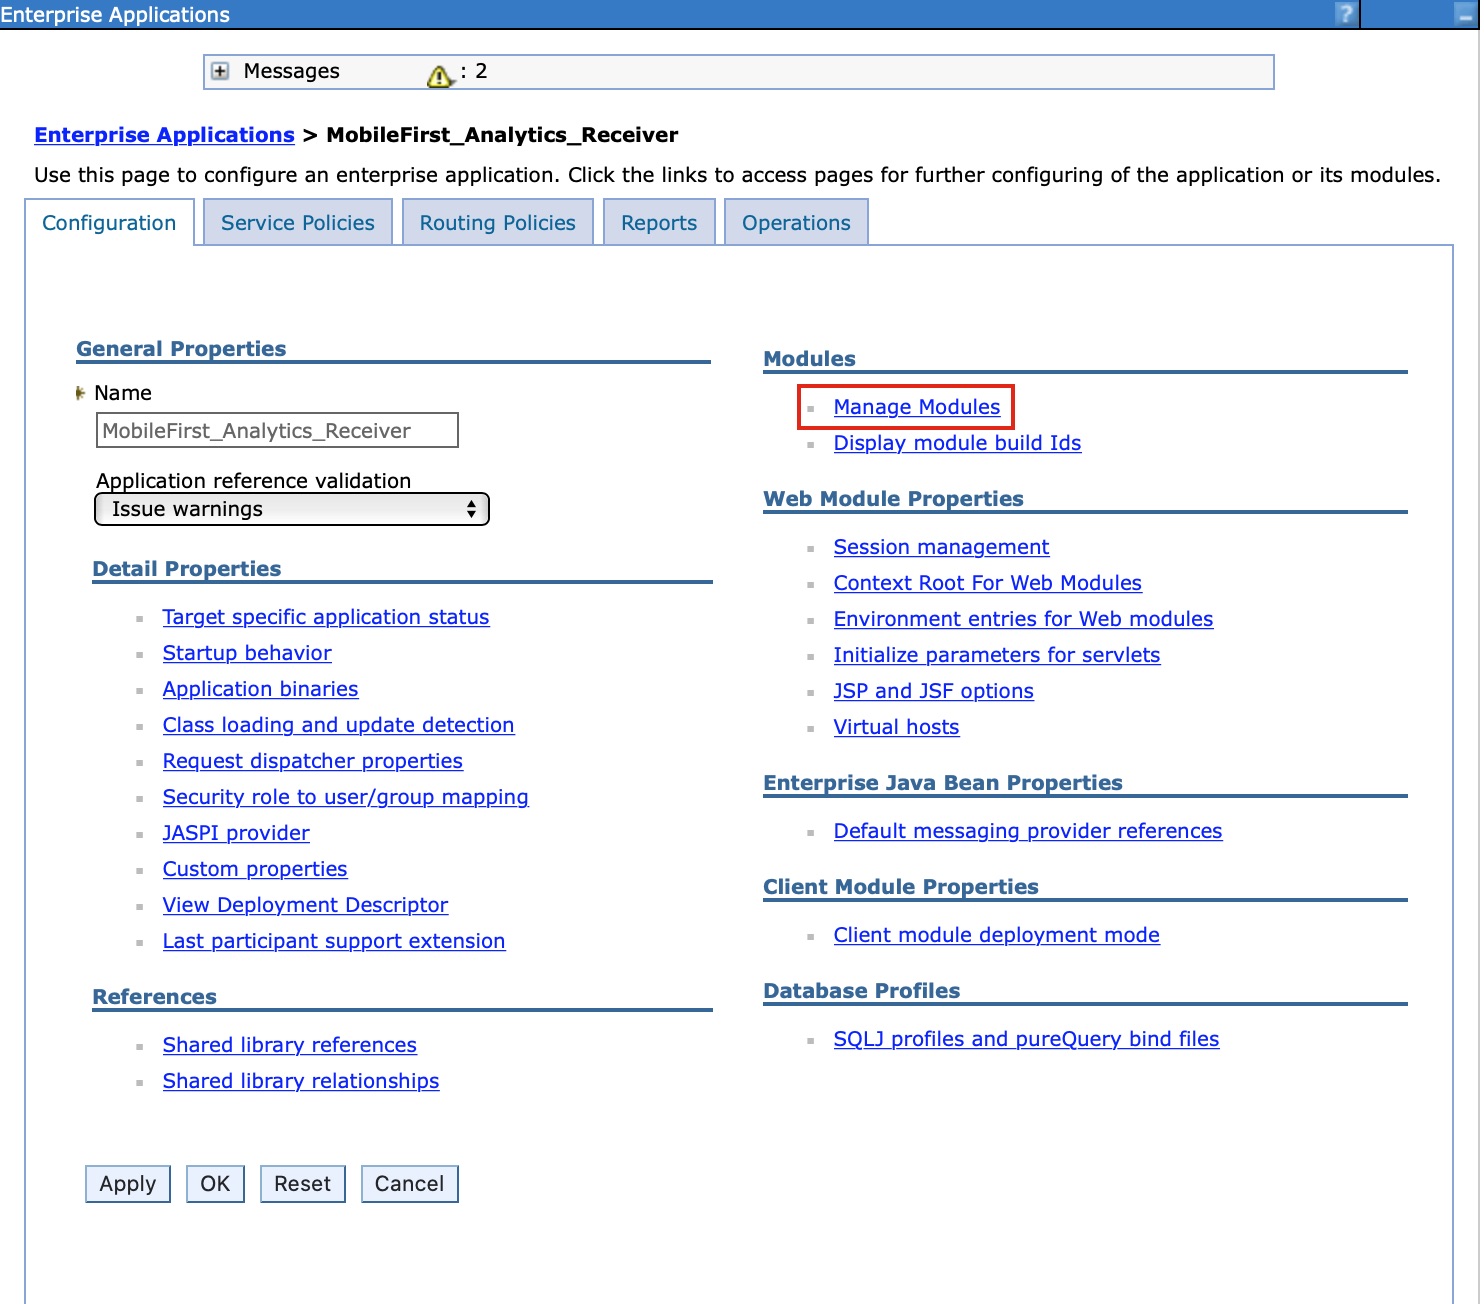
Select the MobileFirst Analytics Receiver application from the Enterprise Applications list.
-
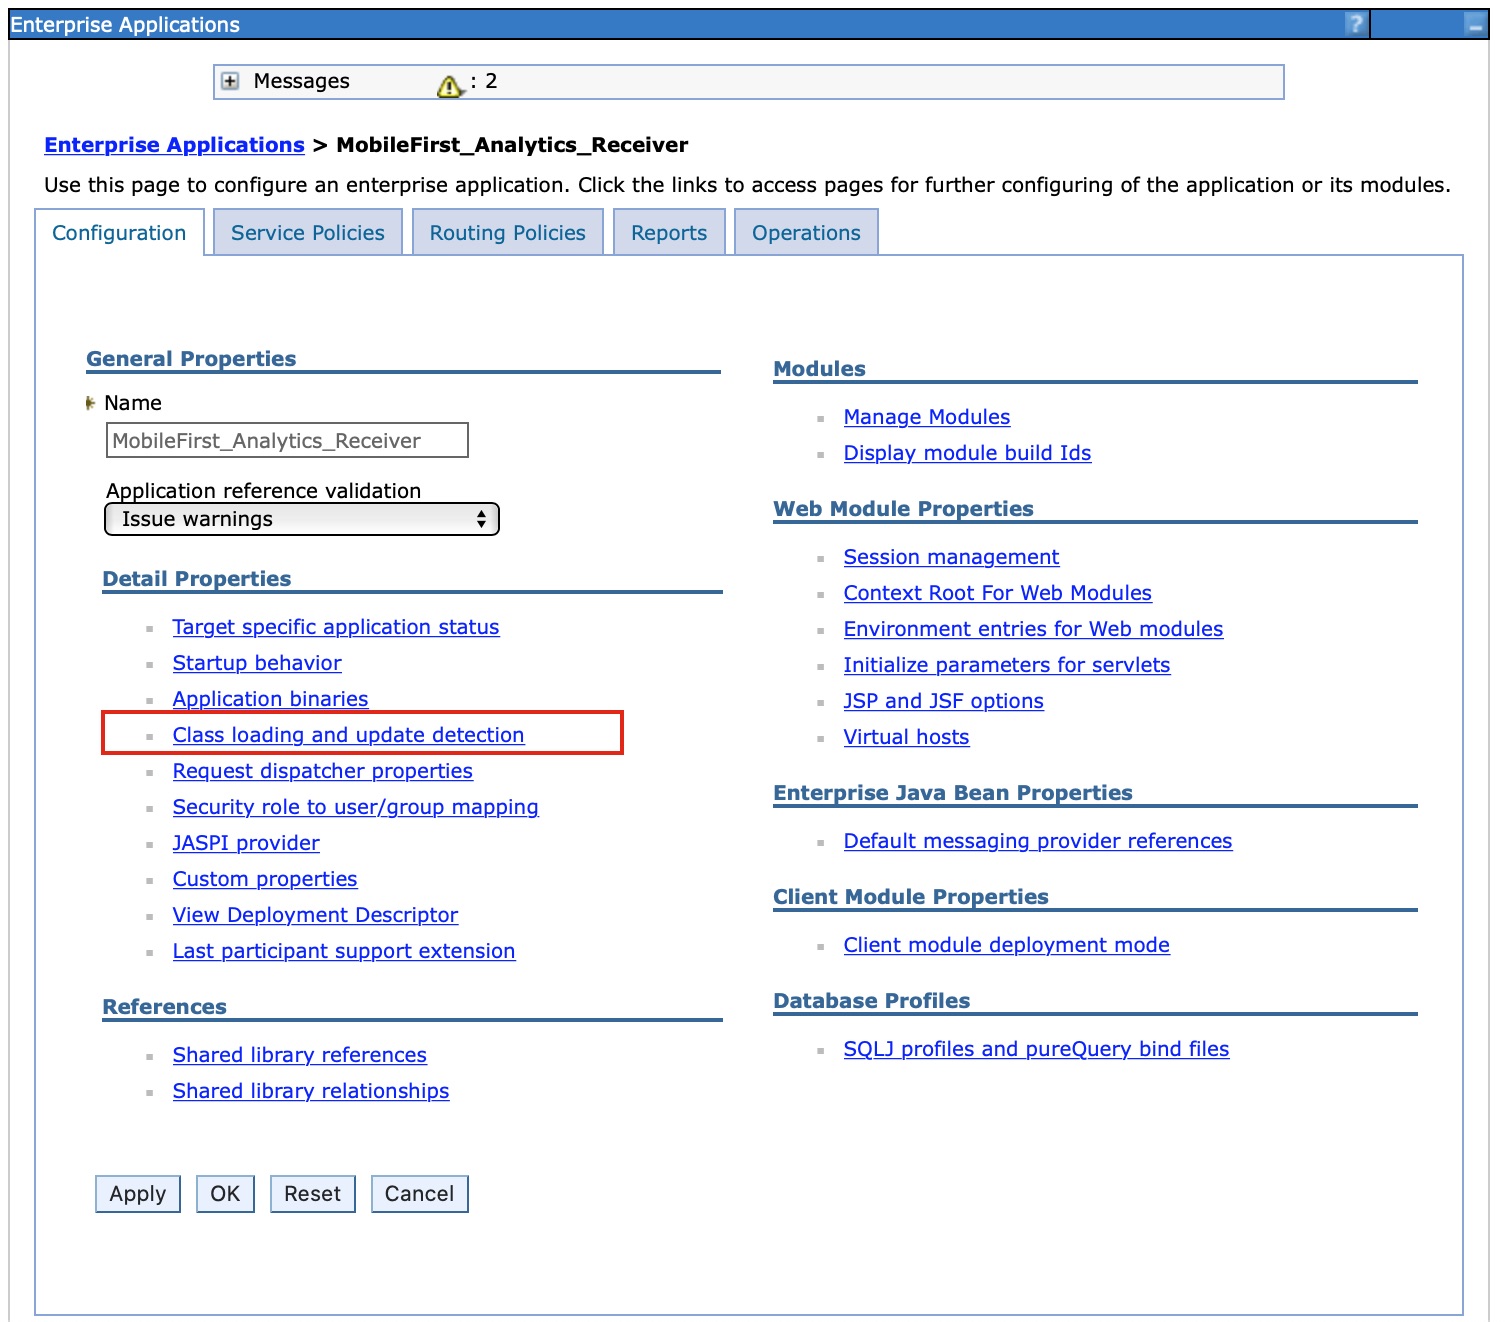
Click Class loading and update detection.
-
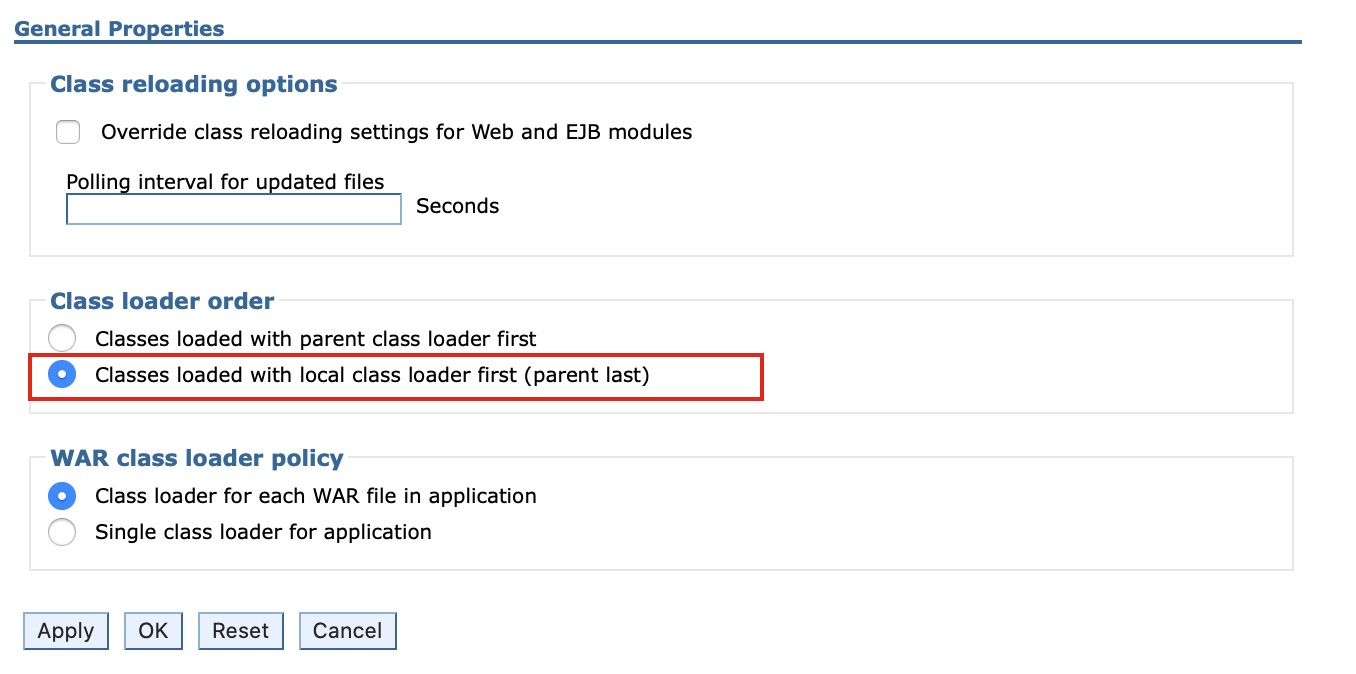
Set the class loading order to parent last.
-
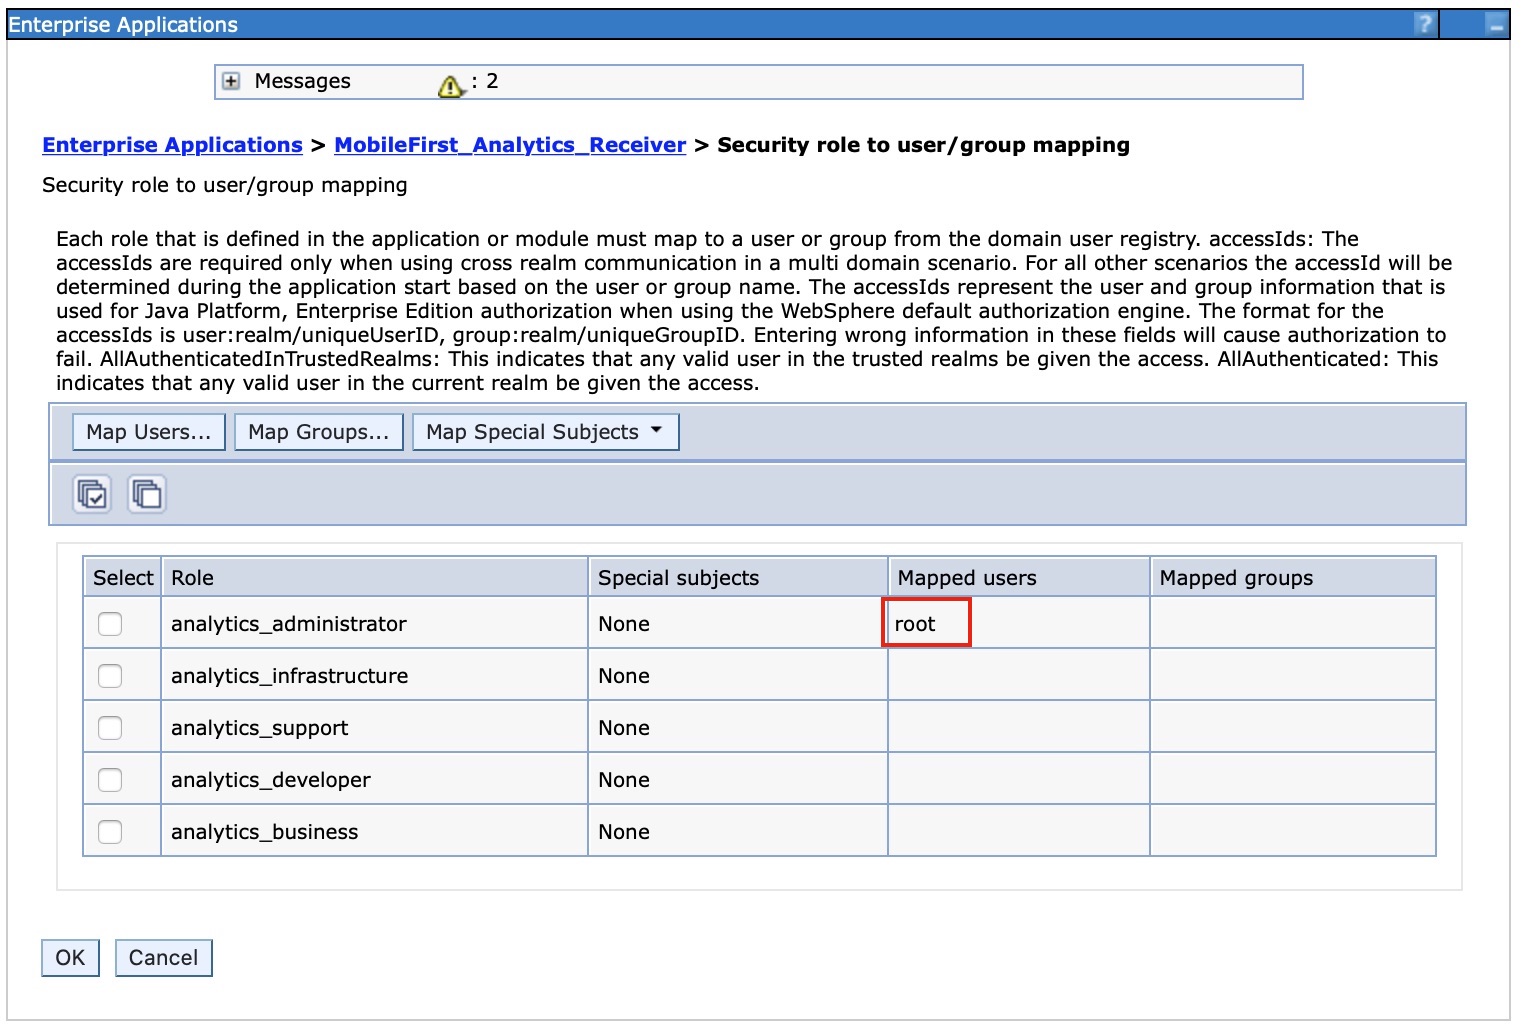
Click Security role to user/group mapping to map the admin user.
-
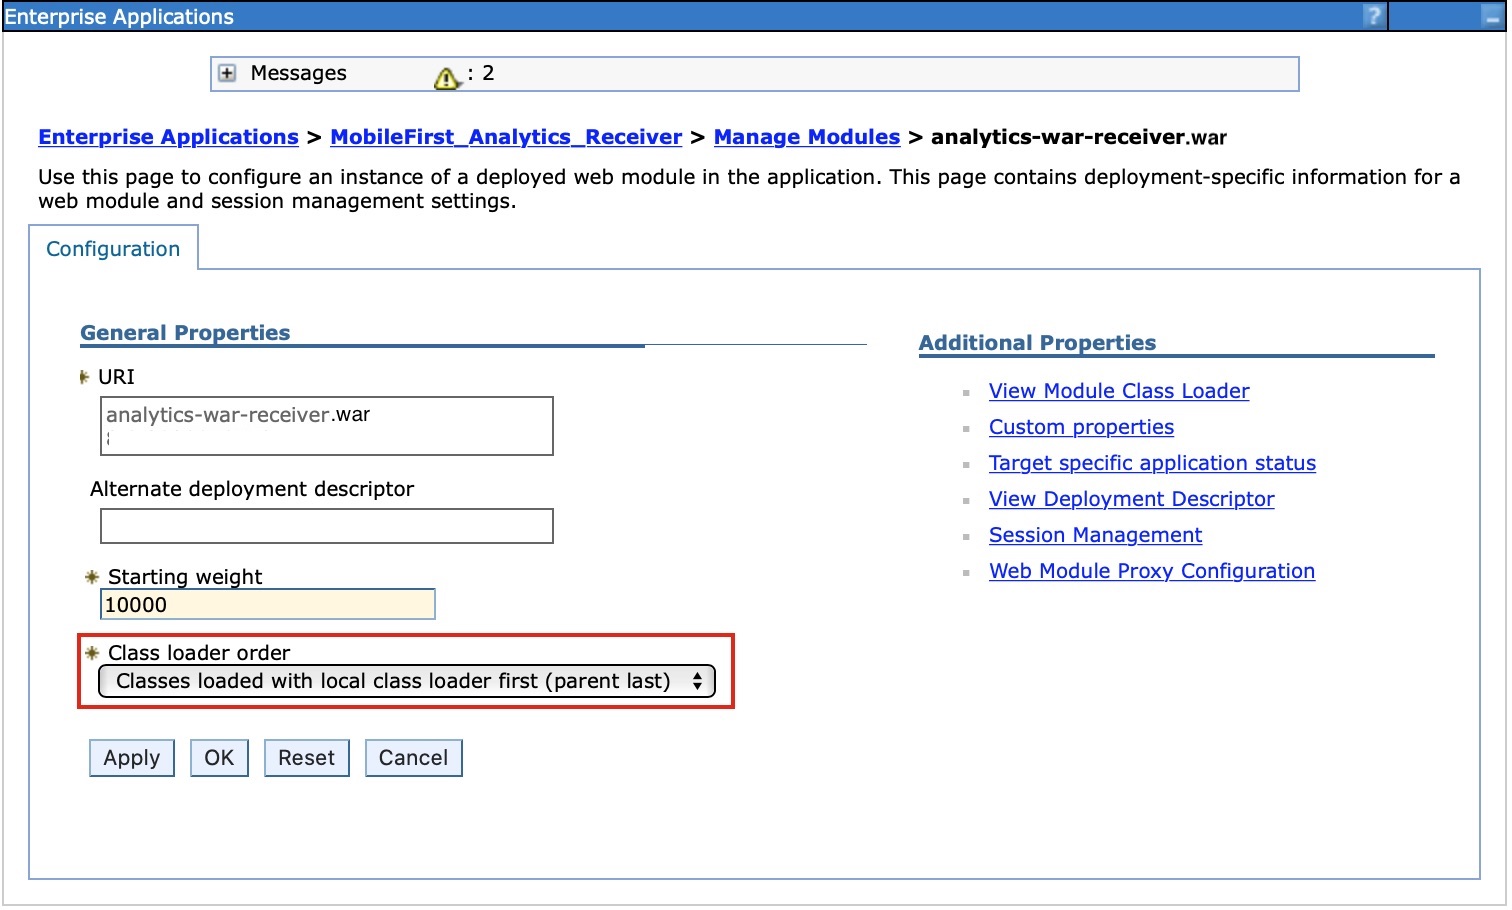
Click Manage Modules.
-
Select the analytics-receiver module and change the class loader order to parent last.
- Enable Administrative security and application security in the WebSphere Application Server administration console:
- Log in to the WebSphere Application Server administration console.
- In the Security > Global Security menu, ensure that Enable administrative security and Enable application security are both selected.
Note: Application security can be selected only after Administrative security is enabled.
- Click OK and save changes.
- To enable the analytics service to be accessed via Swagger documentation, complete the following steps:
- Click Servers > Server Types > WebSphere application servers and choose the server on which Analytics service is deployed, from the list of servers.
- Under Server Infrastructure, click Java and then navigate to process management > Process definition > Java virtual machine > Custom
properties.
- Set the following custom property
Property Name: com.ibm.ws.classloader.strict
Value: true
- Set the following custom property
- Start the MobileFirst Analytics Receiver application and verify the health url is accessible in the browser:
http://<hostname>:<port>/analytics-receiver/rest/data/health.
Installing MobileFirst Analytics Receiver with Ant tasks
Ensure that you have the necessary WAR and configuration files: analytics-receiver.war. For more information on the installation artifacts, see Installing MobileFirst Server to an application server. The analytics-receiver.war file is found in the MobileFirst_Platform_Server\AnalyticsReceiver.
You must run the Ant task on the computer where the application server is installed, or the Network Deployment Manager for WebSphere Application Server Network Deployment. If you want to start the Ant task from a computer on which MobileFirst Server is not installed, you must copy the file \<mf_server_install_dir\>/MobileFirstServer/mfp-ant-deployer.jar to that computer.
Note: The mf_server_install_dir is the directory where you installed MobileFirst Server.
- Edit the Ant script that you will use later to deploy MobileFirst Analytics Receiver WAR files.
- Review the sample configuration files in Sample configuration files for MobileFirst Analytics Receiver.
- Replace the placeholder values with the properties at the beginning of the file.
Note: The following special characters must be escaped when they are used in the values of the Ant XML scripts:
- The dollar sign ($) must be written as $$, unless you explicitly want to reference an Ant variable through the syntax ${variable}, as described in the Properties section of the Apache Ant Manual.
- The ampersand character (&) must be written as &, unless you explicitly want to reference an XML entity.
- Double quotation marks (“) must be written as ", except when it is inside a string that is enclosed in single quotation marks.
- To deploy the WAR file, run the following command:
ant -f configure-appServer-analytics-receiver.xml installYou can find the Ant command in
mf_server_install_dir/shortcuts. This installs a node of MobileFirst Analytics Receiver on the server or on each member of a cluster, if you install on WebSphere Application Server Network Deployment. - Save the Ant file. You might need it later to apply a fix pack or perform an upgrade.
If you do not want to save the passwords, you can replace them by
************(12 asterisks) for interactive prompting.
Inclusive terminology note: The Mobile First Platform team is making changes to support the IBM® initiative to replace racially biased and other discriminatory language in our code and content with more inclusive language. While IBM values the use of inclusive language, terms that are outside of IBM's direct influence are sometimes required for the sake of maintaining user understanding. As other industry leaders join IBM in embracing the use of inclusive language, IBM will continue to update the documentation to reflect those changes.