Android でのプッシュ通知の処理
improve this page | report issue概説
受け取ったプッシュ通知を Android アプリケーションが処理できるようにするためには、Google Play Services のサポートを構成する必要があります。 アプリケーションが構成されると、MobileFirst が提供する通知 API を使用して、デバイスの登録や登録抹消、タグへのサブスクライブやアンサブスクライブを実行できます。 このチュートリアルでは、Android アプリケーションでプッシュ通知を処理する方法について学習します。
前提条件
- 必ず、以下のチュートリアルをお読みください。
- ローカルで稼働している MobileFirst Server、またはリモートで稼働している MobileFirst Server
- 開発者ワークステーションに MobileFirst CLI がインストールされていること
ジャンプ先:
通知構成
新しい Android Studio プロジェクトを作成するか、または既存のプロジェクトを使用します。
MobileFirst Native Android SDK がプロジェクトにまだ存在しない場合は、Android アプリケーションへの Mobile Foundation SDK の追加チュートリアルの説明に従ってください。
プロジェクトのセットアップ
Google Cloud Messaging (GCM) は廃止され、Firebase Cloud Messaging (FCM) と統合されています。
FCM でのアプリケーションのセットアップは、古い GCM モデルと比較すると少し異なります。
- Firebase Messaging を使用するには、google-services.json ファイルが必要です。入手方法に関するドキュメントについては、ここをクリックしてください。
- 「Android アプリに Firebase を追加する」ウィンドウで、パッケージ名として
com.ibm.mobilefirstplatform.clientsdk.android.pushを使用します。
- 「Android アプリに Firebase を追加する」ウィンドウで、パッケージ名として
- 「Android」 → 「Gradle スクリプト」で、build.gradle (モジュール: アプリ) ファイルを選択し、
dependenciesに次の行を追加します。implementation group: 'com.ibm.mobile.foundation', name: 'ibmmobilefirstplatformfoundationpush', version: '8.0.+', ext: 'aar', transitive: true ``` または、単一行内: ```xml implementation 'com.ibm.mobile.foundation:ibmmobilefirstplatformfoundationpush:8.0.+' ``` >**注**: [Google Dynamic Delivery](https://developer.android.com/studio/projects/dynamic-delivery) フィーチャーを使用していて、MobileFirst API をフィーチャー・モジュールから呼び出したい場合は、「implementation」ではなく「api」宣言を使用してください。「implementation」を使用すると、同じモジュール自体で MobileFirst API の使用が制限され、「api」を使用すると、フィーチャー・モジュールを含むアプリ内のすべてのモジュールで MobileFirst API を利用できるようになります。詳しくは、[API and implementation separation](https://docs.gradle.org/current/userguide/java_library_plugin.html#sec:java_library_separation) をお読みください。 ```xml api 'com.ibm.mobile.foundation:ibmmobilefirstplatformfoundationpush:8.0.+' - Gradle ファイルを構成します。アプリの「build.gradle」ファイルに、以下を追加します。
dependencies { ...... compile 'com.google.firebase:firebase-messaging:17.6.0' ..... } apply plugin: 'com.google.gms.google-services'- ルート
build.gradleファイルの buildscript セクションに、次の従属関係を追加します。classpath 'com.google.gms:google-services:3.0.0'
注: Android Studio v3.2 以前を使用している場合は、各依存関係行にバージョン番号が 1 つだけ指定されるようにしてください。
- ルート
- Android →「app」→「manifests」で、
AndroidManifest.xmlファイルを開きます。-
以下の許可を
manifestタグの上部に追加します。<!-- Permissions --> <uses-permission android:name="android.permission.WAKE_LOCK" /> -
以下を
applicationタグに追加します。```xml
<!-- MFPPush Intent Service --><!-- MFPPush Instance ID Listener Service --> <service android:name="com.ibm.mobilefirstplatform.clientsdk.android.push.api.MFPPush" android:exported="true"> <intent-filter> <action android:name="com.google.firebase.INSTANCE_ID_EVENT" /> </intent-filter> </service>
android:theme="@android:style/Theme.NoDisplay"/> ``` * 以下の `intent-filter` をアプリケーションのアクティビティーに追加します。```xml
注: 必ず、ご使用のアプリケーションの実際のパッケージ名で
your.application.package.nameを置き換えてください。 -
-
Android Studio でアプリケーションを開きます。 ステップ 1 で作成した
google-services.jsonファイルをアプリケーション・ディレクトリー内にコピーします。google-service.jsonファイルには、追加したパッケージ名が含まれていることに注意してください。 - SDK をコンパイルします。 アプリケーションをビルドします。
通知 API
MFPPush インスタンス
すべての API 呼び出しは、MFPPush のインスタンスから呼び出される必要があります。 これを行うには、クラス・レベルのフィールド (private MFPPush push = MFPPush.getInstance(); など) を作成し、その後、クラス内で一貫して push.<api-call> を呼び出します。
代わりに、プッシュ API メソッドにアクセスする必要があるインスタンスごとに MFPPush.getInstance().<api_call> を呼び出すこともできます。
チャレンジ・ハンドラー
push.mobileclient スコープがセキュリティー検査にマップされる場合、プッシュ API を使用する前に、一致するチャレンジ・ハンドラーが存在し、登録済みであることを確認する必要があります。
チャレンジ・ハンドラーについて詳しくは、資格情報の検証チュートリアルを参照してください。
クライアント・サイド
| Java メソッド | 説明 |
|---|---|
initialize(Context context); |
提供されたコンテキストの MFPPush を初期化します。 |
isPushSupported(); |
デバイスがプッシュ通知をサポートするかどうか。 |
registerDevice(JSONObject, MFPPushResponseListener); |
デバイスをプッシュ通知サービスに登録します。 |
getTags(MFPPushResponseListener) |
プッシュ通知サービス・インスタンス内で使用可能なタグを取得します。 |
subscribe(String[] tagNames, MFPPushResponseListener) |
指定されたタグにデバイスをサブスクライブします。 |
getSubscriptions(MFPPushResponseListener) |
デバイスが現在サブスクライブしているタグをすべて取得します。 |
unsubscribe(String[] tagNames, MFPPushResponseListener) |
特定のタグからアンサブスクライブします。 |
unregisterDevice(MFPPushResponseListener) |
プッシュ通知サービスからデバイスを登録抹消します。 |
初期化
クライアント・アプリケーションが、正しいアプリケーション・コンテキストの MFPPush サービスに接続するために必要です。
- 最初に API メソッドを呼び出してから、その他の MFPPush API を使用する必要があります。
- 受け取ったプッシュ通知を処理するコールバック関数を登録します。
MFPPush.getInstance().initialize(this);
プッシュがサポートされるか
デバイスがプッシュ通知をサポートするかどうかをチェックします。
Boolean isSupported = MFPPush.getInstance().isPushSupported();

if (isSupported ) {
    // Push is supported
} else {
    // Push is not supported
}
デバイスの登録
デバイスをプッシュ通知サービスに登録します。
MFPPush.getInstance().registerDevice(null, new MFPPushResponseListener<String>() {
    @Override
    public void onSuccess(String s) {
        // Successfully registered
    }

    @Override
    public void onFailure(MFPPushException e) {
        // Registration failed with error
    }
});
タグの取得
プッシュ通知サービスからすべての使用可能なタグを取得します。
MFPPush.getInstance().getTags(new MFPPushResponseListener<List<String>>() {
    @Override
    public void onSuccess(List<String> strings) {
        // Successfully retrieved tags as list of strings
    }

    @Override
    public void onFailure(MFPPushException e) {
        // Failed to receive tags with error
    }
});
サブスクライブ
目的のタグにサブスクライブします。
String[] tags = {"Tag 1", "Tag 2"};

MFPPush.getInstance().subscribe(tags, new MFPPushResponseListener<String[]>() {
    @Override
    public void onSuccess(String[] strings) {
        // Subscribed successfully
    }

    @Override
    public void onFailure(MFPPushException e) {
        // Failed to subscribe
    }
});
サブスクリプションの取得
デバイスが現在サブスクライブしているタグを取得します。
MFPPush.getInstance().getSubscriptions(new MFPPushResponseListener<List<String>>() {
    @Override
    public void onSuccess(List<String> strings) {
        // Successfully received subscriptions as list of strings
    }

    @Override
    public void onFailure(MFPPushException e) {
        // Failed to retrieve subscriptions with error
    }
});
アンサブスクライブ
タグからアンサブスクライブします。
String[] tags = {"Tag 1", "Tag 2"};

MFPPush.getInstance().unsubscribe(tags, new MFPPushResponseListener<String[]>() {
    @Override
    public void onSuccess(String[] strings) {
        // Unsubscribed successfully
    }

    @Override
    public void onFailure(MFPPushException e) {
        // Failed to unsubscribe
    }
});
登録抹消
プッシュ通知サービス・インスタンスからデバイスを登録抹消します。
MFPPush.getInstance().unregisterDevice(new MFPPushResponseListener<String>() {
    @Override
    public void onSuccess(String s) {
        disableButtons();
        // Unregistered successfully
    }

    @Override
    public void onFailure(MFPPushException e) {
        // Failed to unregister
    }
});
プッシュ通知の処理
プッシュ通知を処理するためには、MFPPushNotificationListener をセットアップする必要があります。 これは、以下のいずれかのメソッドを実装することで実現できます。
オプション 1
プッシュ通知を処理する必要があるアクティビティー内で、以下のようにします。
implements MFPPushNofiticationListenerをクラス宣言に追加します。onCreateメソッド内でMFPPush.getInstance().listen(this)を呼び出すことで、このクラスがリスナーになるように設定します。-
次に、以下の必須 メソッドを追加する必要があります。
@Override public void onReceive(MFPSimplePushNotification mfpSimplePushNotification) { // Handle push notification here } - このメソッド内で
MFPSimplePushNotificationを受け取り、目的の動作にあわせて通知を処理できます。
オプション 2
下記の概略のように、MFPPush のインスタンスで listen(new MFPPushNofiticationListener()) を呼び出すことで、リスナーを作成します。
MFPPush.getInstance().listen(new MFPPushNotificationListener() {
    @Override
    public void onReceive(MFPSimplePushNotification mfpSimplePushNotification) {
        // Handle push notification here
    }
});
FCM SDK v19.x へのマイグレーション
古いバージョンの FCM SDK を使用している既存のアプリケーションの場合、最新の FCM SDK v19.x 以上を使用するには、AndroidX に Android プロジェクトをマイグレーションする必要があります。アプリケーションに以下を追加してください。
-
アプリの build.gradle ファイル内
-
build.gradleファイルから以下の依存関係を削除します``` dependencies { ... implementation 'com.android.support:appcompat-v7:28.0.0' implementation 'com.android.support:design:28.0.0' implementation 'com.android.support:support-v4:28.0.0' implementation 'com.google.firebase:firebase-messaging:17.6.0' ... } ``` -
以下の依存関係に置き換えます
```
	dependencies {
 			 ...
		implementation "com.google.firebase:firebase-messaging:20.0.0"
      implementation "androidx.appcompat:appcompat:1.1.0'"
      implementation "androidx.legacy:legacy-support-v4:1.0.0"
      implementation "com.google.android.material:material:1.1.0"
      ...
  }   ```
-
-
AndroidManifest ファイルを構成します。
AndroidManifest.xml>で以下の変更が必要です。-
以下の項目を変更する必要があります。
<service android:exported="true" android:name="com.ibm.mobilefirstplatform.clientsdk.android.push.api.MFPPushIntentService"> <intent-filter> <action android:name="com.google.firebase.MESSAGING_EVENT" /> </intent-filter> </service> -
これらの項目を以下のように変更します。
  <service android:exported="true" android:name="com.ibm.mobilefirstplatform.clientsdk.android.push.api.MFPPushNewIntentService">
      <intent-filter>
  		<action android:name="com.google.firebase.MESSAGING_EVENT" />
      </intent-filter>
  </service>
-
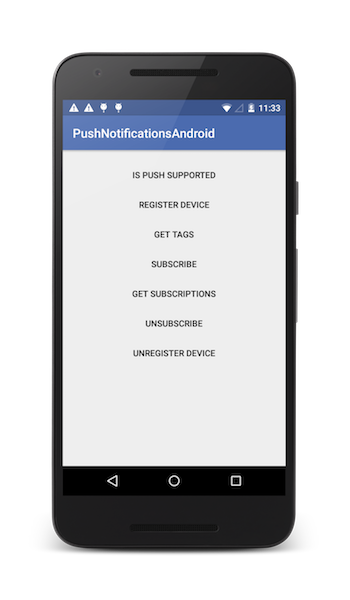
サンプル・アプリケーション
ここをクリック して Android Studio プロジェクトをダウンロードします。
サンプルの使用法
サンプルの README.md ファイルの指示に従ってください。
▲Inclusive terminology note: The Mobile First Platform team is making changes to support the IBM® initiative to replace racially biased and other discriminatory language in our code and content with more inclusive language. While IBM values the use of inclusive language, terms that are outside of IBM's direct influence are sometimes required for the sake of maintaining user understanding. As other industry leaders join IBM in embracing the use of inclusive language, IBM will continue to update the documentation to reflect those changes.