Android のエンドツーエンドのデモンストレーション
improve this page | report issue概説
このデモンストレーションの目的は、エンドツーエンドのフローを体験することです。
- MobileFirst クライアント SDK と事前にバンドルされているサンプル・アプリケーションは登録済みで、MobileFirst Operations Console からダウンロードされています。
- 新規または提供済みのアダプターは MobileFirst Operations Console にデプロイされています。
- アプリケーション・ロジックは、リソース要求を行うために変更されています。
終了結果:
- MobileFirst Server を正常に ping している。
- アダプターを使用してデータを正常に取得している。
前提条件:
1. MobileFirst Server の開始
Mobile Foundation インスタンスが作成済みであることを確認してください。作成済みでない場合は、
MobileFirst Developer Kitを使用しているときは、サーバーのフォルダーにナビゲートして、Mac および Linux では ./run.sh、Windows では run.cmd のコマンドを実行してください。
2. アプリケーションの作成
ブラウザー・ウィンドウで、URL http://your-server-host:server-port/mfpconsole をロードして MobileFirst Operations Console を開きます。 ローカルで実行している場合は、http://localhost:9080/mfpconsole を使用します。 ユーザー名/パスワードは admin/admin です。
- アプリケーションの隣の「新規」ボタンをクリックします。
- Android プラットフォームを選択します。
- com.ibm.mfpstarterandroid をアプリケーション ID として入力します。
- 1.0 を version の値として入力します。
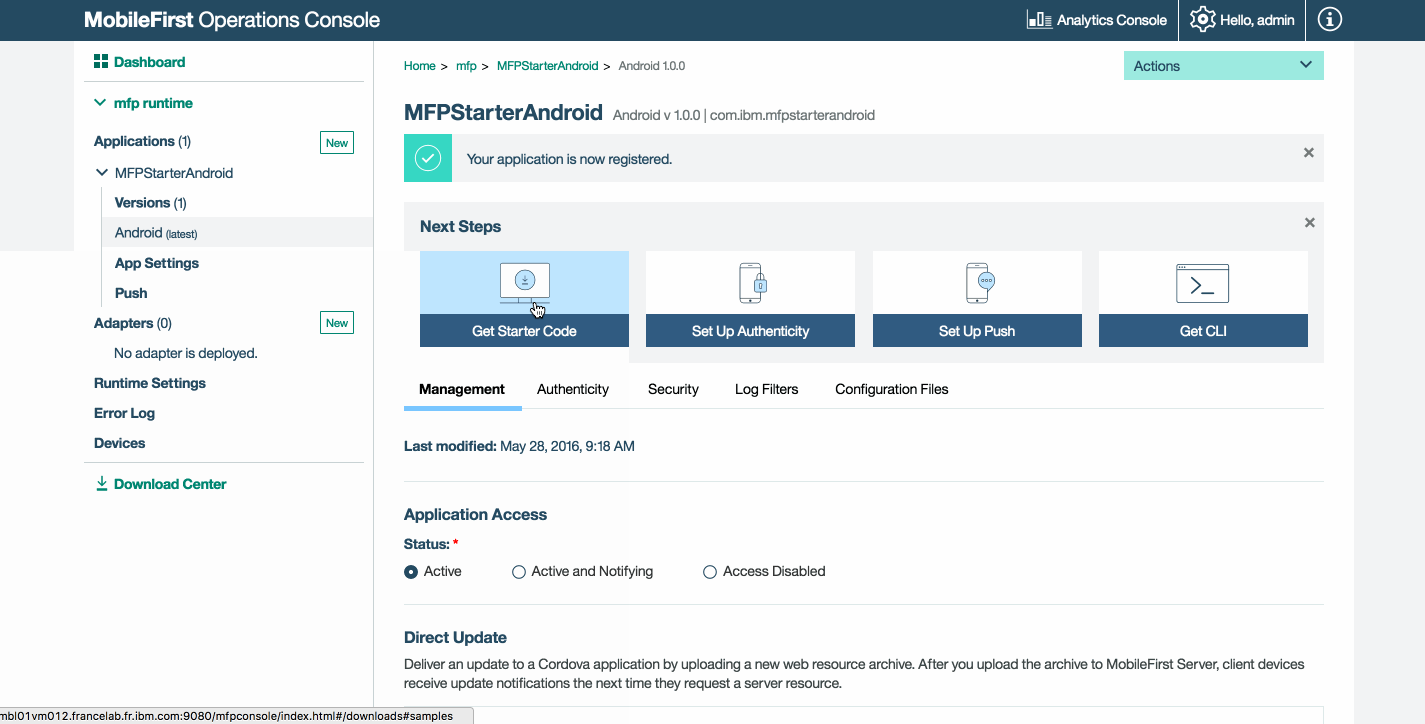
- 「アプリケーションの登録」をクリックします。

-
「スターター・コードの取得」タイルをクリックして、Android サンプル・アプリケーションをダウンロードすることを選択します。
3. アプリケーション・ロジックの編集
-
Android Studio プロジェクトを開いて、プロジェクトをインポートします。
-
「プロジェクト (Project)」サイドバー・メニューから、「app」→「Java」→「com.ibm.mfpstarterandroid」→「ServerConnectActivity.java」ファイルを選択します。
-
以下のインポートを追加します。
import java.net.URI; import java.net.URISyntaxException; import android.util.Log; -
以下のコード・スニペットを貼り付けて、
WLAuthorizationManager.getInstance().obtainAccessTokenへの呼び出しを置換します。WLAuthorizationManager.getInstance().obtainAccessToken("", new WLAccessTokenListener() { @Override public void onSuccess(AccessToken token) { System.out.println("Received the following access token value: " + token); runOnUiThread(new Runnable() { @Override public void run() { titleLabel.setText("Yay!"); connectionStatusLabel.setText("Connected to MobileFirst Server"); } }); URI adapterPath = null; try { adapterPath = new URI("/adapters/javaAdapter/resource/greet"); } catch (URISyntaxException e) { e.printStackTrace(); } WLResourceRequest request = new WLResourceRequest(adapterPath, WLResourceRequest.GET); request.setQueryParameter("name","world"); request.send(new WLResponseListener() { @Override public void onSuccess(WLResponse wlResponse) { // Will print "Hello world" in LogCat. Log.i("MobileFirst Quick Start", "Success: " + wlResponse.getResponseText()); } @Override public void onFailure(WLFailResponse wlFailResponse) { Log.i("MobileFirst Quick Start", "Failure: " + wlFailResponse.getErrorMsg()); } }); } @Override public void onFailure(WLFailResponse wlFailResponse) { System.out.println("Did not receive an access token from server: " + wlFailResponse.getErrorMsg()); runOnUiThread(new Runnable() { @Override public void run() { titleLabel.setText("Bummer..."); connectionStatusLabel.setText("Failed to connect to MobileFirst Server"); } }); } });
4. アダプターのデプロイ
この作成済みの .adapter 成果物をダウンロードし、MobileFirst Operations Console から「アクション」→「アダプターのデプロイ」アクションを使用して、この成果物をデプロイします。
あるいは、「アダプター」の隣の「新規」ボタンをクリックします。
-
「アクション」→「サンプルのダウンロード」オプションを選択します。 「Hello World」Java アダプターのサンプルをダウンロードします。
Maven および MobileFirst CLI がインストールされていない場合は、スクリーン内の「開発環境をセットアップします」の説明に従います。
-
コマンド・ライン・ウィンドウからアダプターの Maven プロジェクト・ルート・フォルダーにナビゲートし、以下のコマンドを実行します。
mfpdev adapter build -
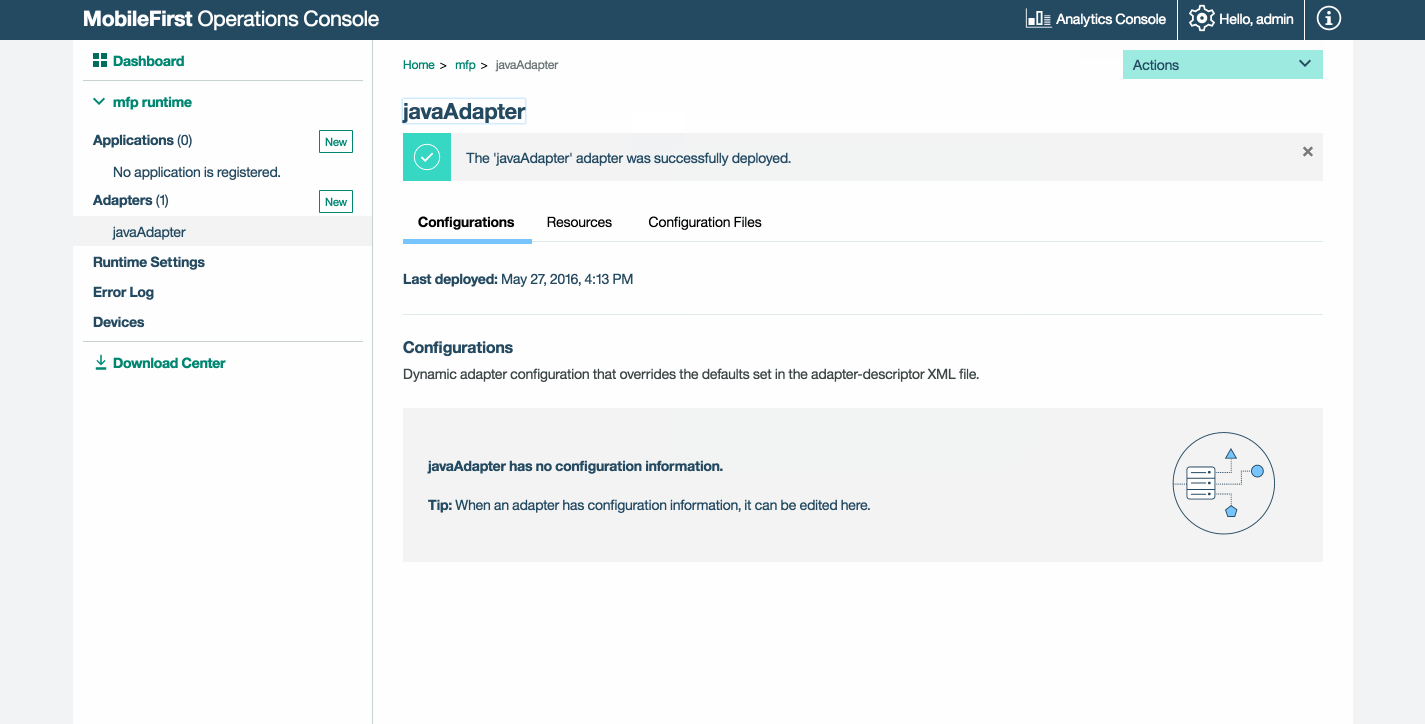
ビルドが終了したら、「アクション」→「アダプターのデプロイ」アクションを使用して MobileFirst Operations Console からアダプターをデプロイします。 アダプターは、[adapter]/target フォルダー内にあります。
5. アプリケーションのテスト
- Android Studio で、「プロジェクト (Project)」サイドバー・メニューで、「app」→「src」→「main」→「assets」→「mfpclient.properties」ファイルを選択し、ご使用の MobileFirst Server の正しい値で protocol、host、および port の各プロパティーを編集します。
- ローカル MobileFirst Server を使用している場合、通常、値は http、localhost、および 9080 です。
- リモート MobileFirst Server (IBM Cloud 上) を使用している場合、通常、値は https、your-server-address、および 443 です。
- IBM Cloud Private 上で Kubernetes クラスターを使用していて、デプロイメントのタイプが NodePort の場合、通常、ポートの値は、Kubernetes クラスターのサービスによって公開される NodePort です。
あるいは、MobileFirst CLI がインストール済みの場合は、プロジェクト・ルート・フォルダーにナビゲートし、コマンド
mfpdev app registerを実行します。 リモート MobileFirst Server が使用されている場合は、コマンドmfpdev server addを実行してサーバーを追加し、続いて、例えば、mfpdev app register myIBMCloudServerを実行します。 - 「アプリケーションの実行 (Run App)」ボタンをクリックします。
結果
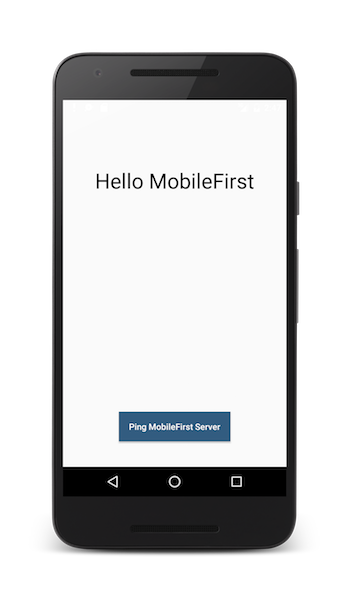
- 「MobileFirst Server への ping (Ping MobileFirst Server)」ボタンをクリックすると、「MobileFirst Server に接続されています (Connected to MobileFirst Server)」が表示されます。
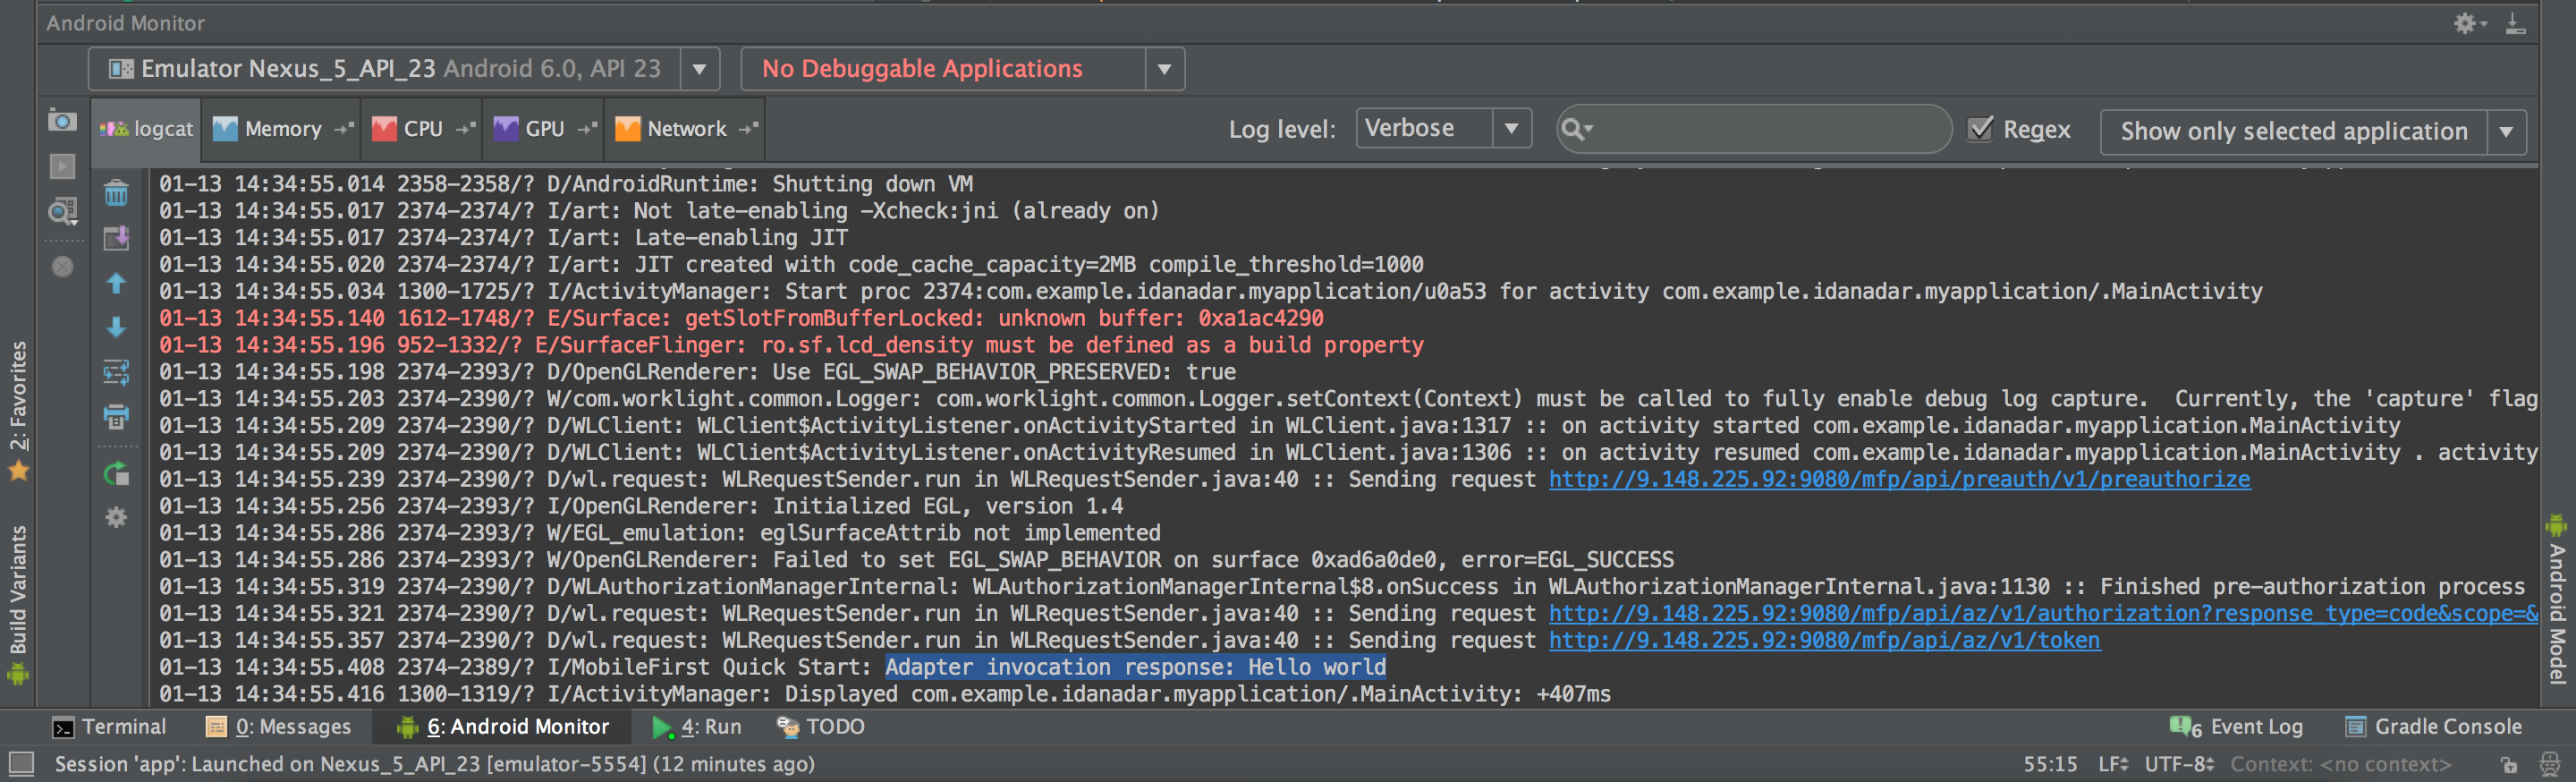
- アプリケーションが MobileFirst Server に接続できた場合は、デプロイした Java アダプターを使用してリソース要求呼び出しが行われます。
その場合、アダプター応答が Android Studio の LogCat ビューに出力されます。
次の手順
アプリケーションでのアダプターの使用、プッシュ通知などの追加のサービスを統合する方法、MobileFirst セキュリティー・フレームワークの使用などについて学習します。
- アプリケーションの開発チュートリアルを検討する
- アダプターの開発チュートリアルを検討する
- 認証およびセキュリティー・チュートリアルを検討する
- 通知チュートリアルを検討する
- すべてのチュートリアルを検討する
Inclusive terminology note: The Mobile First Platform team is making changes to support the IBM® initiative to replace racially biased and other discriminatory language in our code and content with more inclusive language. While IBM values the use of inclusive language, terms that are outside of IBM's direct influence are sometimes required for the sake of maintaining user understanding. As other industry leaders join IBM in embracing the use of inclusive language, IBM will continue to update the documentation to reflect those changes.