Android에서 푸시 알림 처리
improve this page | report issue개요
Android 애플리케이션이 수신된 푸시 알림을 처리할 수 있으려면 먼저 Google Play Services에 대한 지원을 구성해야 합니다. 애플리케이션이 구성되고 나면 디바이스를 등록 및 등록 취소하고 태그에 등록 및 등록 취소하기 위해 MobileFirst 제공 알림 API를 사용할 수 있습니다. 이 학습서에서는 Android 애플리케이션에서 푸시 알림을 처리하는 방법에 대해 학습합니다.
전제조건:
- 다음과 같은 학습서를 읽어야 합니다.
- MobileFirst Server가 로컬로 실행되거나 MobileFirst Server가 원격으로 실행 중입니다.
- MobileFirst CLI가 개발자 워크스테이션에 설치되어 있습니다.
다음으로 이동:
알림 구성
새 Android Studio 프로젝트를 작성하거나 기존 프로젝트를 사용하십시오.
MobileFirst 네이티브 Android SDK가 아직 프로젝트에 없는 경우 Android 애플리케이션에 Mobile Foundation SDK 추가 학습서의 지시사항을 따르십시오.
프로젝트 설정
GCM(Google Cloud Messaging)은 단종되었으며, FCM(Firebase Cloud Messaging)과 통합되었습니다.
FCM에서 애플리케이션을 설정하는 작업은 이전 GCM 모델에서와는 조금 다릅니다.
- Firebase 메시징을 사용하려면 google-services.json 파일이 필요합니다. 이를 가져오는 방법에 대한 문서를 보려면 여기를 클릭하십시오.
- 사용자 Android 앱에 Firebase 추가 창에서 패키지 이름으로
com.ibm.mobilefirstplatform.clientsdk.android.push를 사용하십시오.
- 사용자 Android 앱에 Firebase 추가 창에서 패키지 이름으로
-
Android → Gradle 스크립트에서 build.gradle (Module: app) 파일을 선택한 후 다음 행을
dependencies에 추가하십시오.xml implementation group: 'com.ibm.mobile.foundation', name: 'ibmmobilefirstplatformfoundationpush', version: '8.0.+', ext: 'aar', transitive: true또는 단일 행으로 다음 행을 추가하십시오.
xml implementation 'com.ibm.mobile.foundation:ibmmobilefirstplatformfoundationpush:8.0.+'참고: Google Dynamic Delivery 기능을 사용 중이고 기능 모듈에서 MobileFirst API를 호출하려는 경우
implementation대신api선언을 사용하십시오.api를 사용하면 기능 모듈을 포함한 앱에 있는 모든 모듈에서 MobileFirst API가 사용 가능하도록 하는 반면implementation을 사용하면 동일한 모듈 자체 내로만 MobileFirst API 사용을 제한합니다. 세부사항은 API 및 구현 분리를 읽으십시오.
api 'com.ibm.mobile.foundation:ibmmobilefirstplatformfoundationpush:8.0.+'
-
Gradle 파일을 구성하십시오. 앱의
build.gradle파일에 다음을 추가하십시오.dependencies { ...... compile 'com.google.firebase:firebase-messaging:17.6.0' ..... } apply plugin: 'com.google.gms.google-services'- 루트
build.gradle파일의 buildscript 섹션에 다음 종속성을 추가하십시오.classpath 'com.google.gms:google-services:3.0.0'
참고: Android Studio v3.2 이하를 사용 중인 경우 각 종속성 행에 하나의 버전 번호만 지정되어 있는지 확인하십시오.
- 루트
- Android → 앱 → Manifest에서
AndroidManifest.xml파일을 여십시오.-
manifest태그 맨 위에 다음과 같은 권한을 추가하십시오.<!-- Permissions --> <uses-permission android:name="android.permission.WAKE_LOCK" /> -
application태그에 다음을 추가하십시오.```xml
<!-- MFPPush Intent Service --><!-- MFPPush Instance ID Listener Service --> <service android:name="com.ibm.mobilefirstplatform.clientsdk.android.push.api.MFPPush" android:exported="true"> <intent-filter> <action android:name="com.google.firebase.INSTANCE_ID_EVENT" /> </intent-filter> </service>
android:theme="@android:style/Theme.NoDisplay"/> ``` * 애플리케이션의 활동에 다음 `intent-filter`를 추가하십시오.```xml
참고:
your.application.package.name을 애플리케이션의 실제 패키지 이름으로 대체해야 합니다. -
-
Android Studio에서 앱을 여십시오. 앱 디렉토리 내 step-1에서 작성한
google-services.json파일을 복사하십시오.google-service.json파일은 추가된 패키지 이름을 포함합니다. - SDK를 컴파일하십시오. 애플리케이션을 빌드하십시오.
알림 API
MFPPush 인스턴스
모든 API 호출은 MFPPush의 인스턴스에서 호출되어야 합니다. 이는 private MFPPush push = MFPPush.getInstance(); 등의 클래스 레벨 필드를 작성한 후 클래스 전체에서 push.<api-call>을 호출하여 수행될 수 있습니다.
또는 푸시 API 메소드에 액세스해야 하는 각 인스턴스에 대해 MFPPush.getInstance().<api_call>을 호출할 수 있습니다.
인증 확인 핸들러
push.mobileclient 범위가 보안 검사에 맵핑되는 경우에는 푸시 API를 사용하기 전에 일치하는 인증 확인 핸들러가 존재하며 등록되어 있는지 확인해야 합니다.
인증 정보 유효성 검증 학습서에서 인증 확인 핸들러에 대해 자세히 알아보십시오.
클라이언트 측
| Java 메소드 | 설명 |
|---|---|
initialize(Context context); |
제공된 컨텍스트에 대해 MFPPush를 초기화합니다. |
isPushSupported(); |
디바이스가 푸시 알림을 지원하는지 확인합니다. |
registerDevice(JSONObject, MFPPushResponseListener); |
디바이스를 푸시 알림 서비스에 등록합니다. |
getTags(MFPPushResponseListener) |
푸시 알림 서비스 인스턴스에서 사용 가능한 태그를 검색합니다. |
subscribe(String[] tagNames, MFPPushResponseListener) |
디바이스를 지정된 태그에 등록합니다. |
getSubscriptions(MFPPushResponseListener) |
디바이스가 현재 등록된 모든 태그를 검색합니다. |
unsubscribe(String[] tagNames, MFPPushResponseListener) |
특정 태그에서 등록 취소합니다. |
unregisterDevice(MFPPushResponseListener) |
푸시 알림 서비스에서 디바이스를 등록 취소합니다. |
초기화
클라이언트 애플리케이션이 올바른 애플리케이션 컨텍스트를 사용하여 MFPPush 서비스에 연결하기 위해 필요합니다.
- 다른 MFPPush API를 사용하기 전에 먼저 API 메소드를 호출해야 합니다.
- 수신된 푸시 알림을 처리하도록 콜백 함수를 등록합니다.
MFPPush.getInstance().initialize(this);
푸시가 지원되는지 여부
디바이스가 푸시 알림을 지원하는지 확인합니다.
Boolean isSupported = MFPPush.getInstance().isPushSupported();

if (isSupported ) {
    // Push is supported
} else {
    // Push is not supported
}
디바이스 등록
디바이스를 푸시 알림 서비스에 등록합니다.
MFPPush.getInstance().registerDevice(null, new MFPPushResponseListener<String>() {
    @Override
    public void onSuccess(String s) {
        // Successfully registered
    }

    @Override
    public void onFailure(MFPPushException e) {
        // Registration failed with error
    }
});
태그 가져오기
푸시 알림 서비스에서 사용 가능한 모든 태그를 검색합니다.
MFPPush.getInstance().getTags(new MFPPushResponseListener<List<String>>() {
    @Override
    public void onSuccess(List<String> strings) {
        // Successfully retrieved tags as list of strings
    }

    @Override
    public void onFailure(MFPPushException e) {
        // Failed to receive tags with error
    }
});
등록
원하는 태그에 등록합니다.
String[] tags = {"Tag 1", "Tag 2"};

MFPPush.getInstance().subscribe(tags, new MFPPushResponseListener<String[]>() {
    @Override
    public void onSuccess(String[] strings) {
        // Subscribed successfully
    }

    @Override
    public void onFailure(MFPPushException e) {
        // Failed to subscribe
    }
});
등록 가져오기
디바이스가 현재 등록된 태그를 검색합니다.
MFPPush.getInstance().getSubscriptions(new MFPPushResponseListener<List<String>>() {
    @Override
    public void onSuccess(List<String> strings) {
        // Successfully received subscriptions as list of strings
    }

    @Override
    public void onFailure(MFPPushException e) {
        // Failed to retrieve subscriptions with error
    }
});
등록 취소
태그에서 등록 취소합니다.
String[] tags = {"Tag 1", "Tag 2"};

MFPPush.getInstance().unsubscribe(tags, new MFPPushResponseListener<String[]>() {
    @Override
    public void onSuccess(String[] strings) {
        // Unsubscribed successfully
    }

    @Override
    public void onFailure(MFPPushException e) {
        // Failed to unsubscribe
    }
});
등록 취소
푸시 알림 서비스 인스턴스에서 디바이스를 등록 취소합니다.
MFPPush.getInstance().unregisterDevice(new MFPPushResponseListener<String>() {
    @Override
    public void onSuccess(String s) {
        disableButtons();
        // Unregistered successfully
    }

    @Override
    public void onFailure(MFPPushException e) {
        // Failed to unregister
    }
});
푸시 알림 처리
푸시 알림을 처리하려면 MFPPushNotificationListener를 설정해야 합니다. 이는 다음 메소드 중 하나를 구현하여 수행할 수 있습니다.
옵션 1
푸시 알림을 처리할 활동에서
- 클래스 선언에
implements MFPPushNofiticationListener를 추가하십시오. onCreate메소드에서MFPPush.getInstance().listen(this)를 호출하여 클래스를 리스너로 설정하십시오.-
그런 다음 아래의 필수 메소드를 추가해야 합니다.
@Override public void onReceive(MFPSimplePushNotification mfpSimplePushNotification) { // Handle push notification here } - 이 메소드에서 사용자는
MFPSimplePushNotification을 수신하고 원하는 작동에 대한 알림을 처리할 수 있습니다.
옵션 2
아래에 개략적으로 설명된 대로 MFPPush의 인스턴스에서 listen(new MFPPushNofiticationListener())를 호출하여 리스너를 작성하십시오.
MFPPush.getInstance().listen(new MFPPushNotificationListener() {
    @Override
    public void onReceive(MFPSimplePushNotification mfpSimplePushNotification) {
        // Handle push notification here
    }
});
FCM SDK v19.x로 마이그레이션
이전 버전의 FCM SDK를 사용하는 기존 애플리케이션의 경우 최신 FCM SDK v19.x 이상을 사용하려면 Android 프로젝트를 AndroidX로 마이그레이션해야 합니다. 해당 애플리케이션에 아래 사항을 추가하십시오.
-
앱의 build.gradle 파일에서
-
build.gradle파일에서 아래 종속 항목을 제거하십시오.``` dependencies { ... implementation 'com.android.support:appcompat-v7:28.0.0' implementation 'com.android.support:design:28.0.0' implementation 'com.android.support:support-v4:28.0.0' implementation 'com.google.firebase:firebase-messaging:17.6.0' ... } ``` -
아래 종속 항목으로 대체하십시오.
```
	dependencies {
 			 ...
		implementation "com.google.firebase:firebase-messaging:20.0.0"
      implementation "androidx.appcompat:appcompat:1.1.0'"
      implementation "androidx.legacy:legacy-support-v4:1.0.0"
      implementation "com.google.android.material:material:1.1.0"
      ...
  }   ```
-
-
AndroidManifest 파일을 구성하십시오.
AndroidManifest.xml에서 다음과 같이 변경해야 합니다.-
다음 항목은 수정이 필요합니다.
<service android:exported="true" android:name="com.ibm.mobilefirstplatform.clientsdk.android.push.api.MFPPushIntentService"> <intent-filter> <action android:name="com.google.firebase.MESSAGING_EVENT" /> </intent-filter> </service> -
이 항목을 다음으로 수정하십시오.
  <service android:exported="true" android:name="com.ibm.mobilefirstplatform.clientsdk.android.push.api.MFPPushNewIntentService">
      <intent-filter>
  		<action android:name="com.google.firebase.MESSAGING_EVENT" />
      </intent-filter>
  </service>
-
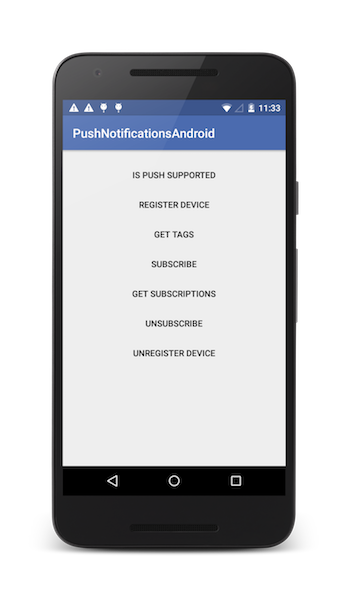
샘플 애플리케이션
Android Studio 프로젝트를 클릭하여 다운로드하십시오.
샘플 사용법
샘플의 README.md 파일에 있는 지시사항을 따르십시오.
▲Inclusive terminology note: The Mobile First Platform team is making changes to support the IBM® initiative to replace racially biased and other discriminatory language in our code and content with more inclusive language. While IBM values the use of inclusive language, terms that are outside of IBM's direct influence are sometimes required for the sake of maintaining user understanding. As other industry leaders join IBM in embracing the use of inclusive language, IBM will continue to update the documentation to reflect those changes.