MobileFirst Platform Foundation 7.1 Performance Testing for Session Independent Mode (OAuth model)
Nir Grande October 25, 2016
MobileFirst_Platform Performance Testing OAuth


##Overview The purpose of this page is to describe how to run performance tests on the different features of the MFP Server. In this post, an Apache JMeter performance test is used and Java classes are compiled especially for JMeter.
There are two descriptions in this post:
- MFP flow - The standard MFP flow, starting from the client request and ending with the reception of a valid access token.
- Test flow - A JMeter test flow that emulates an MFP client. A zip file containing the files that are used in the JMeter flow below has been provided. Read more here.
Before we describe the actual test flow, let us consider the OAuth flow:
OAuth flow with Java adapter
The OAuth 2.0 protocol is based on acquiring an access token, which encapsulates the authorization that is granted to the client. In that context, the IBM MobileFirst Platform Server serves as an authorization server and is able to generate such tokens. The client can then use these tokens to access resources on a resource server, which can be either the MobileFirst Server itself, or an external server. The resource servers perform validation on the token to make sure that the client can be granted access to the requested resource. This separation between resource server and authorization server in the new OAuth-based model allows you to enforce MobileFirst security on resources that are running outside the MobileFirst Server.
MFP flow
The resource in this flow is Java adapter
Registration - This phase occurs once in the lifetime of a mobile app that is installed on a device. In this phase, the client registers itself with the MobileFirst Server. When application authenticity has been configured, it is activated during registration.
Authorization - In this phase, the client has to undergo specific security checks, according to the scope of the authorization request. All the security checks supported by MobileFirst can be used in this phase (built-in realms such as remoteDisable and others, custom realms, and adapter-based authentication).
Token - After successful authorization, the client is redirected to the token endpoint, where it is authenticated using the PKI trust that was established during the registration phase. The endpoint then generates two sets of tokens and sends them back to the client: an access token, which encapsulates all the security checks that the client has passed in the authorization phase and an ID token, which contains information regarding the user and device identity of the client.
Access resource - From this point it is possible to access the resource, either an adapter or an external resource, with a valid token.
Test flow
- Prerequisite - Before running the script, ensure that the MFP Server is up. Deploy the application and also copy all the dependencies as mentioned below.
- Registration - In this test this step is bypassed by adding the clients directly to the database. It is a single action in the application life cycle that should have no effect on performance.
- Authorization - In the test, authorization is required for the
antiXSRFanddeviceNoProvisioningrealms. This means that the client has to extract the correct instance id and device token in order to successfully pass the authorization phase and get a valid grant code. - Sign grant code - This Java class mimics client behavior by signing the grant code that was received in the authorization phase.
- Token - The client sends the signed grant code and receives an access token and ID token. These values are then extracted by JMeter.
- A sample REST API call - Shows how to access the resource endpoint with a valid token.
JMeter is used here for simulating an MFP client. It lets you use hundreds of threads, each thread holding a large number of fake devices. Using this method, you can stress the MFP server according to your needs. This flow describes a single client session with several requests.
Prerequisite
-
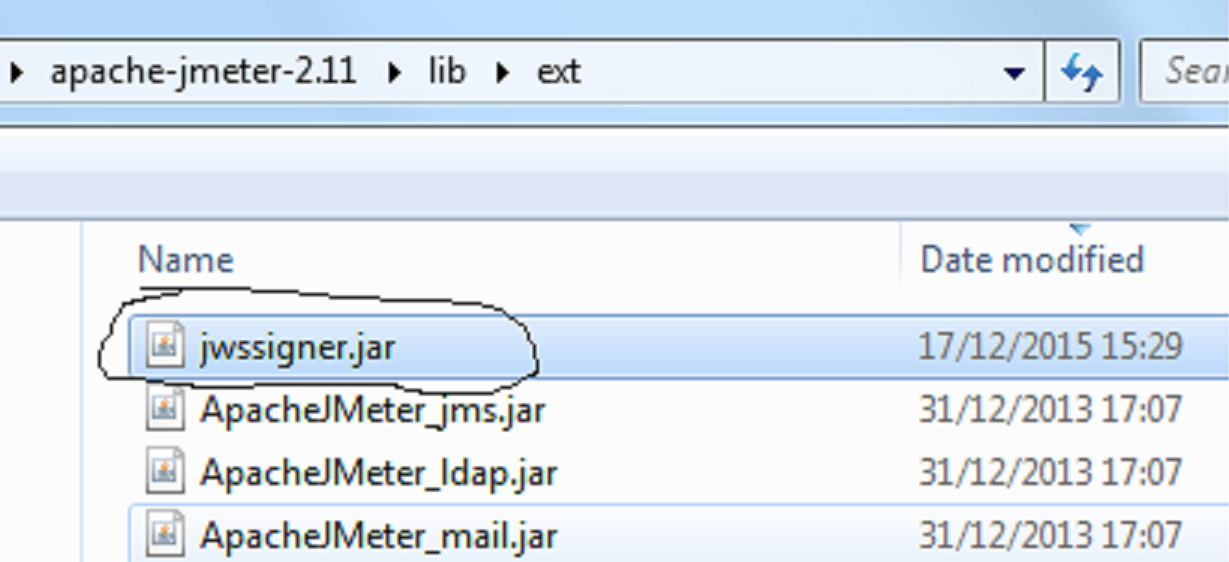
Import the Java class that has been provided to the /lib/ext folder in JMeter.
-
Deploy the
testapp. The application is needed for the registration procedure. The application is protected by the default security test that includesantiXSRFrealm. If your app is protected by other realms, you must answer all these challenges successfully before getting the grant code.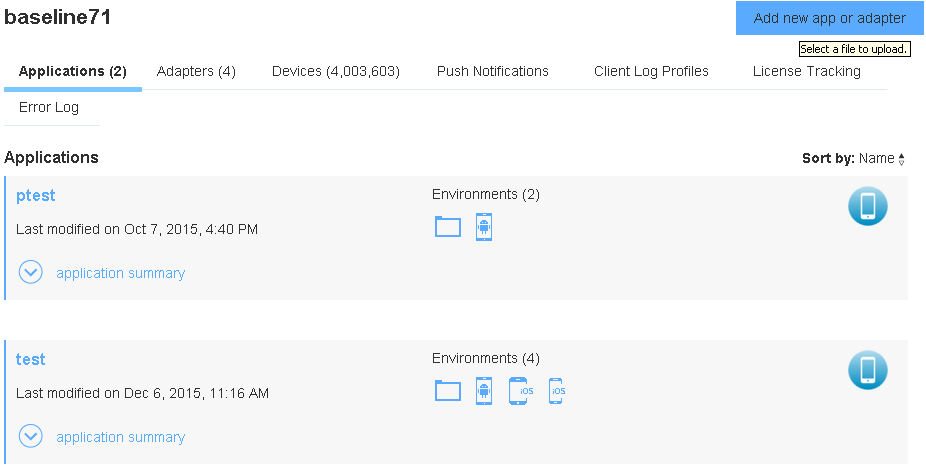
Registration
The registration flow occurs during the first client server negotiation and is written to the CLIENT_INSTANCES table. Only registered clients can access MFP resources.
Registration is a single action that should have no effect on performance. We did not implement this operation inside JMeter script.
The CLIENT INSTANCES table has been populated with pairs of coordinated client_id and device_id. This data will be used later by JMeter.
The following SQL command inserts clients into the CLIENT_INSTANCES table:
insert into CLIENT_INSTANCES values (count ,'test','1.0','ANDROID',blob(x'30819F300D06092A864886F70D010101050003818D00308189028181009A8757DC39A58B28210FC8367385B2920C02C647C4A82411FFD5B0C0B60985EAE4A785760D1CB8213E01B1AABBA4D71031D769387F62D501690CF4E870D9A8E78A9A613E112CA9759B40C4F839E84E502880EEA56B5A316971C3E7D270A003DF4453FC4FC69247DD2B7204724599D60335B6F542C7FDD84380B1B7183E23A2C90203010001'),count,'Android-4.2.2','Lenovo S750');
You can use the DB2 sql script that is attached in the zip file below.
Parameters:
count- Variable that represents the client id and device idtest- Application name1.0- Application versionANDROID- Application environmentblob- Constant public key
The default insert command assumes you have an application called test in an ANDROID environment. Ensure that you have deployed such a dummy application. Wrap this command according to your needs and to the tool you use.
Please note that the command inserts the public key that is used by the Java class. This value should not be changed.
Authorization
Authorization involves a set of requests, with which the client eventually receives a grant code after successfully handling all challenges.
Send the appropriate headers for each request.
The following are the default headers for all requests:
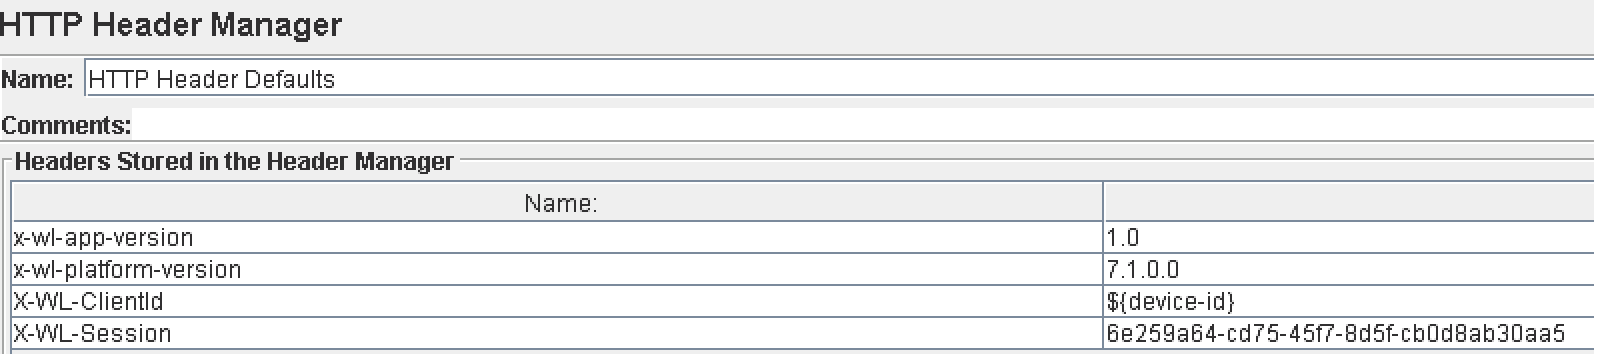
x-wl-app-version: Version of your appx-wl-platform-version: MFP platform version (for 7.1, do not change)X-WL-ClientId- Client IDX-WL-Session- Any string for session ID
Now we will demonstrate the authorization process in two phases:
Authorization1
Sends a request to authorization in order to get the challenges back and extract them:
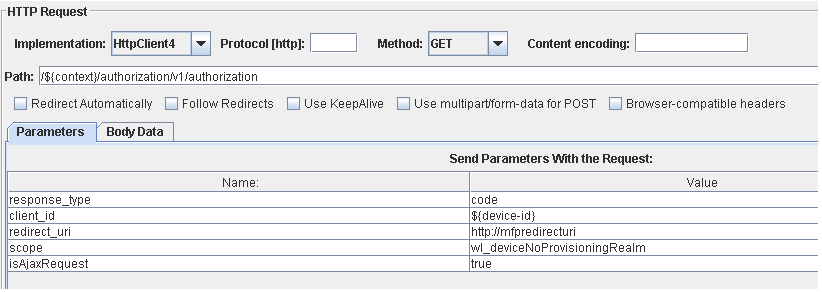
client id- The client that is used during the sessionscope- App is protected byanti-XSRF. We will add another challenge -deviceNoProvisioning- to the authorization by using the scope parameter. If you have a different authentication flow, change this parameter accordingly.
Use your own values for scope and client id. Leave all the other parameters as they appear here.
The Server returns the anti-XSRF and deviceNoProvisioning realm challenges:

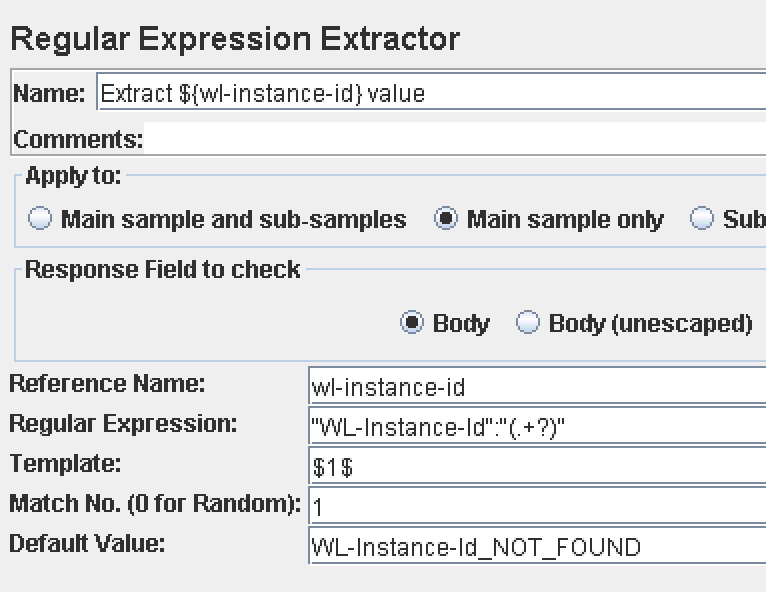
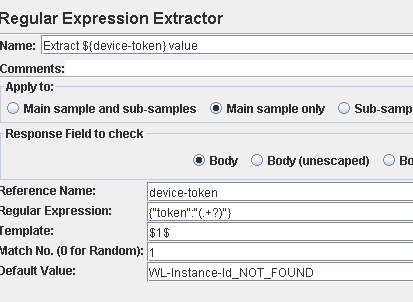
Extract the wl-instance-Id and the device-token from the response and send them as headers in all requests to the MFP Server. If you do not, the authentication check will fail and the request will be rejected. Challenge data is different for each session, so you need to extract and store the challenge data for each thread:
Extract instance-id
Extract device token
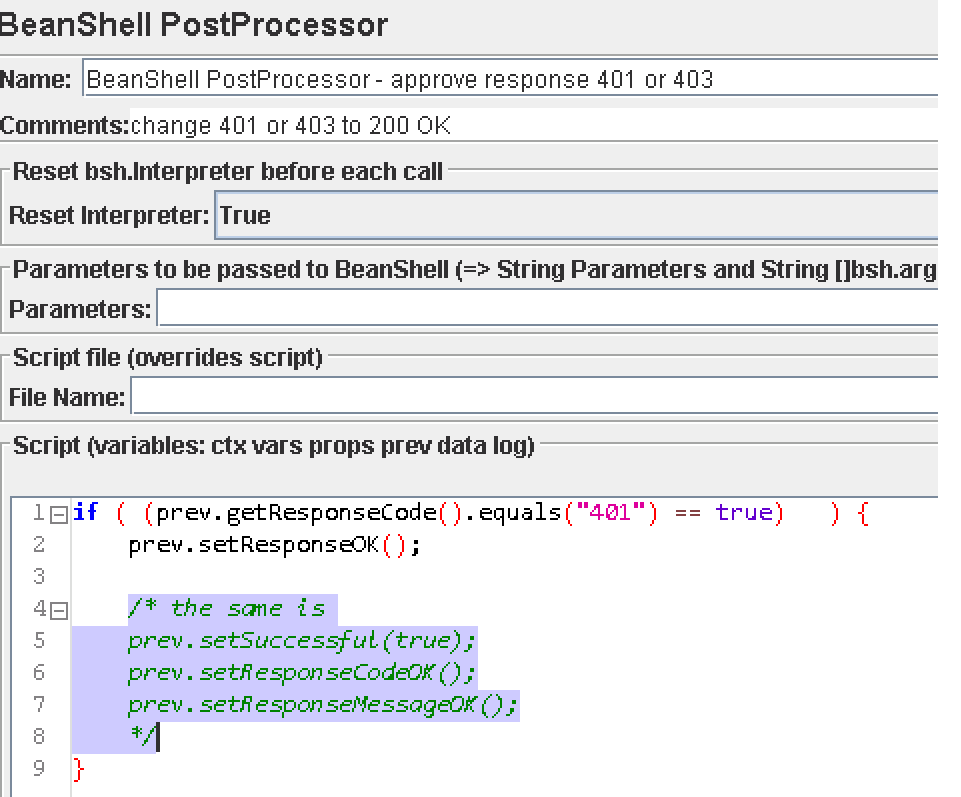
Change response status to HTTP 200
When JMeter performs initialization the first time, MFP Server will respond with an HTTP 401 status. This is as expected, so the performance tool should treat this HTTP status as a success, too. You may consider changing the HTTP status to HTTP 200. Otherwise, JMeter reports this request as “failed” and records it as an error, thus impacting significantly on the performance testing report.
Authorization2
First, add the extracted values of the previous request (device-token + instance-id) as headers:

Now, execute the same authorization request again, with the same parameters.
The expected response is 307 and the server sends the grant code:
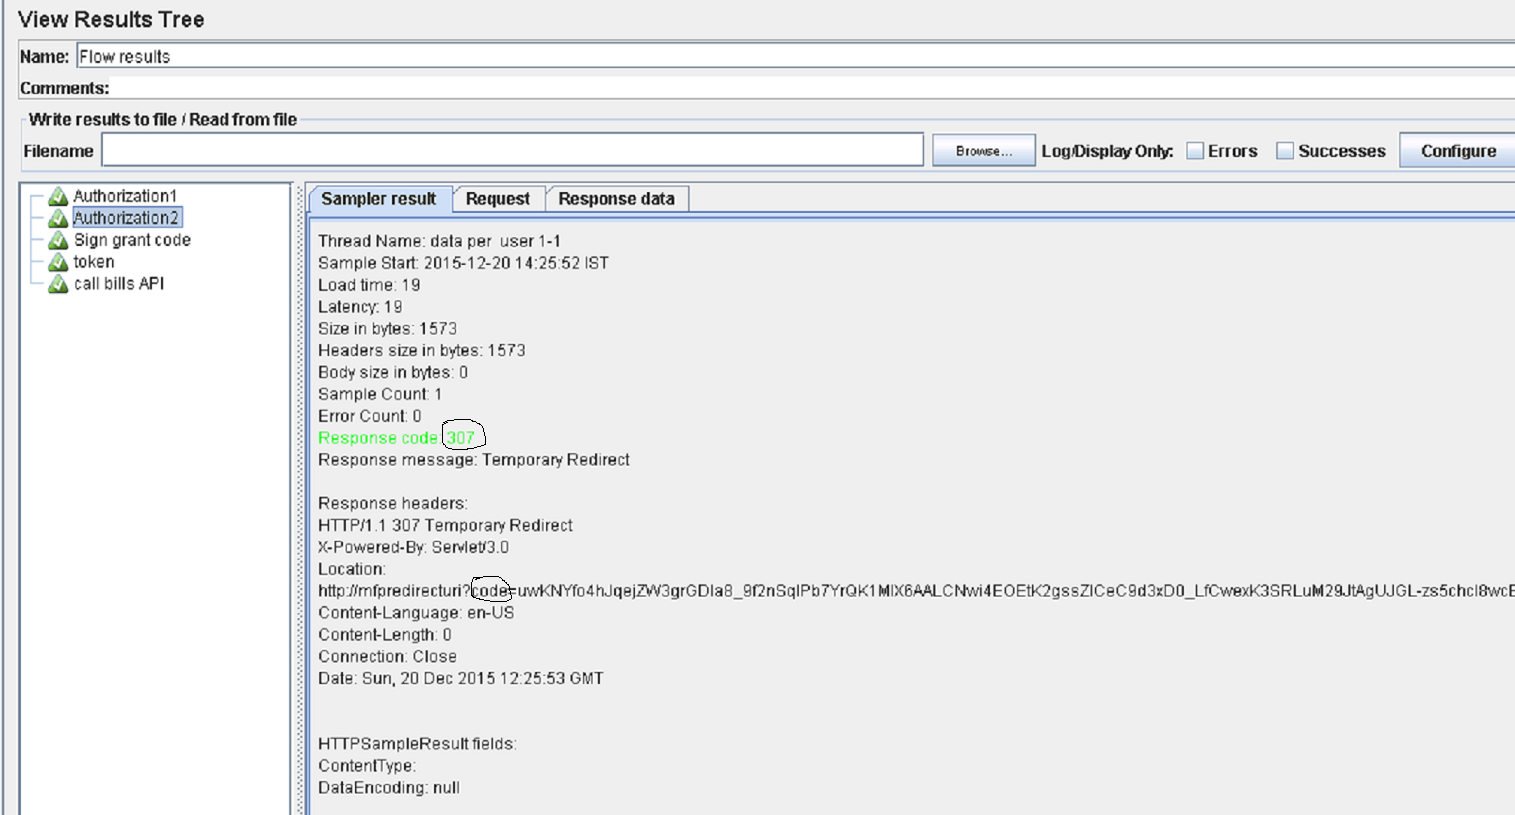
The grant code is extracted by JMeter:
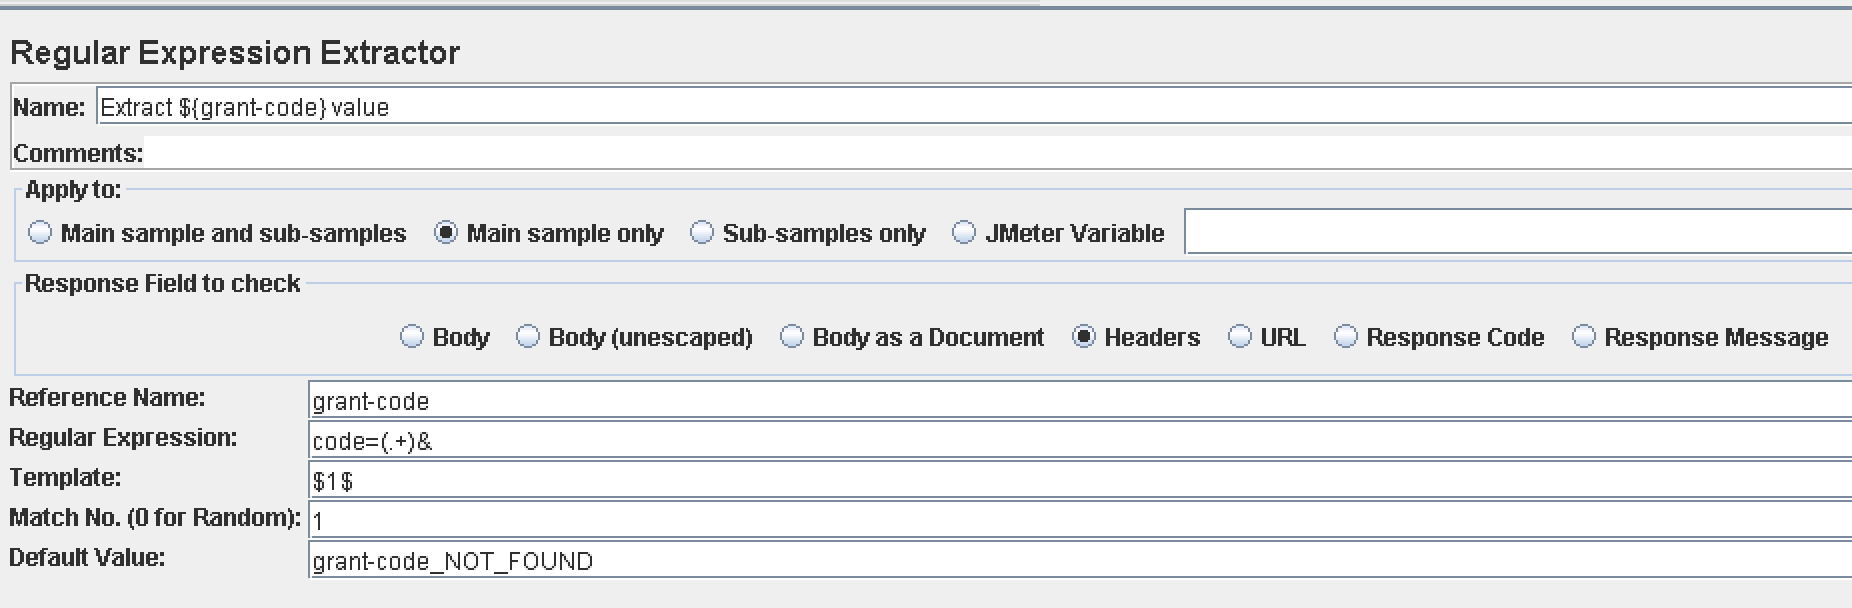
Sign grant code
This phase is an internal JMeter operation in order to sign the grant code.
Ensure that the jmeter.jwscreator class name is selected.
The class gets the payload parameter (extracted grant code) and signs the grant code with the constant public key, which was already inserted using the registration script.
The class signs the grant code and returns the jws parameter to be used as a header to get the access token:

Token
This is the final authorization step. At the end of this flow, the client receives the access token that will be used to access the resource endpoint.
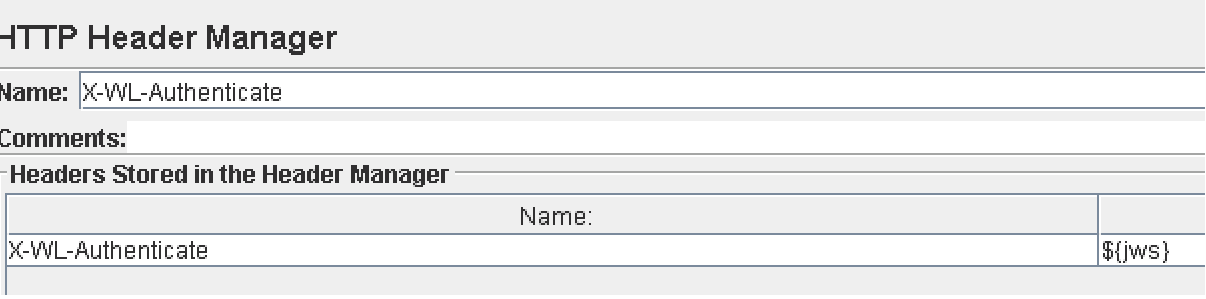
Add the X-WL-Authenticate header, returned by the sign grant code Java request:
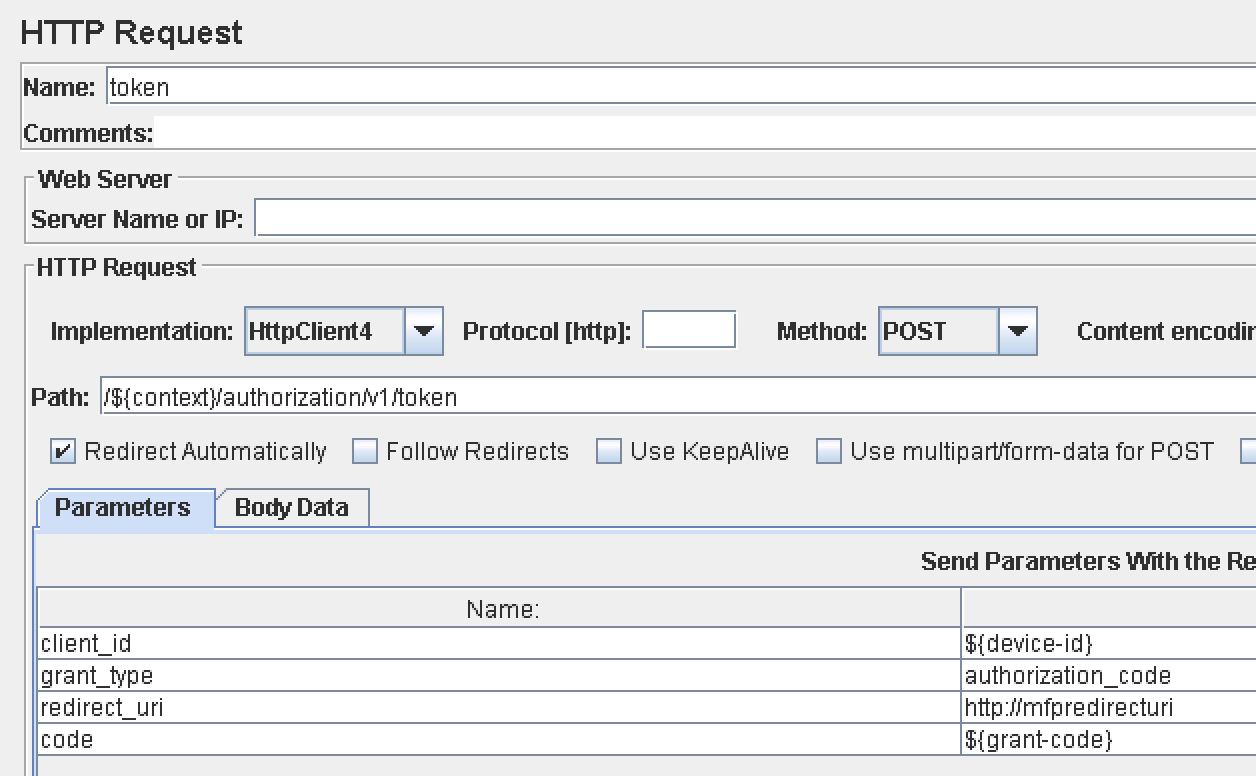
Token request: Pass in four parameters including two dynamic – client_id and code:
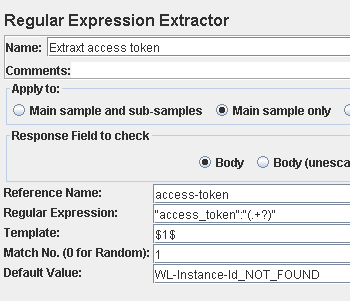
In the response you get access_token and id_token:
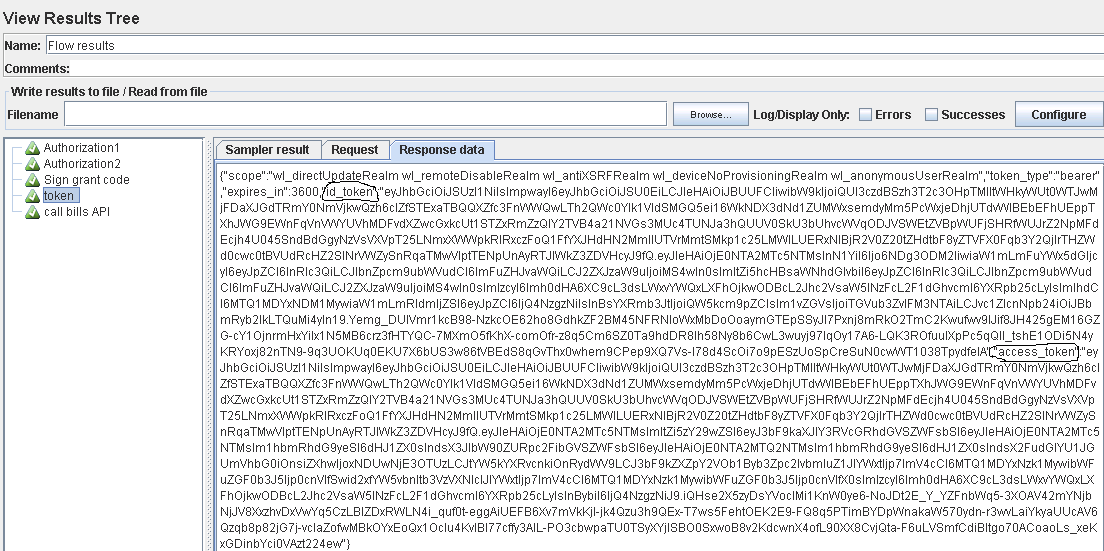
Extract both parameters: access_token and id_token

The above steps should work as-is on any target server, assuming the server URL and context path are correct.
The context path is a user-defined parameter, and server URL can be configured in the **HTTP request defaults section.
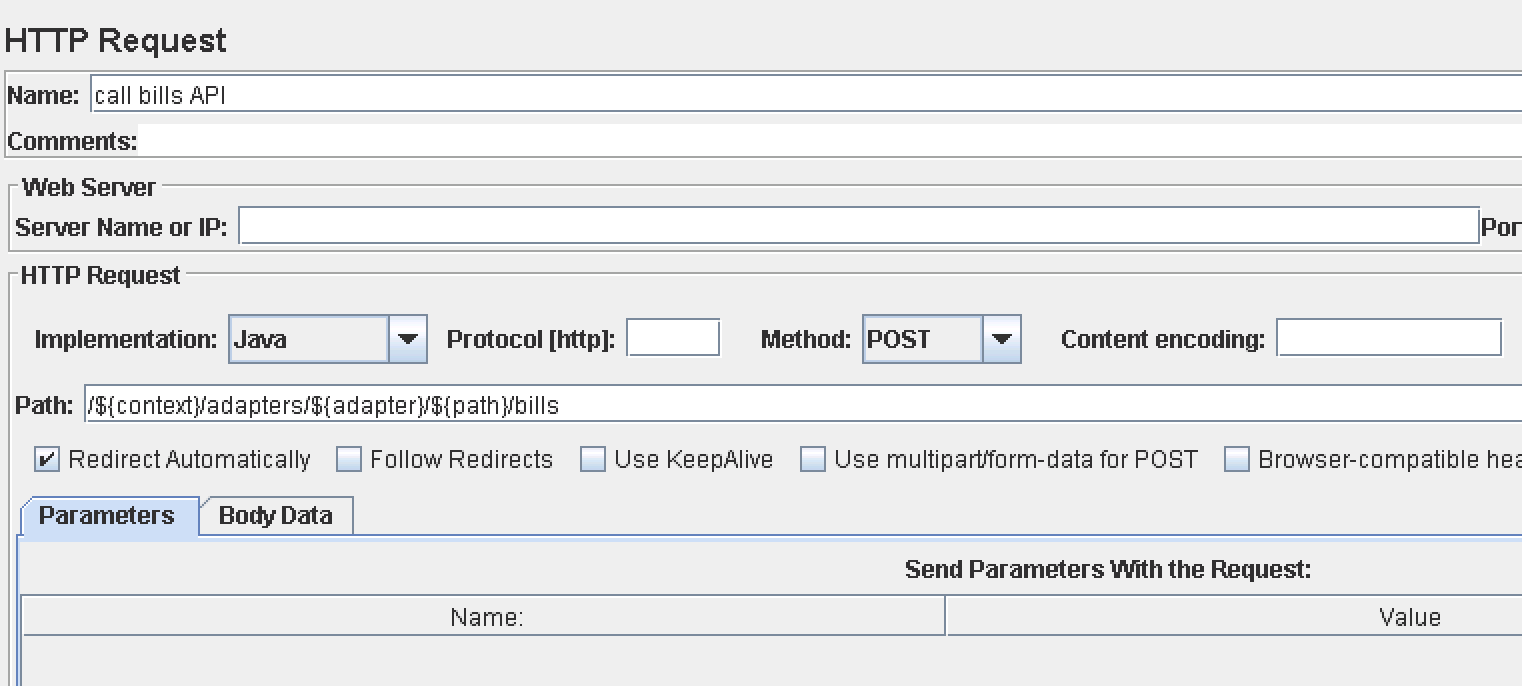
Sample of REST API call
This is a sample API call to a test adapter. Use your own adapter API.
This call demonstrates how to pass the access_token and id_token into the Authorization header.
Adding tokens to the authorization header
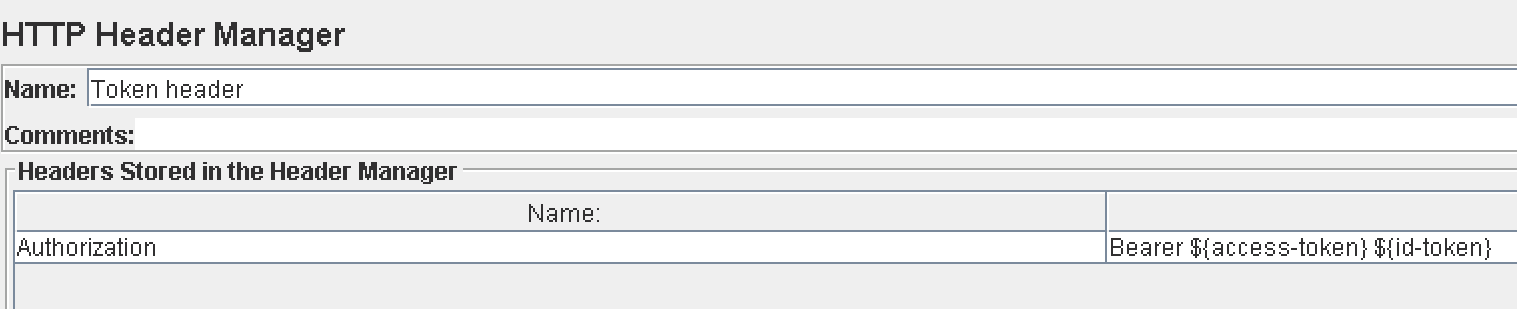
Sample request showing how to access a resource endpoint with a REST API call:
Attachment
The zip file perftestfiles includes the following files:
- JMeter script - Script file that demonstrates all the steps above
- Grant code signer Java class - Java class that signs grant code
- SQL script for DB2 convention - SQL insert command for DB2
testdummy application withandroidenvironment
Tips when running the script:
- Fill in the desired number of threads and loop count in data per user. It is recommended to start with one cycle for monitoring purposes. Ensure the single flow works as expected.
- When running with more threads, do not forget to select the errors checkbox in the Flow results section to avoid a mass of write operations that will kill the JMeter.
- You can also spread the script among several JMeter clients, or run it from the command line.
Inclusive terminology note: The Mobile First Platform team is making changes to support the IBM® initiative to replace racially biased and other discriminatory language in our code and content with more inclusive language. While IBM values the use of inclusive language, terms that are outside of IBM's direct influence are sometimes required for the sake of maintaining user understanding. As other industry leaders join IBM in embracing the use of inclusive language, IBM will continue to update the documentation to reflect those changes.