在 Android 中处理推送通知
improve this page | report issue
概述
在 Android 应用程序处理已收到的任何推送通知之前,需要配置 Google Play Services 支持。 在配置应用程序后,可以使用 MobileFirst 提供的通知 API 来注册和注销设备以及预订和取消预订标记。 在本教程中,您将学会如何在 Android 应用程序中处理推送通知。
先决条件:
- 确保您已阅读过下列教程:
- 本地运行的 MobileFirst Server 或远程运行的 MobileFirst Server。
- 安装在开发人员工作站上的 MobileFirst CLI
跳转至:
通知配置
创建新的 Android Studio 项目或使用现有项目。
如果该项目中还没有 MobileFirst 本机 Android SDK,请遵循将 Mobile Foundation SDK 添加到 Android 应用程序教程中的指示信息。
项目设置
-
在 Android → Gradle 脚本中,选择 build.gradle(模块:应用程序)文件,并将以下行添加到
dependencies中:com.google.android.gms:play-services-gcm:9.0.2- 注:存在一个已知的 Google 缺陷,此缺陷将阻止使用最新的 Play Services 版本(当前为 9.2.0)。 请使用较低的版本。
以及:
compile group: 'com.ibm.mobile.foundation',
         name: 'ibmmobilefirstplatformfoundationpush',
         version: '8.0.+',
         ext: 'aar',
         transitive: true
或在单独一行中:
compile 'com.ibm.mobile.foundation:ibmmobilefirstplatformfoundationpush:8.0.+' -
在 Android → 应用程序 → 清单中,打开
AndroidManifest.xml文件。-
向顶部的
manifest标记中添加以下许可权:<!-- Permissions --> <uses-permission android:name="android.permission.WAKE_LOCK" /> <!-- GCM Permissions --> <uses-permission android:name="com.google.android.c2dm.permission.RECEIVE" /> <permission android:name="your.application.package.name.permission.C2D_MESSAGE" android:protectionLevel="signature" /> -
向
application标记添加以下内容:<!-- GCM Receiver --> <receiver android:name="com.google.android.gms.gcm.GcmReceiver" android:exported="true" android:permission="com.google.android.c2dm.permission.SEND"> <intent-filter> <action android:name="com.google.android.c2dm.intent.RECEIVE" /> <category android:name="your.application.package.name" /> </intent-filter> </receiver> <!-- MFPPush Intent Service --> <service android:name="com.ibm.mobilefirstplatform.clientsdk.android.push.api.MFPPushIntentService" android:exported="false"> <intent-filter> <action android:name="com.google.android.c2dm.intent.RECEIVE" /> </intent-filter> </service> <!-- MFPPush Instance ID Listener Service --> <service android:name="com.ibm.mobilefirstplatform.clientsdk.android.push.api.MFPPushInstanceIDListenerService" android:exported="false"> <intent-filter> <action android:name="com.google.android.gms.iid.InstanceID" /> </intent-filter> </service> <activity android:name="com.ibm.mobilefirstplatform.clientsdk.android.push.api.MFPPushNotificationHandler" android:theme="@android:style/Theme.NoDisplay"/>注:请确保将
your.application.package.name替换为您应用程序的实际包名。 -
向应用程序的活动中添加以下
intent-filter。<intent-filter> <action android:name="your.application.package.name.IBMPushNotification" /> <category android:name="android.intent.category.DEFAULT" /> </intent-filter>
-
通知 API
MFPPush 实例
必须在一个 MFPPush 实例上发出所有 API 调用。 为此,需要创建一个类级别字段(例如 private MFPPush push = MFPPush.getInstance();),然后在该类中调用 push.<api-call>。
也可以针对要访问推送 API 方法的每个实例都调用 MFPPush.getInstance().<api_call>。
验证问题处理程序
如果 push.mobileclient 作用域映射到安全性检查,那么需要确保在使用任何推送 API 之前,存在已注册的匹配验证问题处理程序。
在凭证验证教程中了解有关验证问题处理程序的更多信息。
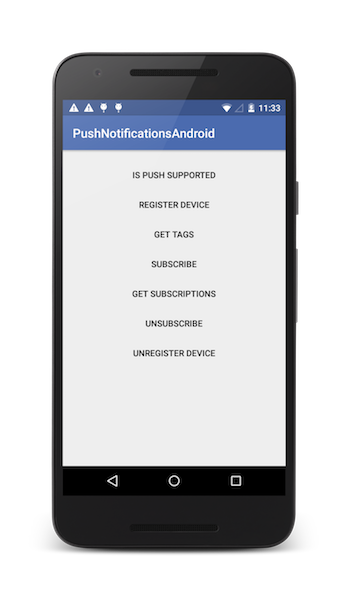
客户端
| Java 方法 | 描述 |
|---|---|
initialize(Context context); |
针对提供的上下文,初始化 MFPPush。 |
isPushSupported(); |
设备是否支持推送通知。 |
registerDevice(JSONObject, MFPPushResponseListener); |
向推送通知服务注册设备。 |
getTags(MFPPushResponseListener) |
在推送通知服务实例中检索可用的标记。 |
subscribe(String[] tagNames, MFPPushResponseListener) |
使设备预订指定的标记。 |
getSubscriptions(MFPPushResponseListener) |
检索设备当前预订的所有标记。 |
unsubscribe(String[] tagNames, MFPPushResponseListener) |
取消对特定标记的预订。 |
unregisterDevice(MFPPushResponseListener) |
从推送通知服务注销设备。 |
初始化
在客户机应用程序使用适当的应用程序上下文连接到 MFPPush 服务时为必需项。
- 应先调用此 API 方法,然后再使用任何其他 MFPPush API。
- 注册回调函数以处理已收到的推送通知。
MFPPush.getInstance().initialize(this);
是否支持推送
检查设备是否支持推送通知。
Boolean isSupported = MFPPush.getInstance().isPushSupported();

if (isSupported ) {
    // Push is supported
} else {
    // Push is not supported
}
注册设备
向推送通知服务注册设备。
MFPPush.getInstance().registerDevice(null, new MFPPushResponseListener<String>() {
    @Override
    public void onSuccess(String s) {
        // Successfully registered
    }

    @Override
    public void onFailure(MFPPushException e) {
        // Registration failed with error
    }
});
获取标记
从推送通知服务检索所有可用标记。
MFPPush.getInstance().getTags(new MFPPushResponseListener<List<String>>() {
    @Override
    public void onSuccess(List<String> strings) {
        // Successfully retrieved tags as list of strings
    }

    @Override
    public void onFailure(MFPPushException e) {
        // Failed to receive tags with error
    }
});
预订
预订所需的标记。
String[] tags = {"Tag 1", "Tag 2"};

MFPPush.getInstance().subscribe(tags, new MFPPushResponseListener<String[]>() {
    @Override
    public void onSuccess(String[] strings) {
        // Subscribed successfully
    }

    @Override
    public void onFailure(MFPPushException e) {
        // Failed to subscribe
    }
});
获取预订
检索设备当前预订的标记。
MFPPush.getInstance().getSubscriptions(new MFPPushResponseListener<List<String>>() {
    @Override
    public void onSuccess(List<String> strings) {
        // Successfully received subscriptions as list of strings
    }

    @Override
    public void onFailure(MFPPushException e) {
        // Failed to retrieve subscriptions with error
    }
});
取消预订
取消对标记的预订。
String[] tags = {"Tag 1", "Tag 2"};

MFPPush.getInstance().unsubscribe(tags, new MFPPushResponseListener<String[]>() {
    @Override
    public void onSuccess(String[] strings) {
        // Unsubscribed successfully
    }

    @Override
    public void onFailure(MFPPushException e) {
        // Failed to unsubscribe
    }
});
注销
从推送通知服务实例注销设备。
MFPPush.getInstance().unregisterDevice(new MFPPushResponseListener<String>() {
    @Override
    public void onSuccess(String s) {
        disableButtons();
        // Unregistered successfully
    }

    @Override
    public void onFailure(MFPPushException e) {
        // Failed to unregister
    }
});
处理推送通知
要处理推送通知,需要设置 MFPPushNotificationListener。 可实现以下某种方法来执行此操作。
选项 1
在要处理推送通知的活动中。
- 向类声明中添加
implements MFPPushNofiticationListener。 - 通过在
onCreate方法中调用MFPPush.getInstance().listen(this),将该类设置为侦听器。 -
然后,需要添加以下必需方法:
@Override public void onReceive(MFPSimplePushNotification mfpSimplePushNotification) { // Handle push notification here } - 在此方法中,您将收到
MFPSimplePushNotification,并可以处理关于期望行为的通知。
选项 2
通过对 MFPPush 实例调用 listen(new MFPPushNofiticationListener()) 来创建侦听器,如下所述:
MFPPush.getInstance().listen(new MFPPushNotificationListener() {
    @Override
    public void onReceive(MFPSimplePushNotification mfpSimplePushNotification) {
        // Handle push notification here
    }
});
样本应用程序
单击以下载 Android Studio 项目。
用法样例
请查看样本的 README.md 文件以获取指示信息。
在 Android 上将客户机应用程序迁移到 FCM
Google Cloud Messaging (GCM) 已不推荐使用,它已与 Firebase Cloud Messaging (FCM) 集成。Google 将在 2019 年 4 月之前关闭大多数 GCM 服务。
如果您正在使用 GCM 项目,那么请将 Android 上的 GCM 客户机应用程序迁移到 FCM。
目前,使用 GCM 服务的现有应用程序将继续按原样运行。由于推送通知服务已更新为使用 FCM 端点,因此以后所有新应用程序必须使用 FCM。
注:在迁移到 FCM 后,更新您的项目以使用 FCM 凭证(而不是旧的 GCM 凭证)。
FCM 项目设置
与旧的 GCM 模型相比,在 FCM 中设置应用程序稍有不同。
-
获取通知提供程序凭证、创建一个 FCM 项目并将相同内容添加到 Android 应用程序。包含应用程序包名称
com.ibm.mobilefirstplatform.clientsdk.android.push。请参阅此处的文档,直至您已完成生成google-services.json文件的步骤 -
配置您的 Gradle 文件。在应用程序的
build.gradle文件中添加以下内容dependencies { ...... compile 'com.google.firebase:firebase-messaging:10.2.6' ..... } apply plugin: 'com.google.gms.google-services'-
在根 build.gradle 的
buildscript部分中添加以下依赖关系classpath 'com.google.gms:google-services:3.0.0' -
从 build.gradle 文件
compile com.google.android.gms:play-services-gcm:+中除去下面的 GCM 插件
-
-
配置 AndroidManifest 文件。
AndroidManifest.xml中需要进行以下更改
移除以下条目:
    <receiver android:exported="true" android:name="com.google.android.gms.gcm.GcmReceiver" android:permission="com.google.android.c2dm.permission.SEND">
        <intent-filter>
            <action android:name="com.google.android.c2dm.intent.RECEIVE" />
            <category android:name="your.application.package.name" />
        </intent-filter>
        <intent-filter>
            <action android:name="com.google.android.c2dm.intent.REGISTRATION" />
            <category android:name="your.application.package.name" />
        </intent-filter>
    </receiver>

    <service android:exported="false" android:name="com.ibm.mobilefirstplatform.clientsdk.android.push.api.MFPPushInstanceIDListenerService">
        <intent-filter>
            <action android:name="com.google.android.gms.iid.InstanceID" />
        </intent-filter>
    </service>

    <uses-permission android:name="your.application.package.name.permission.C2D_MESSAGE" />
    <uses-permission android:name="com.google.android.c2dm.permission.RECEIVE" />
下列条目需要修改:
    <service android:exported="true" android:name="com.ibm.mobilefirstplatform.clientsdk.android.push.api.MFPPushIntentService">
        <intent-filter>
            <action android:name="com.google.android.c2dm.intent.RECEIVE" />
        </intent-filter>
    </service>
将条目修改为:
    <service android:exported="true" android:name="com.ibm.mobilefirstplatform.clientsdk.android.push.api.MFPPushIntentService">
        <intent-filter>
            <action android:name="com.google.firebase.MESSAGING_EVENT" />
        </intent-filter>
    </service>
添加以下条目:
    <service android:name="com.ibm.mobilefirstplatform.clientsdk.android.push.api.MFPPush"
            android:exported="true">
            <intent-filter>
                <action android:name="com.google.firebase.INSTANCE_ID_EVENT" />
            </intent-filter>
    </service>
-
在 Android Studio 中打开应用程序。复制您在应用程序目录内的 step-1 中创建的
google-services.json文件。请注意,google-service.json文件将包含您添加的包名称。 -
编译 SDK。构建应用程序。
Inclusive terminology note: The Mobile First Platform team is making changes to support the IBM® initiative to replace racially biased and other discriminatory language in our code and content with more inclusive language. While IBM values the use of inclusive language, terms that are outside of IBM's direct influence are sometimes required for the sake of maintaining user understanding. As other industry leaders join IBM in embracing the use of inclusive language, IBM will continue to update the documentation to reflect those changes.