Distributing mobile applications with IBM Application Center
improve this page | report issueOverview
IBM MobileFirst Foundation Application Center is a repository of mobile applications similar to public app stores but focused on the needs of an organization or a team. It is a private app store.
Application Center facilitates sharing mobile applications:
- You can share feedback and rating information.
- You can use access control lists to limit who can install applications.
Application Center works with MobileFirst apps and non-MobileFirst apps, and supports any iOS, Android, and Windows/Phone 8.x applications.
Note: Archive/IPA files generated using Test Flight or iTunes Connect for store submission/validation of iOS apps, might cause a runtime crash/fail, read the blog Preparing iOS apps for App Store submission in IBM MobileFirst Foundation 8.0, to know more.
You can use Application Center in different contexts. For example:
- As an enterprise app store across an organization.
- During development to distribute applications within a team.
Note: to build the iOS AppCenter Installer application, MobileFirst 7.1 is required.
Studio is required to for 7.1 worklight apps and is not required for pure cordova apps.
Jump to:
- Installing and configuring
- Cordova based IBM AppCenter client
- Preparing mobile clients
- Managing applications in the Application Center console
- The Application Center mobile client
- Application Center command-line tools
Installing and configuring
Application Center is installed as part of the installation of MobileFirst Server with IBM Installation Manager.
Prerequisite: Before you install Application Center, you must have installed an application server and a database:
- Application server: Tomcat or WebSphere Application Server full profile or Liberty profile
- Database: DB2 , Oracle, or MySQL
If you do not have a database installed, the installation process can also install an Apache Derby database. However, using the Derby database is not recommended for production scenarios.
-
IBM Installation Manager guides you through the installation of Application Center with choices of database and application server.
For more information, see the topic about installing MobileFirst Server.
Because iOS 7.1 supports only the https protocol, the Application Center server must be secured with SSL (at least with TLS v.1) if you plan to distribute apps for devices that run iOS 7.1 or later. Self-signed certificates are not recommended, but can be used for testing purposes, provided that self-signed CA certificates are distributed to devices.
-
After Application Center is installed with IBM Installation Manager, open the console:
http://localhost:9080/appcenterconsole -
Log in with this user/password combination: demo/demo
-
At this point, you can configure user authentication. For example, you can connect to an LDAP repository.
For more information, see the topic about configuring the Application Center after installation.
-
Prepare the mobile client for Android, iOS, BlackBerry 6/7, and Windows Phone 8
The mobile client is the mobile application that you use to browse the catalog and install the application.
Note: For a production installation, consider to install the Application Center by running the provided Ant tasks: it enables you to decouple updates to the server from updates to the Application Center.
Cordova based IBM AppCenter client
The Cordova based AppCenter client project is located in the install directory at: install_dir/ApplicationCenter/installer/CordovaAppCenterClient.
This project is based solely on the Cordova framework and thus has no dependency on the Mobile Foundation client/server APIs.
Since this a standard Cordova app, there is also no dependency on MobileFirst Studio. This app uses Dojo for the UI.
Follow the steps below to get started:
- Install Cordova.
npm install -g cordova@latest
- Install Android SDK and set the
ANDROID_HOME. - Build and run this project.
Build all platforms:
cordova build
Build only Android:
cordova build android
Build only iOS:
cordova build ios
Customizing AppCenter Installer application
You can further customize the application, such as updating its user interface for your specific company or needs.
Note: While you can freely customize the application UI and behavior, such changes are not under the support agreement by IBM.
Android
- Open the Android Studio.
- Select Import project (Eclipse ADT, Gradle, etc.)
- Select the android folder from install_dir/ApplicationCenter/installer/CordovaAppCenterClient/platforms/android.
This might take some time. Once this is done you are ready to customize.
Note: Select to skip the update option on the popup window, for upgrading the gradle version. Refer to
grade-wrapper.propertiesfor the version.
iOS
- Go to install_dir/ApplicationCenter/installer/CordovaAppCenterClient/platforms.
- Click to open the IBMAppCenterClient.xcodeproj file, the project is opened in Xcode and you are ready to customize.
Preparing mobile clients
For Android phones and tablets
The mobile client is delivered as a compiled application (APK) and is located at install_dir/ApplicationCenter/installer/IBMApplicationCenter.apk
Note: Refer to Cordova based IBM AppCenter client, if you are using Cordova framework for building Android and iOS AppCenter client.
For iPad and iPhone
-
Compile and sign the client application provided in source code. This is mandatory.
-
In MobileFirst Studio, open the IBMAppCenter Project at: install_dir/ApplicationCenter/installer
-
Use Run As → Run on MobileFirst Development Server to build the project.
-
Use Xcode to build and sign the application with your Apple iOS Enterprise profile.
You can either open the resulting native project (in iphone\native) manually in Xcode, or right-click the iPhone folder and select Run As → Xcode project. This action generats the project and opens it in Xcode.
Note: Refer to Cordova based IBM AppCenter client, if you are using Cordova framework for building Android and iOS AppCenter client.
For Windows Phone 8
-
Register a company account with Microsoft.
Application Center manages only company applications that are signed with the company certificate that comes with your company account. -
The Windows Phone version of the mobile client is included at: install_dir/ApplicationCenter/installer/IBMApplicationCenterUnsigned.xap
-
Make sure that also the Application Center mobile client is signed with this company certificate.
-
To install company applications on a device, first enroll the device with the company by installing a company enrollment token.
For more information about company accounts and enrollment tokens, see the Microsoft Developer website → Company app distribution for Windows Phone page.
For more information about how to sign Windows Phone mobile client applications, see the Microsoft Developer website.
Important: You cannot use the unsigned
.xapfile directly. Before you can install it on a device, you must first sign it with your company certificate, which you obtained from Symantec or Microsoft.
For Windows Store Apps for Windows 8.1 Pro
-
The install_dir/ApplicationCenter/installer/IBMApplicationCenterWindowsStore.zip file contains the executable of the Application Center client. Distribute this file to the client computer and unzip it. It contains the executable program.
-
Installing a Windows Store app (a file of type
appx) without using Microsoft Windows Store is called sideloading an app. To sideload an app, you must comply with the prerequisites in Prepare to sideload apps. The Windows 8.1.1 update simplifies the prerequisites for sideloading. For more information, see Sideloading Store Apps to Windows 8.1.1 Devices.
Managing applications in the Application Center console
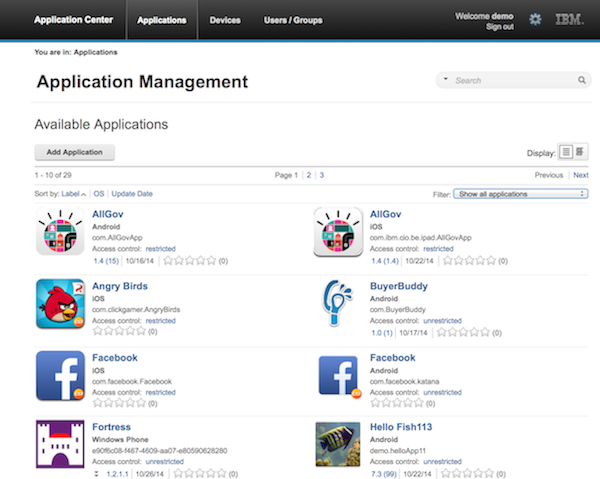
Use the Application Center console to manage applications in the catalog in the following ways:
- Add and remove applications
- Manage versions of applications
- Look at the details of an application
- Restrict the access of an application to specific users or groups of users
- Read the reviews for each application
- Review registered users and devices
Adding new applications to the store
To add new applications to the Store:
- Open the Application Center console.
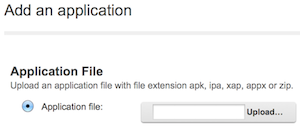
- Click Add application.
- Select an application file:
.ipa: iOS.apk: Android.xap: Windows Phone 8.x.appx: Windows Store 8.x
-
Click Next.
In the Application Details views, you can review the information about the new application and enter further information such as the description. You can return to this view later for all applications in the catalog.
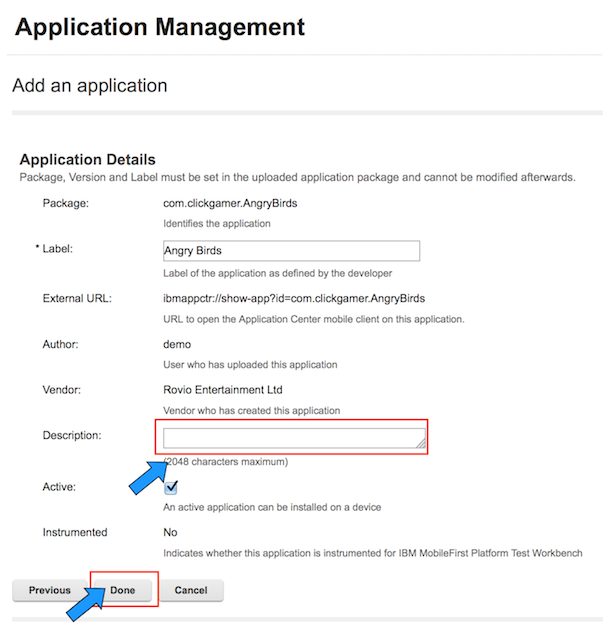
-
Click Done to finish the task.
The new application is added to the store.
By default, an application can be installed by any authorized user of the store.
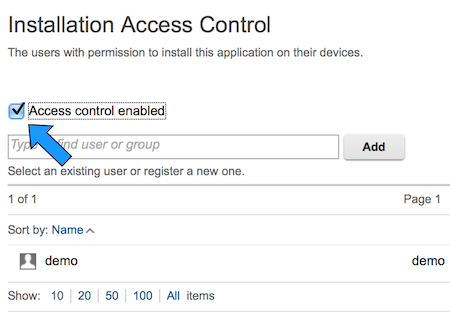
Restricting access to a group of users
To restrict access to a group of users:
- In the catalog view, click the unrestricted link that is next to the application name. The Installation Access Control page opens.
- Select Access control enabled. You can now enter the list of users or groups that are authorized to install the application.
- If you have configured LDAP, add users and groups that are defined in the LDAP repository.
You can also add applications from public app stores such as Google Play or Apple App Store by entering their URLs.
The Application Center mobile client
The App Center mobile client is a mobile application to manage the applications on the device. With the mobile client, you can:
- List all applications from the catalog (for which you have access rights).
- List the favorite applications.
- Install an application or upgrade to a new version.
- Provide feedback and five-star rating for an application.
Adding mobile client applications to the catalog
You must add Application Center mobile client applications to the catalog.
- Open the Application Center console.
- Click the Add Application button to add the mobile client
.apk,.ipa,.zip, or.xapfile. - Click Next to open the Application Details page.
- In the Application Details page, select Installer to indicate that this application is a mobile client.
- Click Done to add the Application Center app to the catalog.
The Application Center client for Windows 8.1 Pro does not need to be added to the catalog. This client is a regular Windows .exe program contained in the install_dir/ApplicationCenter/installer/IBMApplicationCenterWindowsStore.zip file. You can simply copy it to the client computer.
Windows Phone 8
On Windows Phone 8, you must also install the enrollment token that you received with your company account to the Application Center console, so that users can enroll their devices. You use the Application Center Settings page, which you can open through the gear icon.
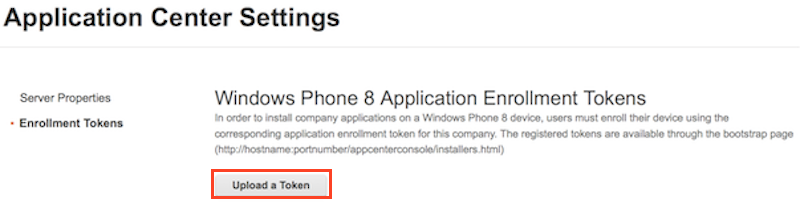
Before you can install the mobile client, you must enroll the device with the company by installing the enrollment token:
- Open the web browser on the device.
- Enter the URL:
http://hostname:9080/appcenterconsole/installers.html - Enter the user name and password.
- Click Tokens to open the list of enrollment tokens.
- Select the company in the list. The details of the company account are displayed.
- Click Add Company Account. Your device is enrolled.
Installing the mobile client on the mobile device
To install the mobile client on the mobile device:
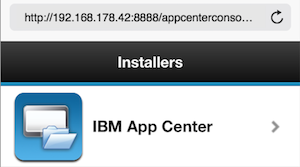
- Open the web browser on the device.
- Enter the URL:
http://hostname:9080/appcenterconsole/installers.html - Enter the user name and password.
- Select the Application Center application to start the installation.
On Android devices, you must open the Android Download application and select IBM App Center for installation.
Logging in to the mobile client
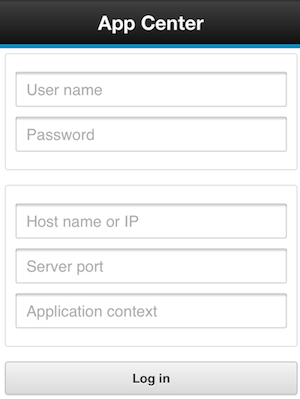
To log in to the mobile client:
- Enter your credentials for access to the server.
- Enter the host name or IP address of the server.
- In the Server port field, enter the port number if it is not the default one (
9080). - In the Application context field, enter the context:
applicationcenter.
Application Center mobile client views
- The Catalog view displays the list of available applications.
-
Selecting an application opens the Details view on the application. You can install applications from the Details view. You can also mark applications as favorites by using the star icon in the Details View.
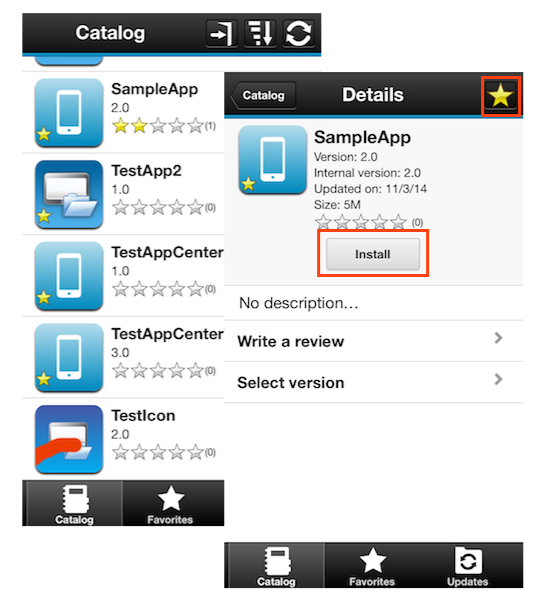
- The Favorites view lists the favorite applications. This list is available on all the devices of a particular user.
- The Updates view lists all available updates. In the Updates view, you can navigate to the Details view. You can select a newer version of the application or take the latest available version. If Application Center is configured to send push notifications, you might be notified of updates by push notification messages.
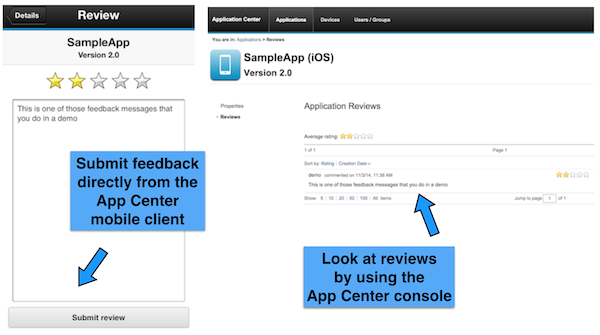
From the mobile client, you can rate the application and send a review. Reviews can be viewed on the console or on the mobile device.
Application Center command-line tools
The install_dir/ApplicationCenter/tools directory contains all the files that are required to use the command-line tool or Ant tasks to manage the applications in the store:
applicationcenterdeploytool.jar: the upload command-line tool.json4jar: the library for the JSON format that is required by the upload tool.build.xml: a sample Ant script that you can use to upload a single file or a sequence of files to Application Center.acdeploytool.shandacdeploytool.bat: Simple scripts to call Java with theapplicationcenterdeploytool.jarfile.
For example, to deploy an application app.apk file to the store in localhost:9080/applicationcenter with user ID demo and password demo, write:
Java com.ibm.appcenter.Upload -s http://localhost:9080 -c applicationcenter -u demo -p demo app.apk
Inclusive terminology note: The Mobile First Platform team is making changes to support the IBM® initiative to replace racially biased and other discriminatory language in our code and content with more inclusive language. While IBM values the use of inclusive language, terms that are outside of IBM's direct influence are sometimes required for the sake of maintaining user understanding. As other industry leaders join IBM in embracing the use of inclusive language, IBM will continue to update the documentation to reflect those changes.