iOS でのプッシュ通知の処理
improve this page | report issue概説
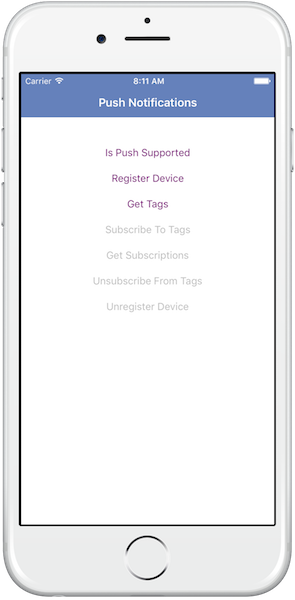
MobileFirst が提供する通知 API を使用して、デバイスの登録や登録抹消、タグへのサブスクライブやアンサブスクライブを実行できます。 このチュートリアルでは、Swift を使用して iOS アプリケーションでプッシュ通知を処理する方法について学習します。
サイレント通知または対話式通知については、以下を参照してください。
前提条件
- 必ず、以下のチュートリアルをお読みください。
- ローカルで稼働している MobileFirst Server、またはリモートで稼働している MobileFirst Server
- 開発者ワークステーションに MobileFirst CLI がインストールされていること
ジャンプ先:
通知構成
新しい Xcode プロジェクトを作成するか、または既存のプロジェクトを使用します。 MobileFirst Native iOS SDK がプロジェクトにまだ存在しない場合は、iOS アプリケーションへの Mobile Foundation SDK の追加チュートリアルの説明に従ってください。
プッシュ SDK の追加
-
プロジェクトの既存の podfile を開き、以下の行を追加します。
use_frameworks! platform :ios, 8.0 target "Xcode-project-target" do pod 'IBMMobileFirstPlatformFoundation' pod 'IBMMobileFirstPlatformFoundationPush' end post_install do |installer| workDir = Dir.pwd installer.pods_project.targets.each do |target| debugXcconfigFilename = "#{workDir}/Pods/Target Support Files/#{target}/#{target}.debug.xcconfig" xcconfig = File.read(debugXcconfigFilename) newXcconfig = xcconfig.gsub(/HEADER_SEARCH_PATHS = .*/, "HEADER_SEARCH_PATHS = ") File.open(debugXcconfigFilename, "w") { |file| file << newXcconfig } releaseXcconfigFilename = "#{workDir}/Pods/Target Support Files/#{target}/#{target}.release.xcconfig" xcconfig = File.read(releaseXcconfigFilename) newXcconfig = xcconfig.gsub(/HEADER_SEARCH_PATHS = .*/, "HEADER_SEARCH_PATHS = ") File.open(releaseXcconfigFilename, "w") { |file| file << newXcconfig } end end- 使用する Xcode プロジェクトのターゲットの名前で Xcode-project-target を置き換えてください。
- podfile を保存して閉じます。
- コマンド・ライン・ウィンドウからプロジェクトのルート・フォルダーにナビゲートします。
- コマンド
pod installを実行します。 - .xcworkspace ファイルを使用して、プロジェクトを開きます。
通知 API
MFPPush インスタンス
すべての API 呼び出しは、MFPPush のインスタンスから呼び出される必要があります。 これを行うには、ビュー・コントローラー内で var を使用し (var push = MFPPush.sharedInstance(); など)、その後、ビュー・コントローラー内で一貫して push.methodName() を呼び出します。
代わりに、プッシュ API メソッドにアクセスする必要があるインスタンスごとに MFPPush.sharedInstance().methodName() を呼び出すこともできます。
チャレンジ・ハンドラー
push.mobileclient スコープがセキュリティー検査にマップされる場合、プッシュ API を使用する前に、一致するチャレンジ・ハンドラーが存在し、登録済みであることを確認する必要があります。
チャレンジ・ハンドラーについて詳しくは、資格情報の検証チュートリアルを参照してください。
クライアント・サイド
| Swift メソッド | 説明 |
|---|---|
initialize() |
提供されたコンテキストの MFPPush を初期化します。 |
isPushSupported() |
デバイスがプッシュ通知をサポートするかどうか。 |
registerDevice(completionHandler: ((WLResponse!, NSError!) -> Void)!) |
デバイスをプッシュ通知サービスに登録します。 |
sendDeviceToken(deviceToken: NSData!) |
デバイス・トークンをサーバーに送信します。 |
getTags(completionHandler: ((WLResponse!, NSError!) -> Void)!) |
プッシュ通知サービス・インスタンス内で使用可能なタグを取得します。 |
subscribe(tagsArray: [AnyObject], completionHandler: ((WLResponse!, NSError!) -> Void)!) |
指定されたタグにデバイスをサブスクライブします。 |
getSubscriptions(completionHandler: ((WLResponse!, NSError!) -> Void)!) |
デバイスが現在サブスクライブしているタグをすべて取得します。 |
unsubscribe(tagsArray: [AnyObject], completionHandler: ((WLResponse!, NSError!) -> Void)!) |
特定のタグからアンサブスクライブします。 |
unregisterDevice(completionHandler: ((WLResponse!, NSError!) -> Void)!) |
プッシュ通知サービスからデバイスを登録抹消します。 |
初期化
初期化は、クライアント・アプリケーションが MFPPush サービスに接続するために必要です。
- 最初に
initializeメソッドを呼び出してから、その他の MFPPush API を使用する必要があります。 - このメソッドは、受け取ったプッシュ通知を処理するコールバック関数を登録します。
MFPPush.sharedInstance().initialize();
プッシュがサポートされるか
デバイスがプッシュ通知をサポートするかどうかをチェックします。
let isPushSupported: Bool = MFPPush.sharedInstance().isPushSupported()

if isPushSupported {
    // Push is supported
} else {
    // Push is not supported
}
デバイスの登録 & デバイス・トークンの送信
デバイスをプッシュ通知サービスに登録します。
MFPPush.sharedInstance().registerDevice(nil) { (response, error) -> Void in
    if error == nil {
        self.enableButtons()
        self.showAlert("Registered successfully")
        print(response?.description ?? "")
    } else {
        self.showAlert("Registrations failed.  Error \(error?.localizedDescription)")
        print(error?.localizedDescription ?? "")
    }
}
MFPPush.sharedInstance().sendDeviceToken(deviceToken)
注: これは一般的に
didRegisterForRemoteNotificationsWithDeviceTokenメソッドの AppDelegate 内で呼び出されます。
タグの取得
プッシュ通知サービスからすべての使用可能なタグを取得します。
MFPPush.sharedInstance().getTags { (response, error) -> Void in
    if error == nil {
        print("The response is: \(response)")
        print("The response text is \(response?.responseText)")
        if response?.availableTags().isEmpty == true {
            self.tagsArray = []
            self.showAlert("There are no available tags")
        } else {
            self.tagsArray = response!.availableTags() as! [String]
            self.showAlert(String(describing: self.tagsArray))
            print("Tags response: \(response)")
        }
    } else {
        self.showAlert("Error \(error?.localizedDescription)")
        print("Error \(error?.localizedDescription)")
    }
}
サブスクライブ
目的のタグにサブスクライブします。
var tagsArray: [String] = ["Tag 1", "Tag 2"]

MFPPush.sharedInstance().subscribe(self.tagsArray) { (response, error)  -> Void in
    if error == nil {
        self.showAlert("Subscribed successfully")
        print("Subscribed successfully response: \(response)")
    } else {
        self.showAlert("Failed to subscribe")
        print("Error \(error?.localizedDescription)")
    }
}
サブスクリプションの取得
デバイスが現在サブスクライブしているタグを取得します。
MFPPush.sharedInstance().getSubscriptions { (response, error) -> Void in
   if error == nil {
       var tags = [String]()
       let json = (response?.responseJSON)! as [AnyHashable: Any]
       let subscriptions = json["subscriptions"] as? [[String: AnyObject]]
       for tag in subscriptions! {
           if let tagName = tag["tagName"] as? String {
               print("tagName: \(tagName)")
               tags.append(tagName)
           }
       }
       self.showAlert(String(describing: tags))
   } else {
       self.showAlert("Error \(error?.localizedDescription)")
       print("Error \(error?.localizedDescription)")
   }
}
アンサブスクライブ
タグからアンサブスクライブします。
var tags: [String] = {"Tag 1", "Tag 2"};

// Unsubscribe from tags
MFPPush.sharedInstance().unsubscribe(self.tagsArray) { (response, error)  -> Void in
    if error == nil {
        self.showAlert("Unsubscribed successfully")
        print(String(describing: response?.description))
    } else {
        self.showAlert("Error \(error?.localizedDescription)")
        print("Error \(error?.localizedDescription)")
    }
}
登録抹消
プッシュ通知サービス・インスタンスからデバイスを登録抹消します。
MFPPush.sharedInstance().unregisterDevice { (response, error)  -> Void in
   if error == nil {
       // Disable buttons
       self.disableButtons()
       self.showAlert("Unregistered successfully")
       print("Subscribed successfully response: \(response)")
   } else {
       self.showAlert("Error \(error?.localizedDescription)")
       print("Error \(error?.localizedDescription)")
   }
}
プッシュ通知の処理
プッシュ通知は、ネイティブ iOS フレームワークによって直接的に処理されます。 アプリケーション・ライフサイクルに応じて、いろいろなメソッドが iOS フレームワークによって呼び出されます。
例えば、アプリケーションの実行中に単純な通知を受け取った場合は、AppDelegate の didReceiveRemoteNotification がトリガーされます。
func application(_ application: UIApplication, didReceiveRemoteNotification userInfo: [AnyHashable: Any]) {
    print("Received Notification in didReceiveRemoteNotification \(userInfo)")
    // display the alert body
      if let notification = userInfo["aps"] as? NSDictionary,
        let alert = notification["alert"] as? NSDictionary,
        let body = alert["body"] as? String {
          showAlert(body)
        }
}
iOS での通知の処理について詳しくは、Apple の資料 を参照してください。
サンプル・アプリケーション
ここをクリック して Xcode プロジェクトをダウンロードします。
サンプルの使用法
サンプルの README.md ファイルの指示に従ってください。
▲Inclusive terminology note: The Mobile First Platform team is making changes to support the IBM® initiative to replace racially biased and other discriminatory language in our code and content with more inclusive language. While IBM values the use of inclusive language, terms that are outside of IBM's direct influence are sometimes required for the sake of maintaining user understanding. As other industry leaders join IBM in embracing the use of inclusive language, IBM will continue to update the documentation to reflect those changes.