Your first hybrid application
improve this page | report issueOverview
This tutorial describes all the steps from creating a new MobileFirst project and Hybrid application to building it. The tutorial explains the structure of the new Hybrid application and all its components, as well as the concept of "Single-Page Application" (SPA) that MobileFirst Hybrid applications are based on.
Agenda:
- Creating a hybrid application
- Adding environments
- Structure of a new application
- Single DOM model
- Building the application
- Previewing the application
- Tutorials to follow next
Creating a hybrid MobileFirst application
Using the command-line interface (CLI)
- If you have installed the CLI, in the terminal, create a project named
HelloWorldProject.
$ mfp create HelloWorldProject A MobileFirst Project was successfully created at /Users/MyUser/Dev/HelloWorldProject - Go to the context of your newly created project.
$ cd HelloWorldProject/ - Define a hybrid application named
HelloWorld.
$ mfp add hybrid HelloWorld
A new Hybrid App was added at /Users/MyUser/Dev/HelloWorldProject/apps/HelloWorld
Using the Studio
- In MobileFirst Studio, select File > New > MobileFirst Project to create a new MobileFirst Project from the top toolbar.
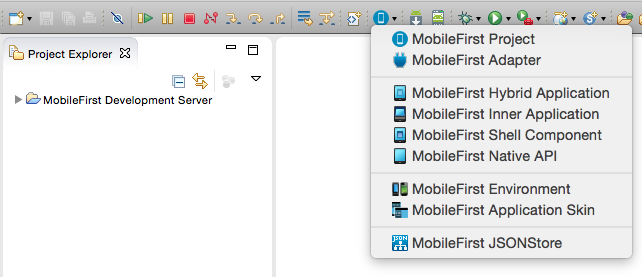
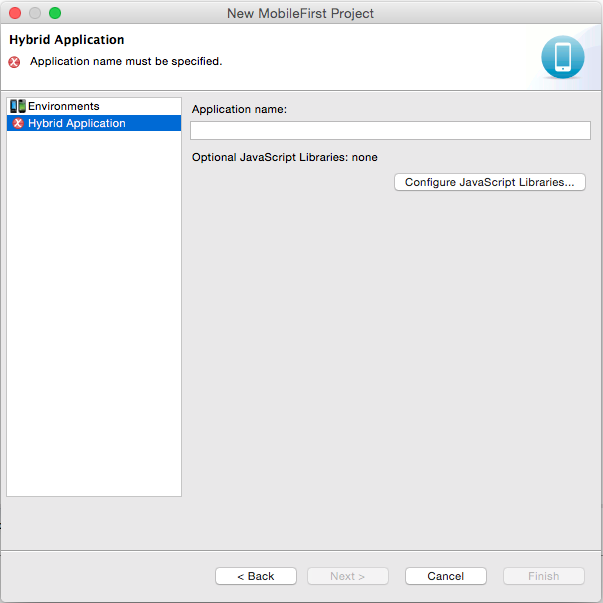
- Give your project a name, for example HelloWorldProject, and select the Hybrid Application template.
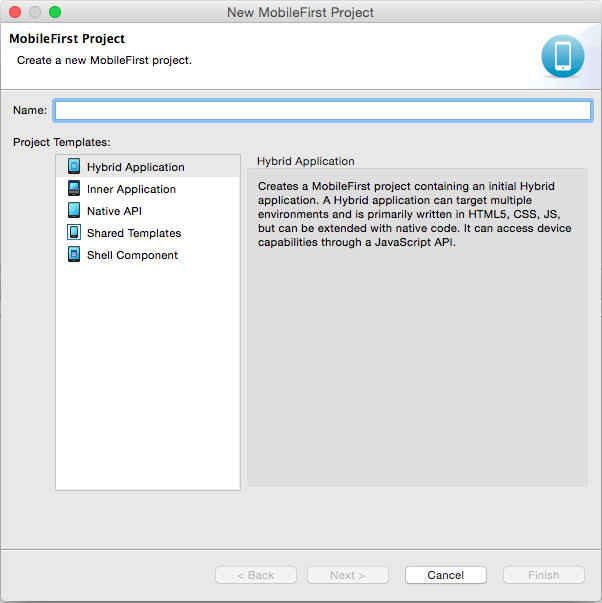
- Give the application a name, for example HelloWorld. You can add JavaScript frameworks to your project in this screen. Click Finish when done.
To learn more about adding frameworks to applications, read the Client-side development basics > Working with UI frameworks tutorial.
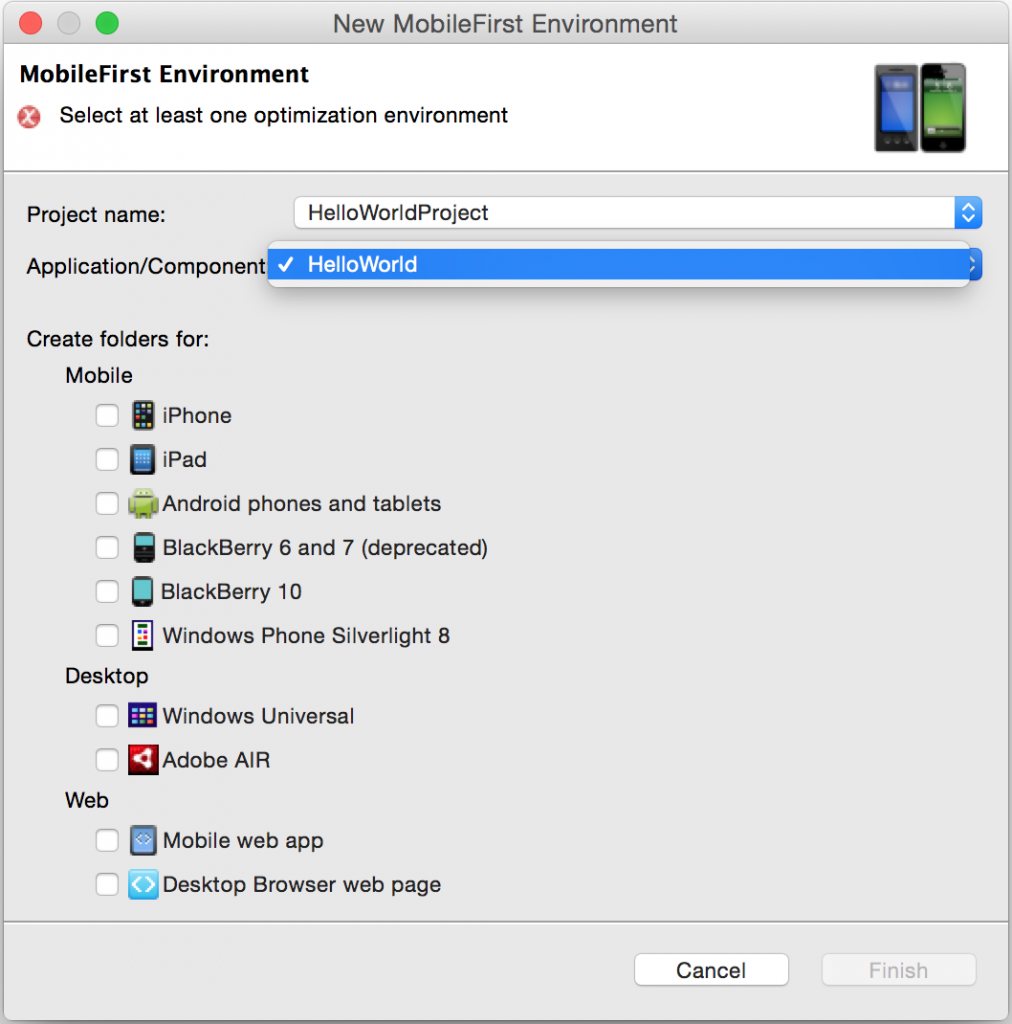
Adding Environments
A MobileFirst environment is a platform on which a Hybrid application can run on. These environments are separated into three groups: Mobile environments, Web environments and Desktop environments.
- Mobile environments: iOS, Android, Windows Phone 8, Windows 8 and BlackBerry 10.
- Web environments: Mobile Web, Desktop Browser
- Desktop environments: Air
To add an environment:
Using the command-line interface (CLI)
Navigate to the Hybrid application and add an environment:
cd apps/HelloWorld
mfp add environment
Using the Studio
- Click the MobileFirst icon in the menu bar and select MobileFirst Environment.
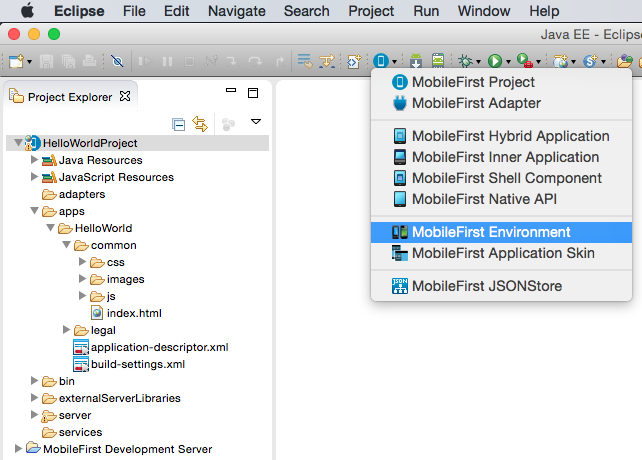
- Select the application to which you would like to add an environment and select one or more environments.
- Click Finish. A new folder with the environment name is added to the project structure.
Structure of the new application
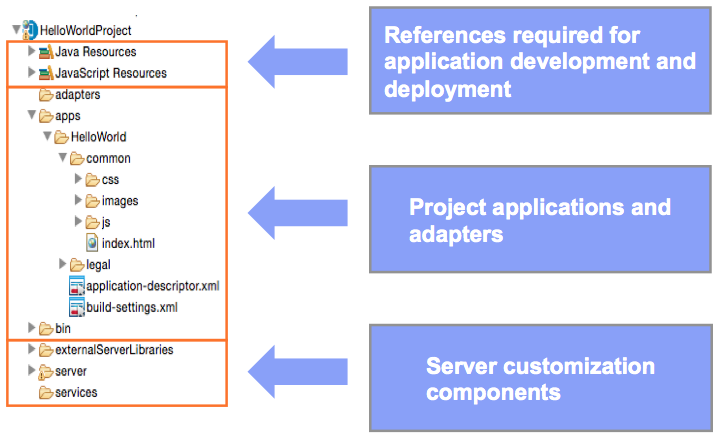
Environment files
Common
The default environment is called common. The common environment contains all the resources that are shared between environments:
- index.html: the main HTML file
- css
- main.css: the main application CSS file
- images: default MobileFirst images for the common environment
- js
- initOptions.js: Used for defining the initialization options of the application. See the documentation of the
WL.Client.initmethod in the API reference part of the user documentation - main.js: the main JavaScript file for the application
- messages.js: Contains A JSON object that holds all app messages. Can be used as the source for translation
- initOptions.js: Used for defining the initialization options of the application. See the documentation of the
- legal: A folder that holds all the legal docs
- application-descriptor.xml: Contains the application metadata
- build-settings.xml: Contains configuration options for minification and concatenation
Environments
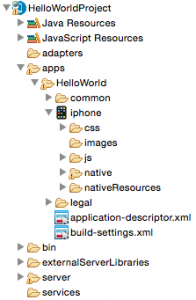
The screen shot to the right depicts the iPhone environment, but the explanation below applies to any mobile environment (iPhone, iPad, Android, BlackBerry, Windows Phone 8, Windows 8).
The mobile environment includes the following folders:
- CSS – The properties that are specified in this folder override the CSS files from the common folder.
- Images – You can add environment-specific images in this folder. If images with the same file names exist in the common folder, they are overwritten in the application.
- JavaScript – Contains JavaScript that can extend, and override if necessary, JavaScript from the common folder.
- The native folder contains automatically generated native project code.
Files in thenative\wwwfolder are regenerated each time the application is built. Any changes that are made to these files are lost. - The nativeResources folder contains resources that are used by the native code.
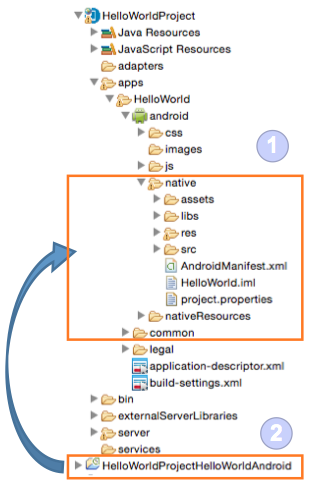
Note about Android
After you add the Android environment, an Android project is generated and added to the workspace.
This project folder does not contain a copy of the application code. Rather, it is mapped to the native folder within the android folder of the application.
Server files
- externalServerLibraries: Contains the libraries to be placed in external service servers and used for access token validation (by the service).
- server: Contains files that are used for server-side customization of a project:
- conf: contains
- authenticationConfig.xml: Defines authentication realm and security tests
- default.keystore: A default SSL certificate that is provided by the project
- login.html: Presents a login form for web environments and the MobileFirst Operations Console
- SMSConfig.xml: Defines SMS Gateways
- worklight.properties: Defines the properties that are used by MobileFirst Server
- conf: contains
- java: Used to hold Java classes that will be compiled and deployed to a MobileFirst Server instance after the application is built. You can place your custom Java code here.
- lib: Used for JAR files that are deployed to the server
- services: Contains any back-end services that were discovered
The bin folder
The bin folder contains project artifacts that are deployed to MobileFirst Server.
MobileFirst Studio deploys those artifacts to the embedded MobileFirst Development Server automatically as a part of the build process.
.wlappfiles are application bundles..wladapterfiles are adapters..jarand.warfiles are server customization files that containworklight.properties,authenticationConfig.xml, and custom Java code.
The application-descriptor.xml file
The application descriptor is an XML file that stores the metadata for an application.
You can edit this file in the Design or Source editors.
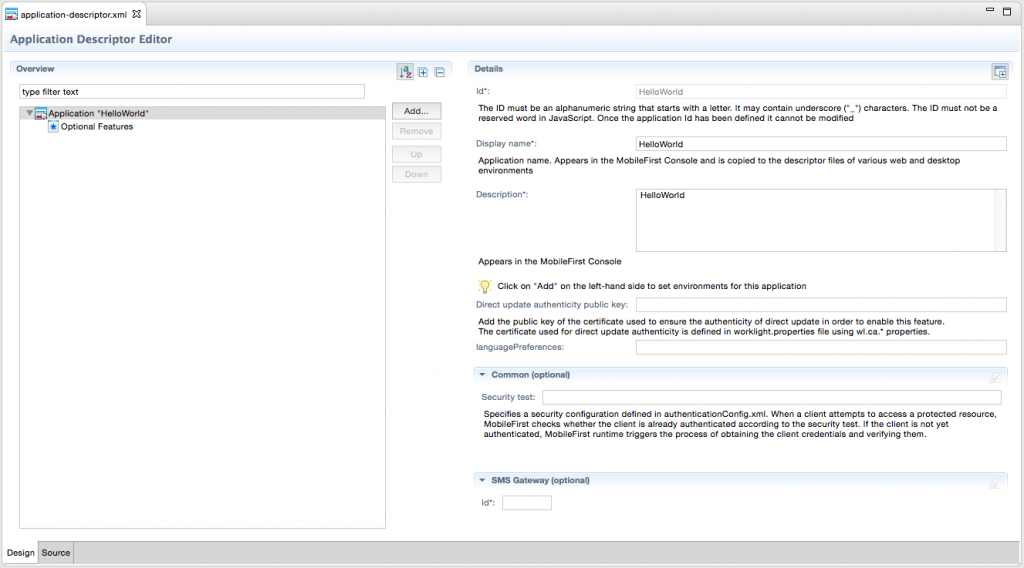
The file is based on the W3C Widget Packaging and Configuration standard and contains application properties that are used at build time.
You can specify the application description, details about the author, the thumbnail image to be displayed in the MobileFirst Operations Console, and more.
    <!-- Attribute "id" must be identical to application folder name -->
    <application id="HelloWorld" platformVersion="7.1.0.00.20150701-1029"
    xmlns="http://www.worklight.com/application-descriptor"
    xmlns:xsi="http://www.w3.org/2001/XMLSchema-instance"></p>
<p>        <displayName>HelloWorld</displayName>
        <description>HelloWorld</description>
        <author>
            <name>application's author</name>
            <email>application author's e-mail</email>
            <copyright>Copyright My Company</copyright>
            <homepage>http://mycompany.com</homepage>
        </author>
        <mainFile>index.html</mainFile>
        <thumbnailImage>common/images/thumbnail.png</thumbnailImage>
        <features>
        </features>
        <targetCategory>UNDEFINED</targetCategory>
    </application>
Environment-specific information is inserted automatically as new environments are added to the MobileFirst project:
    <iphone bundleId="com.HelloWorld" version="1.0">
        <worklightSettings include="false"/>
        <security>
            <encryptWebResources enabled="false"/>
            <testWebResourcesChecksum enabled="false" ignoreFileExtensions="png, jpg, jpeg, gif, mp4, mp3"/>
        </security>
    </iphone>
    <android version="1.0">
        <worklightSettings include="false"/>
        <security>
            <encryptWebResources enabled="false"/>
            <testWebResourcesChecksum enabled="false" ignoreFileExtensions="png, jpg, jpeg, gif, mp4, mp3"/>
            <publicSigningKey/>
            <packageName/>
        </security>
    </android>
Learn more about the
application-descriptor.xmlfile in the user documentation.
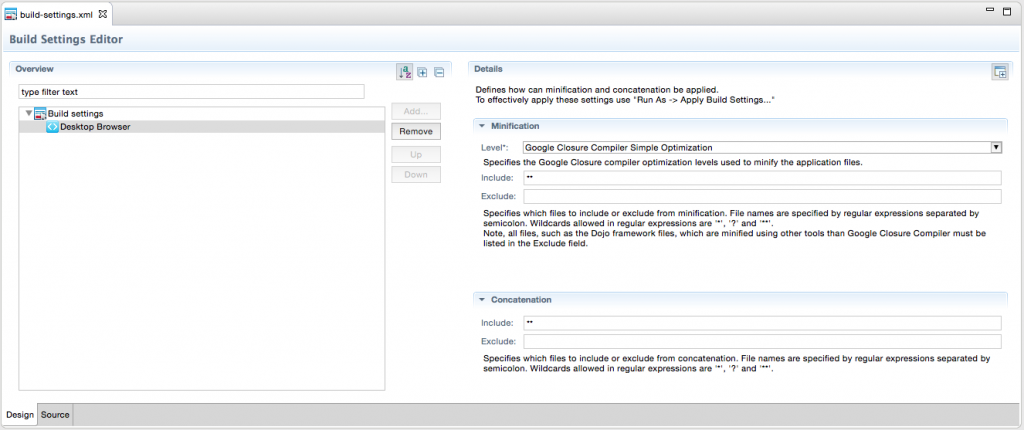
The build-settings.xml file
The build settings file is an XML file that contains configuration options for minification and concatenation of the Desktop Browser and Mobile Web environment web resources.
You can edit this file in the Design or Source editors.
By using minification on specific web resources, you can reduce the size of JavaScript and CSS files in the application.
In addition, you can use concatenation of the web resources to improve the start time of the application.
The index.html file
At application run time, the main HTML document cannot be replaced by another HTML document.
The default application HTML template complies with HTML5 standard markup, but any other DOCTYPE can be specified.
The MobileFirst client-side framework uses the jQuery library for internal functions. By default, the $ char is assigned to the internal jQuery in the main HTML file (see below). If a different jQuery version is required or if jQuery is not required in the application, this line (#12) can be removed.
The MobileFirst client framework initialization is bound to the onload event specified in the initOptions.js file. For more information about initialization options, see the user documentation.
    <!DOCTYPE HTML>
    <html>
            <head>
                <meta charset="UTF-8">
                <title>HelloWorld</title>
                <meta name="viewport" content="width=device-width, initial-scale=1.0, maximum-scale=1.0, minimum-scale=1.0, user-scalable=0">
                <!--
                    <link rel="shortcut icon" href="images/favicon.png">
                    <link rel="apple-touch-icon" href="images/apple-touch-icon.png">
                -->
                <link rel="stylesheet" href="css/main.css">
                <script>window.$ = window.jQuery = WLJQ;</script>
            </head>
            <body style="display: none;">
                <!--application UI goes here-->
                Hello World
                <script src="js/initOptions.js"></script>
                <script src="js/main.js"></script>
                <script src="js/messages.js"></script>
            </body>
    </html>
The initOptions.js file
The initialization options file contains MobileFirst framework initialization settings.
It is also responsible for initializing the MobileFirst framework after the element finishes loading.
By default, the MobileFirst application starts in offline mode (the application does not attempt to connect to MobileFirst Server).
To connect to MobileFirst Server, use WL.Client.connect().
Some default initialization options are documented in the file itself. The entire set of options is documented in the Reference topic for the API method WL.Client.init, in the user documentation.
The main.js file
When you create an application, a main.js file is created and holds its JavaScript portion.
It contains a wlCommonInit() function which is invoked automatically after the MobileFirst framework initialization finishes. Application initialization code can be implemented herein.
This function is used in environment-specific JavaScript files to have a common initialization starting point. Additional details are provided in subsequent tutorials.
As discussed previously, the MobileFirst application starts in offline mode by default.
To begin communicating with MobileFirst Server, follow the instructions provided in the default wlCommonInit() function:
function wlCommonInit(){
    /*
     * Use of WL.Client.connect() API before any connectivity to MobileFirst Server is required.
     * Call this API only once, before any other WL.Client methods that communicate with MobileFirst Server.
     * Remember to specify and implement the onSuccess and onFailure callback functions for WL.Client.connect(), e.g:
     *
     *    WL.Client.connect({
     *    		onSuccess: onConnectSuccess,
     *    		onFailure: onConnectFailure
     *    });
     *
     */
    // Common initialization code goes here</p>
}<
Building an application
Using the command-line interface (CLI)
Navigate to the application folder and use the push command to build and deploy the application to the MobileFirst Server.
mfp push
Using MobileFirst Studio
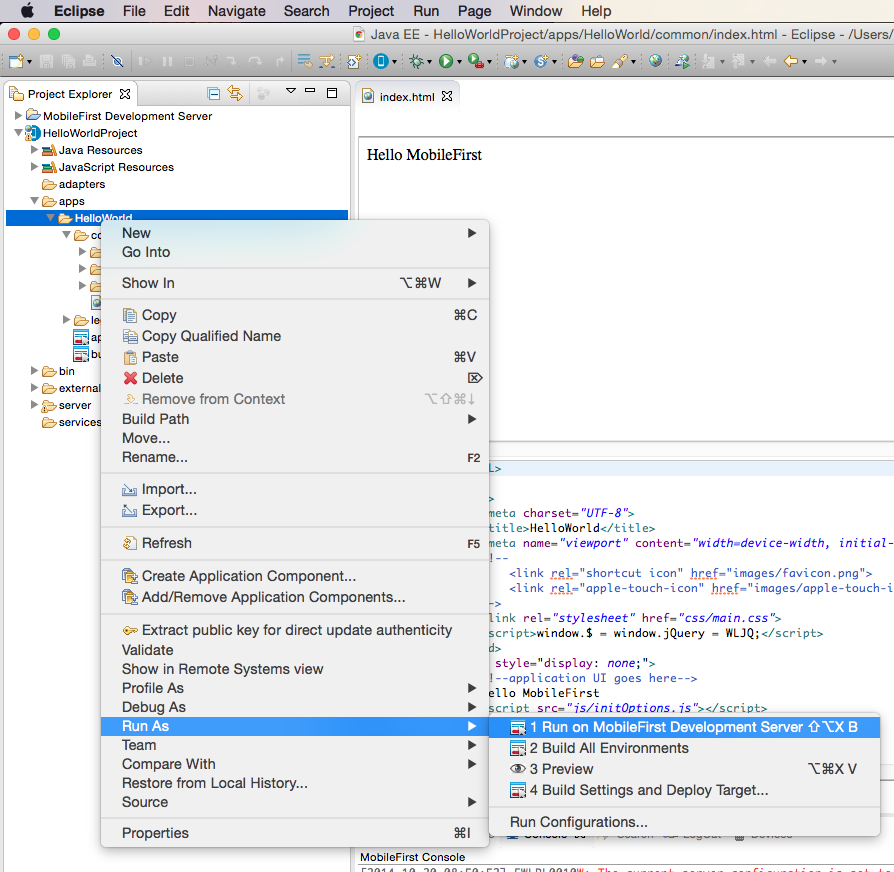
To build an application, right-click the application name and select Run As > Run on MobileFirst Development Server.
While the application is being built and deployed, you can monitor the progress in the Eclipse Console view.
After the build completes, the application is available for preview in the catalog tab of the MobileFirst Operations Console.
MobileFirst Operations Console
Learn about the MobileFirst Operations Console from the Introduction to MobileFirst Operations Console tutorial.
Single DOM model
MobileFirst hybrid applications use a single DOM model.
The single DOM model means that navigation between various HTML files must not be implemented by using hyperlinks or by changing the window.location property.
Instead, you can implement a multipage interface by loading an external HTML file content through Ajax requests and by injecting it into an existing DOM.
Such implementation is required because the main application HTML file loads the MobileFirst client-side JavaScript framework files. If the webview navigates away from one HTML file to another, the JavaScript context and loaded scripts are lost.
Most JavaScript UI frameworks available today (for example, jQuery Mobile, Dojo Mobile, Sencha Touch) provide an extensive range of APIs to achieve the required multipage navigation.
This module explains the principles of a single-page application.
Principles of multipage applications that are built with a single DOM model are explained in other tutorials.
Previewing an Application
Using the command-line interface (CLI)
From the application preview, use the preview command, and select preview mode: Simple preview or MBS.
mfp preview
Using MobileFirst Studio
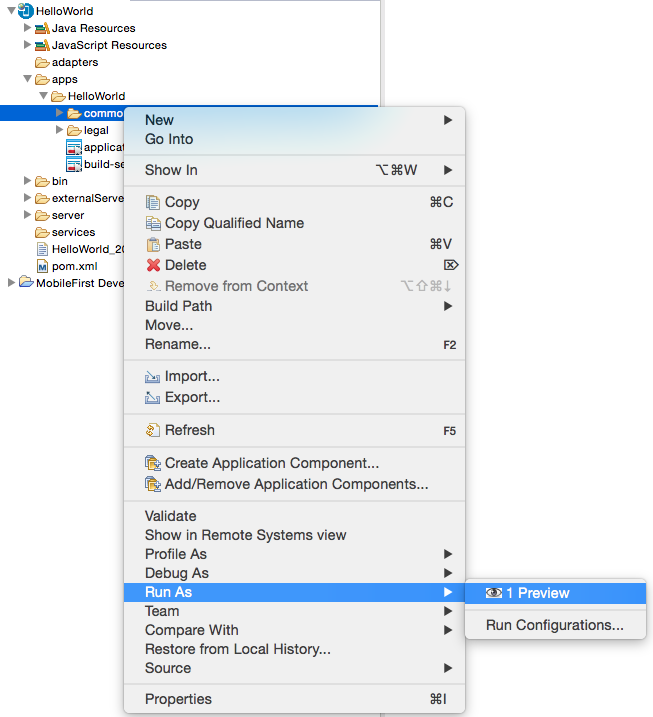
To preview the application's common resources from the Studio, right-click thecommon folder and choose Run As > Preview.
If you are presented with a login screen, use admin/admin as the username/password.
To learn more about previewing, see the Previewing your Hybrid Application tutorial.
Tutorials to follow next
Now that you created your first hybrid application, you can follow the tutorials in the Hybrid client-side development section to learn more about authentication and security, server-side development, advanced client-side development, notifications, and more.
▲Inclusive terminology note: The Mobile First Platform team is making changes to support the IBM® initiative to replace racially biased and other discriminatory language in our code and content with more inclusive language. While IBM values the use of inclusive language, terms that are outside of IBM's direct influence are sometimes required for the sake of maintaining user understanding. As other industry leaders join IBM in embracing the use of inclusive language, IBM will continue to update the documentation to reflect those changes.