iOS アプリケーションでの JSONStore
improve this page | report issue前提条件
- JSONStore 親チュートリアルを読む。
- MobileFirst ネイティブ SDK が Xcode プロジェクトに追加されていることを確認する。 『iOS アプリケーションへの Mobile Foundation SDK の追加』チュートリアルに従ってください。
ジャンプ先:
JSONStore の追加
-
Xcode プロジェクトのルートにある既存の
podfileに以下を追加します。pod 'IBMMobileFirstPlatformFoundationJSONStore' -
コマンド・ライン・ウィンドウで、Xcode プロジェクトのルートにナビゲートし、コマンド
pod installを実行します。このアクションにはしばらく時間がかかる場合があることに注意してください。
JSONStore を使用する場合はいつでも、必ず JSONStore ヘッダーをインポートするようにしてください。
Objective-C:
#import <IBMMobileFirstPlatformFoundationJSONStore/IBMMobileFirstPlatformFoundationJSONStore.h>
Swift:
import IBMMobileFirstPlatformFoundationJSONStore
基本的な使用法
開く
1 つ以上の JSONStore コレクションを開くには、openCollections を使用します。
コレクションの開始またはプロビジョニングは、コレクションとドキュメントが含まれる永続ストレージを作成することを意味します (永続ストレージが存在しない場合)。
永続ストレージが暗号化され、正しいパスワードが渡されると、そのデータにアクセスできるようにするための、セキュリティー上必要な手順が実行されます。
初期化時に有効にできるオプション・フィーチャーについては、このチュートリアルの後半にある『セキュリティー』、『複数ユーザー・サポート』、および『MobileFirst アダプターの統合』を参照してください。
let collection:JSONStoreCollection = JSONStoreCollection(name: "people")

collection.setSearchField("name", withType: JSONStore_String)
collection.setSearchField("age", withType: JSONStore_Integer)

do {
  try JSONStore.sharedInstance().openCollections([collection], withOptions: nil)
} catch let error as NSError {
  // handle error
}
取得
コレクションへのアクセス機能を作成するには、getCollectionWithName を使用します。 getCollectionWithName を呼び出す前に openCollections を呼び出す必要があります。
let collectionName:String = "people"
let collection:JSONStoreCollection = JSONStore.sharedInstance().getCollectionWithName(collectionName)
これで、変数 collection を使用して、people コレクションに対して add、find、replace などの操作を実行できます。
追加
コレクション内にデータをドキュメントとして保管するには、addData を使用します。
let collectionName:String = "people"
let collection:JSONStoreCollection = JSONStore.sharedInstance().getCollectionWithName(collectionName)

let data = ["name" : "yoel", "age" : 23]

do {
  try collection.addData([data], andMarkDirty: true, withOptions: nil)
} catch let error as NSError {
  // handle error
}
検索
照会を使用してコレクション内のドキュメントを見つけるには、findWithQueryParts を使用します。 コレクション内のすべてのドキュメントを取り出すには、findAllWithOptions を使用します。 ドキュメントの固有 ID で検索するには、findWithIds を使用します。
let collectionName:String = "people"
let collection:JSONStoreCollection = JSONStore.sharedInstance().getCollectionWithName(collectionName)

let options:JSONStoreQueryOptions = JSONStoreQueryOptions()
// returns a maximum of 10 documents, default: returns every document
options.limit = 10

let query:JSONStoreQueryPart = JSONStoreQueryPart()
query.searchField("name", like: "yoel")

do {
  let results:NSArray = try collection.findWithQueryParts([query], andOptions: options)
} catch let error as NSError {
  // handle error
}
置換
コレクション内のドキュメントを変更するには、replaceDocuments を使用します。 置換の実行に使用するフィールドは _id, で、これはドキュメントの固有 ID です。
let collectionName:String = "people"
let collection:JSONStoreCollection = JSONStore.sharedInstance().getCollectionWithName(collectionName)

var document:Dictionary<String,AnyObject> = Dictionary()
document["name"] = "chevy"
document["age"] = 23

var replacement:Dictionary<String, AnyObject> = Dictionary()
replacement["_id"] = 1
replacement["json"] = document

do {
  try collection.replaceDocuments([replacement], andMarkDirty: true)
} catch let error as NSError {
  // handle error
}
この例では、ドキュメント {_id: 1, json: {name: 'yoel', age: 23} } がコレクションにあることを前提としています。
削除
ドキュメントをコレクションから削除するには、removeWithIds を使用します。
markDocumentClean を呼び出すまで、ドキュメントはコレクションから消去されません。 詳しくは、このチュートリアルの後半にあるMobileFirst『アダプターの統合』セクションを参照してください。
let collectionName:String = "people"
let collection:JSONStoreCollection = JSONStore.sharedInstance().getCollectionWithName(collectionName)

do {
  try collection.removeWithIds([1], andMarkDirty: true)
} catch let error as NSError {
  // handle error
}
コレクションの削除
コレクション内に保管されているすべてのドキュメントを削除するには、 removeCollection を使用します。 この操作は、データベース用語における、表のドロップと似ています。
let collectionName:String = "people"
let collection:JSONStoreCollection = JSONStore.sharedInstance().getCollectionWithName(collectionName)

do {
  try collection.removeCollection()
} catch let error as NSError {
  // handle error
}
破棄
以下のデータを削除するには、destroyData を使用します。
- すべてのドキュメント
- すべてのコレクション
- すべてのストア - このチュートリアル後半の『複数ユーザー・サポート』を参照してください。
- すべての JSONStore メタデータおよびセキュリティー成果物 - このチュートリアル後半の『セキュリティー』を参照してください。
do {
  try JSONStore.sharedInstance().destroyData()
} catch let error as NSError {
  // handle error
}
高度な使用法
セキュリティー
JSONStoreOpenOptions オブジェクトとパスワードを openCollections 関数に渡すことにより、ストア内のすべてのコレクションを保護できます。 パスワードを渡さないと、ストア内のすべてのコレクションにあるドキュメントが暗号化されません。
一部のセキュリティー・メタデータはキーチェーンに保管されます (iOS)。
ストアは 256 ビットの Advanced Encryption Standard (AES) 鍵で暗号化されます。 すべての鍵は Password-Based Key Derivation Function 2 (PBKDF2) により強化されています。
closeAllCollections を使用して、openCollections を再度呼び出すまですべてのコレクションへのアクセスをロックします。 openCollections をログイン関数と考えると、closeAllCollections はそれに対応するログアウト関数と考えることができます。
changeCurrentPassword を使用して、パスワードを変更します。
let collection:JSONStoreCollection = JSONStoreCollection(name: "people")
collection.setSearchField("name", withType: JSONStore_String)
collection.setSearchField("age", withType: JSONStore_Integer)

let options:JSONStoreOpenOptions = JSONStoreOpenOptions()
options.password = "123"

do {
  try JSONStore.sharedInstance().openCollections([collection], withOptions: options)
} catch let error as NSError {
  // handle error
}
複数ユーザー・サポート
単一の MobileFirst アプリケーションに、異なるコレクションを含む複数のストアを作成できます。 openCollections 関数はオプション・オブジェクトとユーザー名を受け取ります。 ユーザー名が指定されていない場合、デフォルトのユーザー名は「jsonstore」です。
let collection:JSONStoreCollection = JSONStoreCollection(name: "people")
collection.setSearchField("name", withType: JSONStore_String)
collection.setSearchField("age", withType: JSONStore_Integer)

let options:JSONStoreOpenOptions = JSONStoreOpenOptions()
options.username = "yoel"

do {
  try JSONStore.sharedInstance().openCollections([collection], withOptions: options)
} catch let error as NSError {
  // handle error
}
MobileFirst アダプターの統合
このセクションは、ユーザーがアダプターについて理解していることを前提とします。 アダプターの統合はオプションであり、コレクションからアダプターにデータを送信する方法、およびアダプターからコレクションにデータを取得する方法を提供します。
WLResourceRequest などの関数を使用することで、これらの目標を達成できます。
アダプターの実装
アダプターを作成し、”People” という名前を付けます。 このアダプターのプロシージャー addPerson、getPeople、pushPeople、 removePerson、および replacePerson を定義します。
function getPeople () {
	var data = { peopleList : [{name: 'chevy', age: 23}, {name: 'yoel', age: 23}] };
	WL.Logger.debug('Adapter: people, procedure: getPeople called.');
	WL.Logger.debug('Sending data: ' + JSON.stringify(data));
	return data;
}
function pushPeople(data) {
	WL.Logger.debug('Adapter: people, procedure: pushPeople called.');
	WL.Logger.debug('Got data from JSONStore to ADD: ' + data);
	return;
}
function addPerson(data) {
	WL.Logger.debug('Adapter: people, procedure: addPerson called.');
	WL.Logger.debug('Got data from JSONStore to ADD: ' + data);
	return;
}
function removePerson(data) {
	WL.Logger.debug('Adapter: people, procedure: removePerson called.');
	WL.Logger.debug('Got data from JSONStore to REMOVE: ' + data);
	return;
}
function replacePerson(data) {
	WL.Logger.debug('Adapter: people, procedure: replacePerson called.');
	WL.Logger.debug('Got data from JSONStore to REPLACE: ' + data);
	return;
}
データを MobileFirst アダプターからロード
データを MobileFirst アダプターからロードするには、WLResourceRequest を使用します。
// Start - LoadFromAdapter
class LoadFromAdapter: NSObject, WLDelegate {
  func onSuccess(response: WLResponse!) {
    let responsePayload:NSDictionary = response.getResponseJson()
    let people:NSArray = responsePayload.objectForKey("peopleList") as! NSArray
    // handle success
  }

  func onFailure(response: WLFailResponse!) {
    // handle failure
}
}
// End - LoadFromAdapter

let pull = WLResourceRequest(URL: NSURL(string: "/adapters/People/getPeople"), method: "GET")

let loadDelegate:LoadFromAdapter = LoadFromAdapter()
pull.sendWithDelegate(loadDelegate)
プッシュが必要な対象 (ダーティーなドキュメント) の取得
allDirty を呼び出すと、「ダーティーなドキュメント」と呼ばれるドキュメントの配列が返されます。これは、バックエンド・システムには存在しないローカル変更が含まれるドキュメントです。
let collectionName:String = "people"
let collection:JSONStoreCollection = JSONStore.sharedInstance().getCollectionWithName(collectionName)

do {
  let dirtyDocs:NSArray = try collection.allDirty()
} catch let error as NSError {
  // handle error
}
JSONStore でドキュメントが「ダーティー」とマーキングされないようにするには、オプション andMarkDirty:false を add、replace、およびremove に渡します。
変更のプッシュ
変更をアダプターにプッシュするには、allDirty を呼び出して変更が含まれるドキュメントのリストを取得し、その後 WLResourceRequest を使用します。 データが送信され、成功応答を受信した後、markDocumentsClean を呼び出す必要があります。
// Start - PushToAdapter
class PushToAdapter: NSObject, WLDelegate {
  func onSuccess(response: WLResponse!) {
    // handle success
  }

  func onFailure(response: WLFailResponse!) {
    // handle failure
}
}
// End - PushToAdapter

let collectionName:String = "people"
let collection:JSONStoreCollection = JSONStore.sharedInstance().getCollectionWithName(collectionName)

do {
  let dirtyDocs:NSArray = try collection.allDirty()
  let pushData:NSData = NSKeyedArchiver.archivedDataWithRootObject(dirtyDocs)

  let push = WLResourceRequest(URL: NSURL(string: "/adapters/People/pushPeople"), method: "POST")

  let pushDelegate:PushToAdapter = PushToAdapter()
  push.sendWithData(pushData, delegate: pushDelegate)

} catch let error as NSError {
  // handle error
}
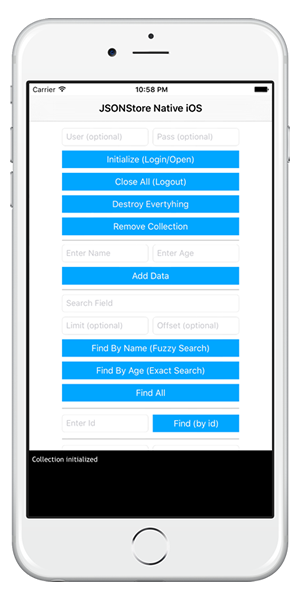
サンプル・アプリケーション
JSONStoreSwift プロジェクトには、JSONStore API セットを使用するネイティブ iOS Swift アプリケーションが含まれています。
JavaScript アダプター Maven プロジェクトも使用可能です。
ここをクリック してネイティブ iOS プロジェクトをダウンロードします。
ここをクリック してアダプター Maven プロジェクトをダウンロードします。
サンプルの使用法
サンプルの README.md ファイルの指示に従ってください。
▲Inclusive terminology note: The Mobile First Platform team is making changes to support the IBM® initiative to replace racially biased and other discriminatory language in our code and content with more inclusive language. While IBM values the use of inclusive language, terms that are outside of IBM's direct influence are sometimes required for the sake of maintaining user understanding. As other industry leaders join IBM in embracing the use of inclusive language, IBM will continue to update the documentation to reflect those changes.